
How to install a Let’s Encrypt SSL cert on Microsoft IIS
If you’ve ever wondered how to install a Let’s Encrypt certificate on a Microsoft IIS server than this post is just for you.
Let’s Encrypt has always been pretty easy to setup on a Linux box and not so much on the Windows side. Thankfully, there are now nearly a dozen different tools that make adding a Let’s Encrypt SSL certificate to a Microsoft IIS server just as easy.
In this post we’ll be focusing in on, and using the Windows ACME Simple (WACS) solution. Mostly because it’s so easy to use, how easy? Well lets take a look!
Install Let’s Encrypt on Microsoft IIS webserver
- Download the latest Windows ACME Simple (WACS) ZIP file from the Github releases page, https://github.com/PKISharp/win-acme/releases.
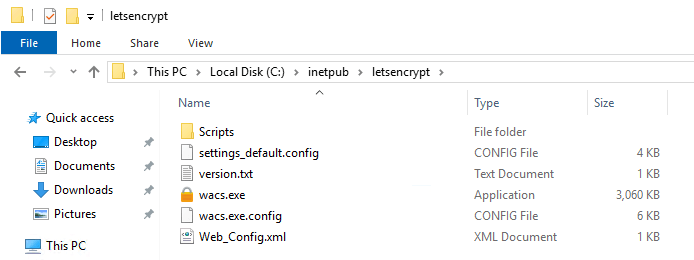
At the time of writing this post, it is win-acme.v2.0.3.206.zip - Next extract the zip file to a folder of your choice. In this example I’m placing it in my C:\inetpub\letsencrypt folder.
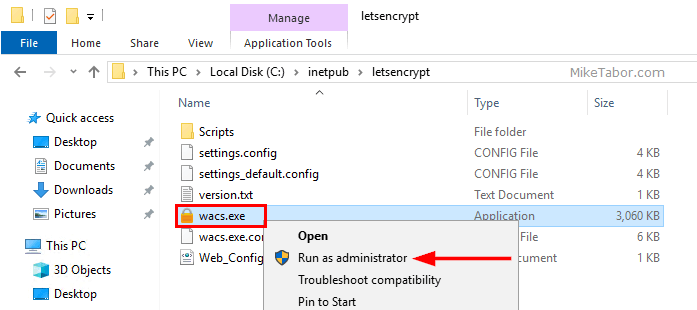
- Right click on wacs.exe and select Run as Administrator to start the Windows ACME Simple wizard.
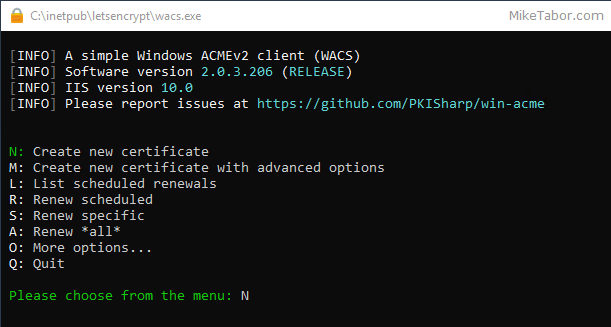
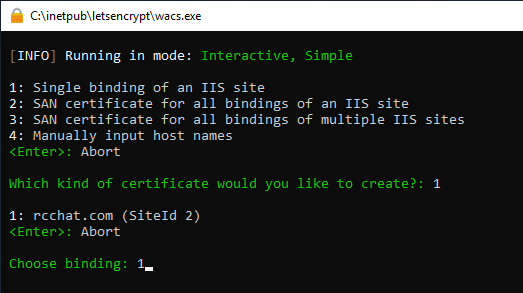
- Select N to create a new certificate.
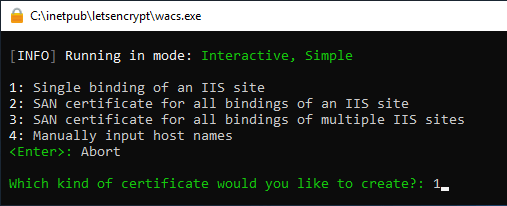
- Next you’ll be prompted for what kind of cert to create. Select 1 for a single binding of an IIS site.
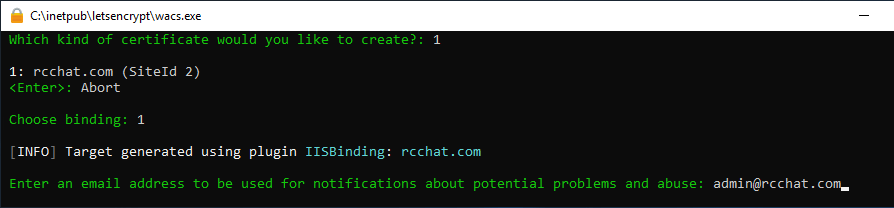
- Now select which site binding to configure. Since we only have one site on this IIS server there is only one option. Select 1.
- Enter an email address to be used for notifications about any potential issues.
- Finally, agree to the Terms of service and the Windows ACME Simple program takes care of the rest.
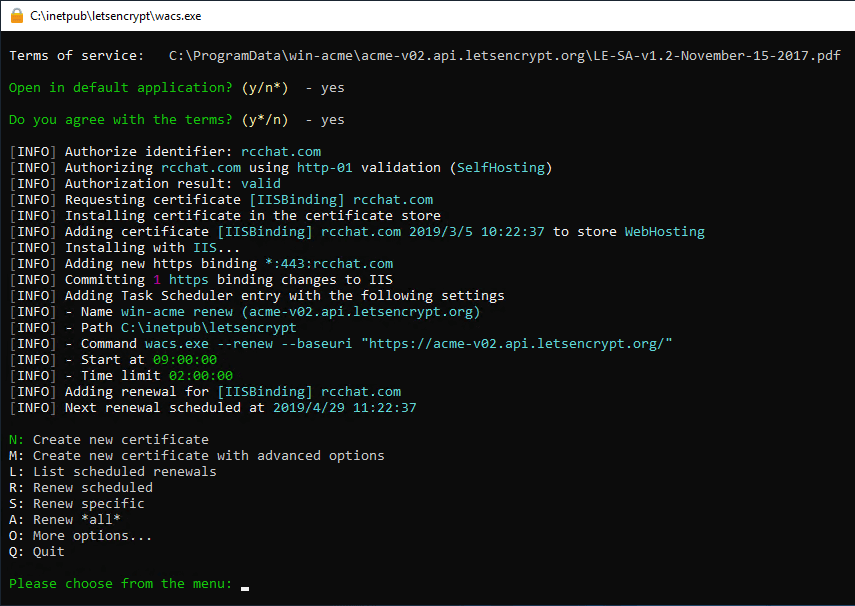
That’s it for installing a Let’s Encrypt SSL cert on IIS.
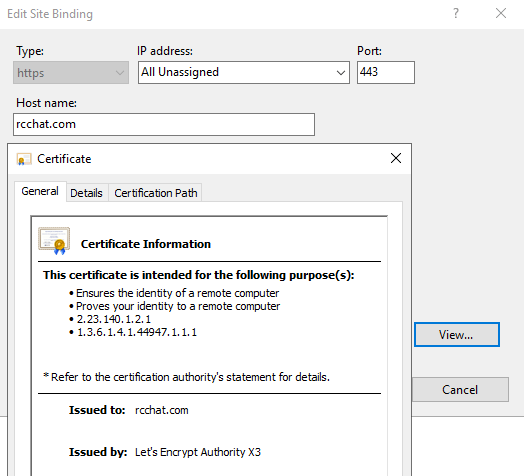
In the background Windows ACME Simple will configure your IIS site to use the newly received Let’s Encrypt certificate. You can verify this by looking at the site binding details.
In addition Windows ACME Simple also adds a task to the Windows Task Scheduler which will automatically renew the Let’s Encrypt for you!

How to redirect HTTP to HTTPS in IIS
Now that you have a Let’s Encrypt SSL certificate added to your Microsoft IIS site, you will most likely want to redirect all non-secure (HTTP) traffic to HTTPS.
To do so, you will need to download and install the IIS Rewrite Module from here, https://www.iis.net/downloads/microsoft/url-rewrite.
Once that is completed, just follow the below steps.
- Open IIS Manager and select the website on the left and open URL Rewrite.
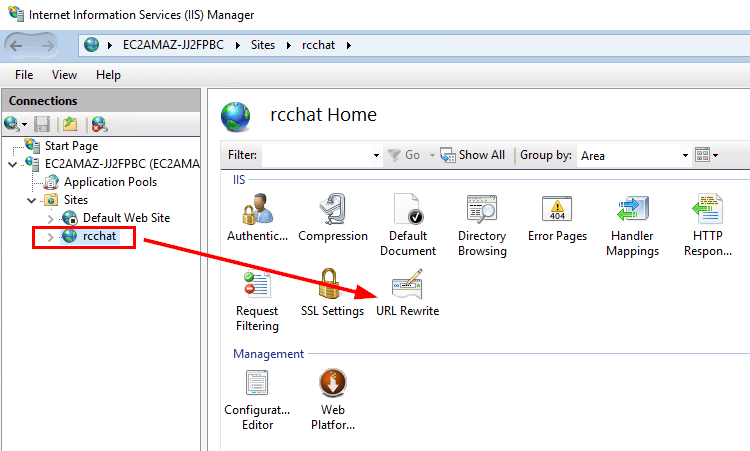
- Click on Add Rule then select Blank rule.

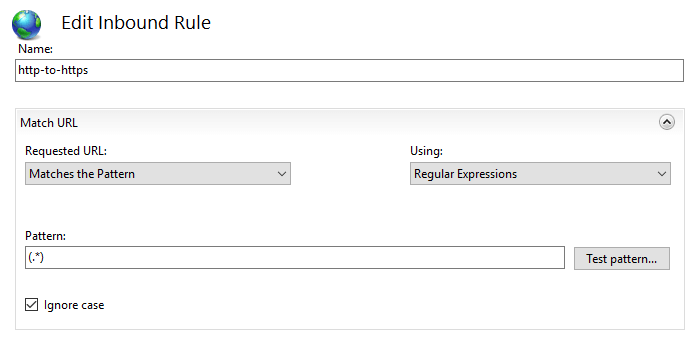
- Next give the new rule a name and under Match URL change the Requested URL to “Matches the Pattern” and Using to “Regular Expressions” and for the Pattern type in (.*)
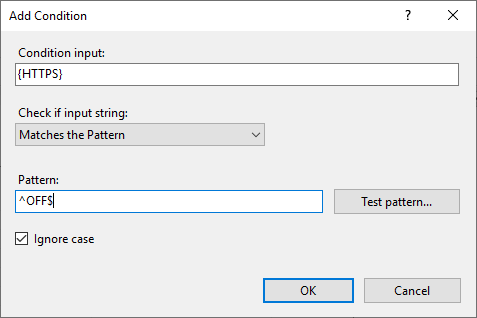
- Expand the Conditions block and under Logical Grouping change the drop down to Match All and click on Add.
- For the Condition input type in {HTTPS} in Add Condition prompt. For Check if input string select Matches the Pattern. For Pattern enter ^OFF$
- Now expand the Action block and select Redirect for the Action Type. In the Redirect URL enter: https://{HTTP_HOST}/{R:1} and set the Redirect type select Permanent (301)
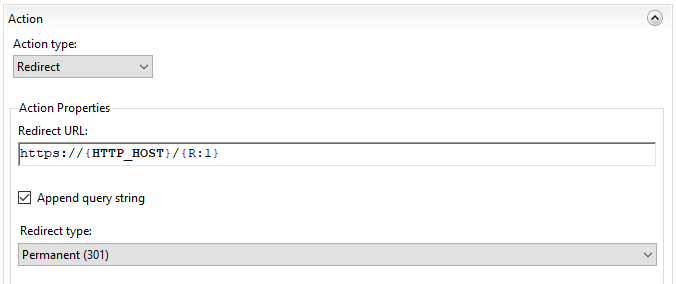
- Finally, click Apply
I’ve been a big fan and donor of Let’s Encrypt for a long while now. Let’s Encrypt certs are automated, offer short lifetimes (90 days) and are completely FREE! What’s not to like about them?
If you’ve found this post helpful please consider donating to Let’s Encrypt!

Hello Mike,
Can we use the same procedure for installing SSL cert for exchange 2016/2019?
Pavan, you should be able to use the same tool for Exchange as well.
Great concise notes.
I am struggling to find instructions (searching the web) to apply these certificates to an RDS Broker / Gateway / Host residing on separate boxes.
Most instructions assume a simple single box setup.
Any thoughts or directions ?
In the https://letsencrypt.org/docs/client-options/ list I don’t see Windows ACME Simple.
It’s the second one listed under Windows / IIS titled “win-acme (.NET)” or you can use the direct link I provided in the instructions above.
-Michael
Hello Mike,
Can we use the same procedure for wildcard certificates as well?
Thank you
You most certainly can. In step 5 instead of selection 1 for a single site you will want to select number 3 “SAN cert for all bindings of multiple IIS sites” and then select “S” to generate a wildcard for all available sites.
-Michael
Awesome thank you very much and hope it has the task for auto renew too? Thank you
That is correct. Win-acme will automatically create a scheduled task to auto-renew the cert. :)
-Michael
Mike, does this procedure apply to iss 10?
Yes this will work with IIS 10.
-Michael
Hi Mike. How i do to renew my certificates ?
Alexandre,
Windows ACME Simple creates a Windows Task to automatically update the certificate for you. However, if you want to manually renew a certificate you can do that as well. Just re-run the .EXE program and select one of the options as shown in Step 4 (R,S,A).
-Michael
Thanks!!
Works perfectly, thank you.
I used the option ” 2: All bindings of an IIS website” as you can then install the cert for both example.com and http://www.example.com etc.
Martin, glad to help!
What is the proper procedure to remove a certificate? Using the Revoke option of wacs? I want to change the primary name of the website. Or could I just install a new certificate and then choose the preferred primary name?
Clear precise information! Thumbs up!!
Quick question if you have a redicet for http to https. will that not also cover the acme verification as well.
AS,
I don’t think I’m understanding you fully. Can you elaborate?
-Michael
Cool! thanks heaps
Most welcome. Glad to help!
-Michael
Mike
Great job – clear instructions and they worked the first time around.
Thanks,
Daniel
Daniel,
I’m glad to have helped and thanks for the feedback!
-Michael
Thanks Mike, great article. Got cert installation sorted for 2 domains in less than 30 minutes for free using LetsEncrypt!
Thanks Mike! This really helped me.
Hey Jyoten, glad to help!
-Michael
How to do the same thing on Windows container, instead of Windows host? Windows container has only command line.