How to add Security Headers to an AWS S3 static website
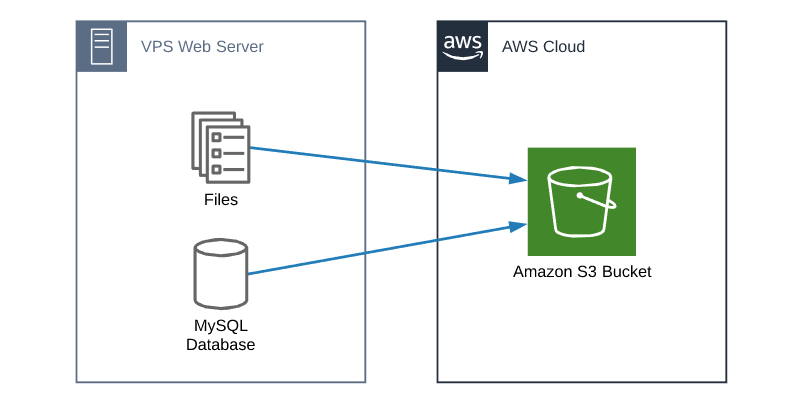
I’ve created a couple posts in the past on how to create a static website using AWS S3 bucket and Cloudfront and using S3 with Cloudflare. Recently I’ve been getting more questions on how to add security response headers to an AWS S3 static website.
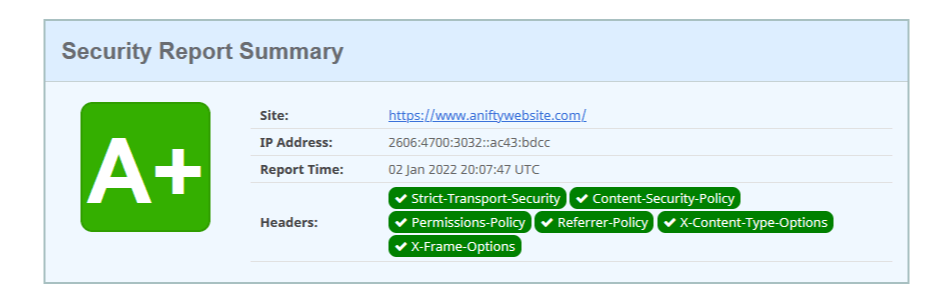
If you’re not familiar with security headers, basically security headers is another layer used to protect your websites. Web.dev has a good article here is a good article on many of the popular security header types. You’ll also want to check out securityheaders.com to easily check the security headers of your own site too.
With that, lets see how to add these security headers to your own static website.
How to add security headers using AWS Cloudfront
In the past, adding security headers in AWS required using AWS Lambda and adding a function to each request. However, AWS very recently made this process much easier with Cloudfront Policies. AWS also has a couple managed policies that make this even easier, or you can create your own.
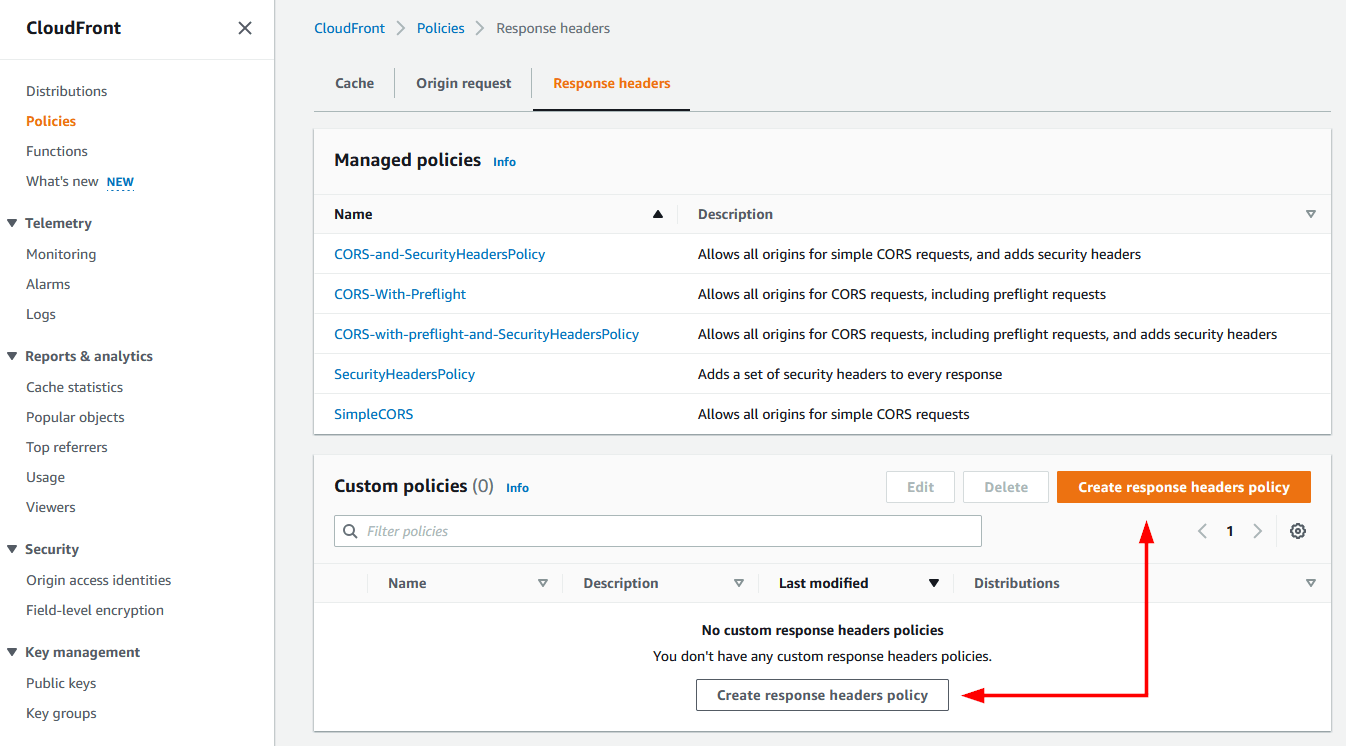
- To view the managed polices or create your own, first log into AWS and go to Cloudfront > Policies > Response Headers.
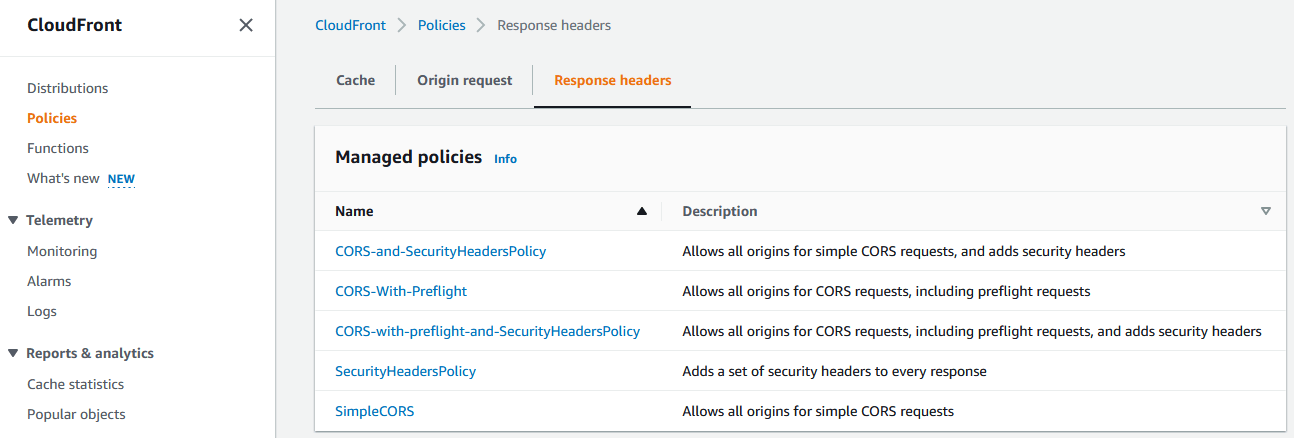
- The existing policy called “SecurityHeadersPolicy” is a great starting point for most any website:
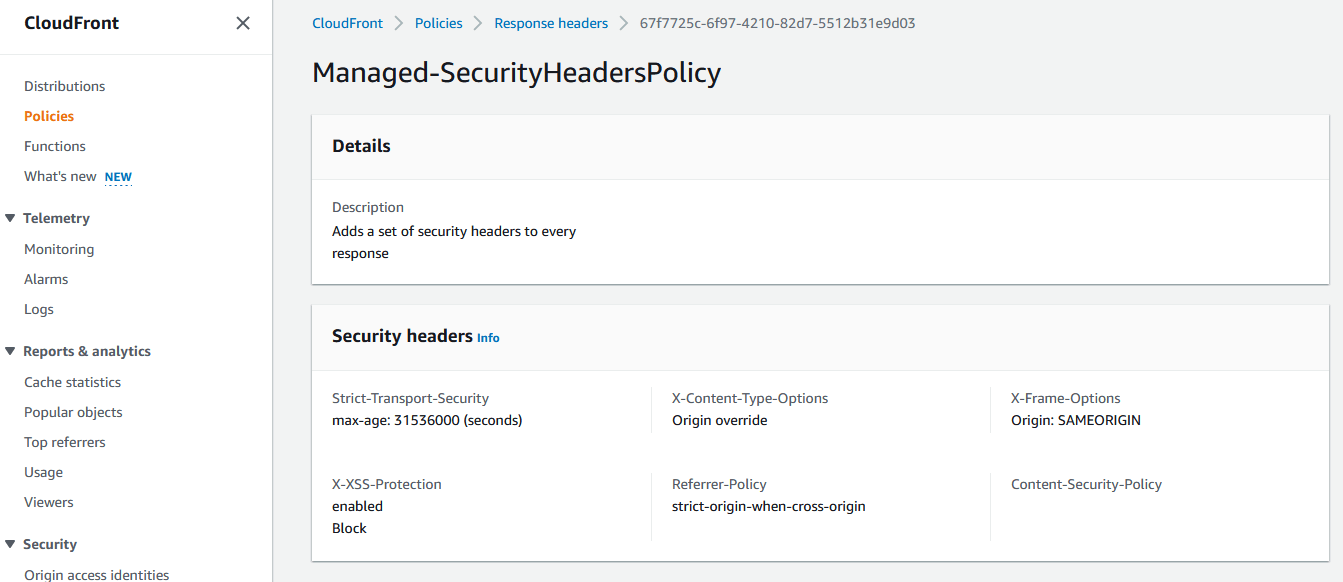
This policy should be a starting point and note this doesn’t set a Content-Security-Policy at all.
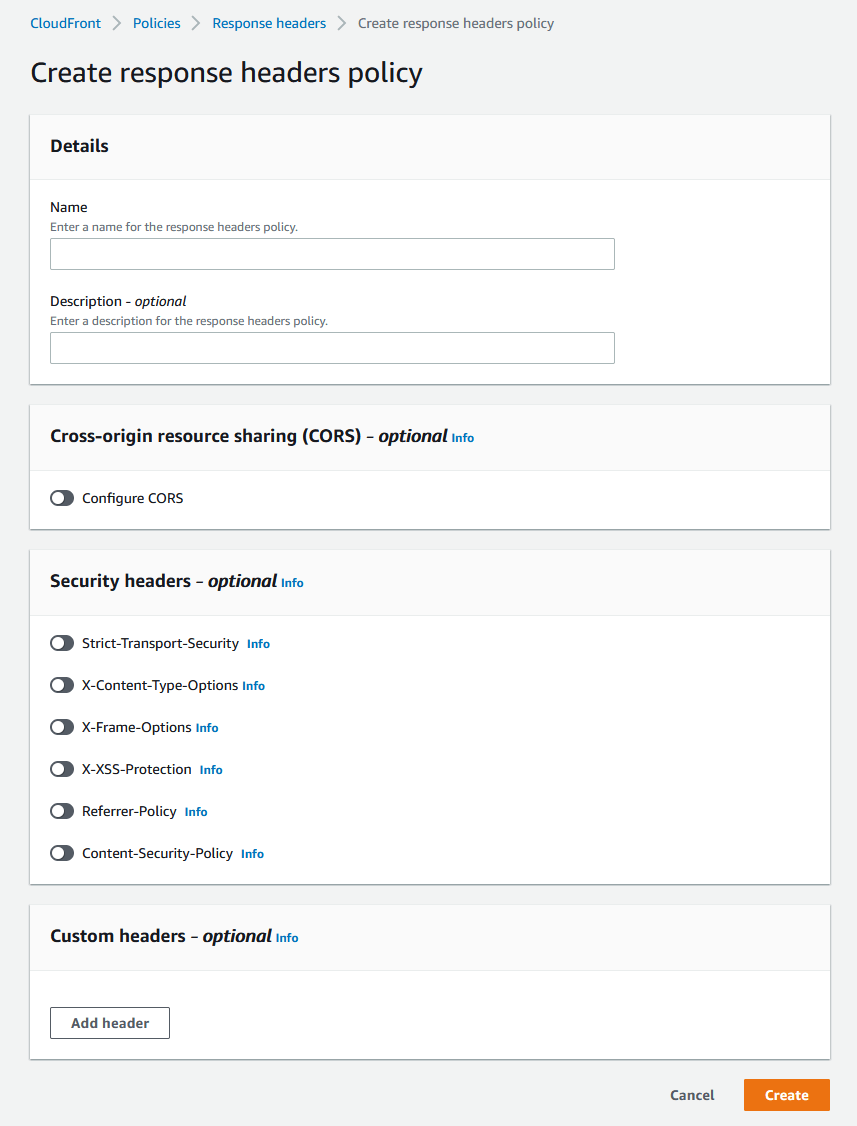
- To create your own policy click on “Create response headers policy”
- Give the new policy a name, description and then enable the headers you want set. I’d recommend turning on each of the security headers. Using the info from the article mentioned earlier at web.dev and the feedback from securityheaders.com you can set your own custom headers. Then click on Create.
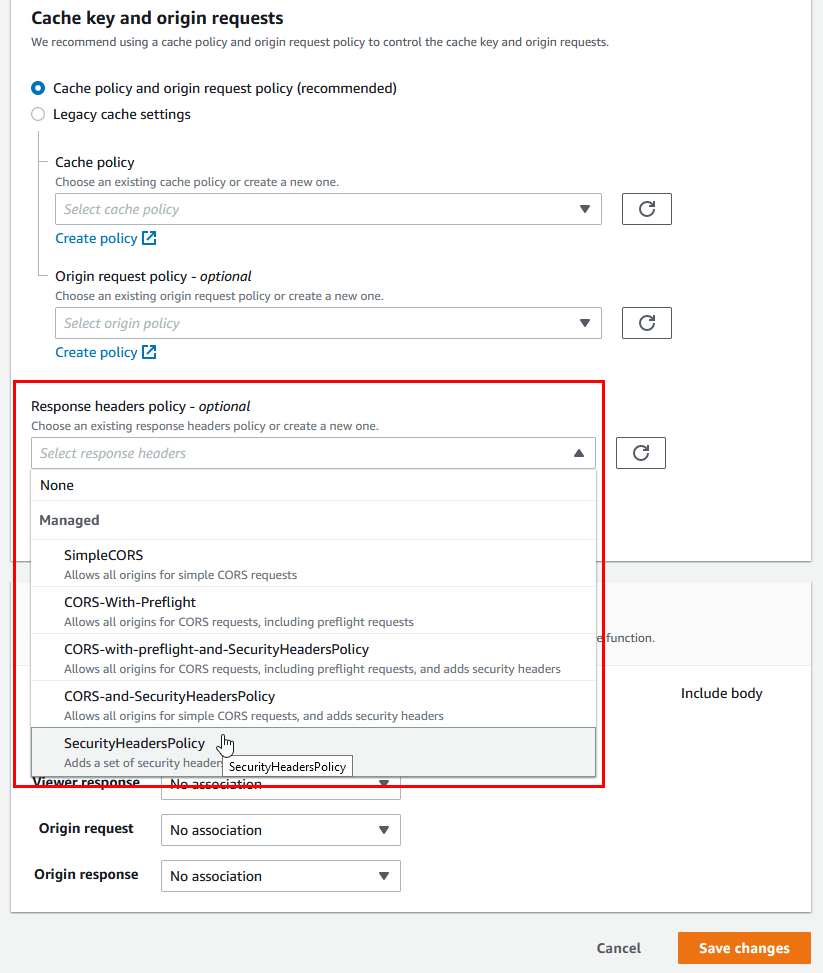
- Now with an AWS managed policy or your own custom policy ready to go, lets add it to your AWS Cloudfront distribution by going to Cloudfront > Distributions > [Your distribution] > and Behaviors then click on EDIT.
- Then under “Response headers policy” select the AWS managed policy or your newly created policy and then click on “Save Changed”.:
- Finally wait a few moments for the AWS Cloudfront distribution to finish updating.
That’s it for static sites using AWS Cloudfront, the only thing left to do is to check your site on securityheaders.com to ensure the new security headers are working as expected.
How to add security headers using Cloudflare Workers
If your static website uses S3 with Cloudflare. then this process is for you. To add security headers in Cloudflare we need to utilize Cloudflare Workers. Cloudflare Workers are similar to AWS Lambda in the way they both host event-driven applications. But don’t let that scare you, this will be painless. ;)
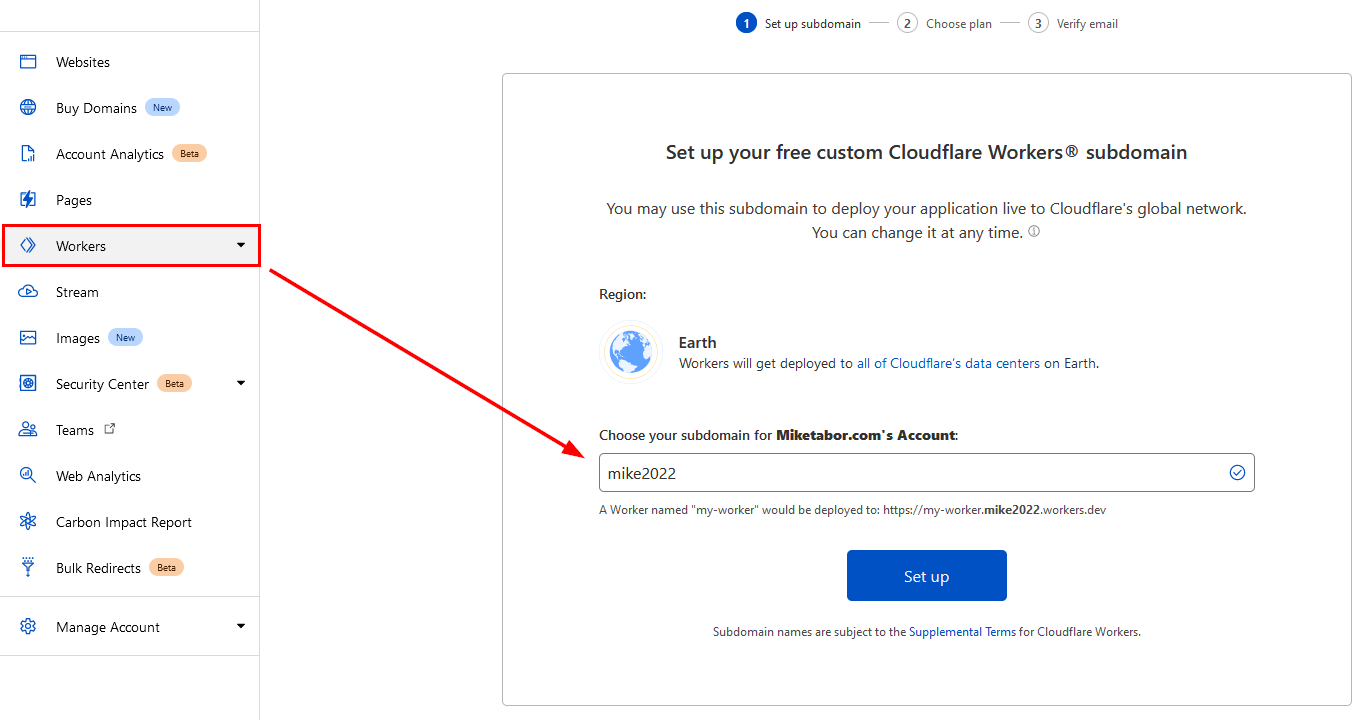
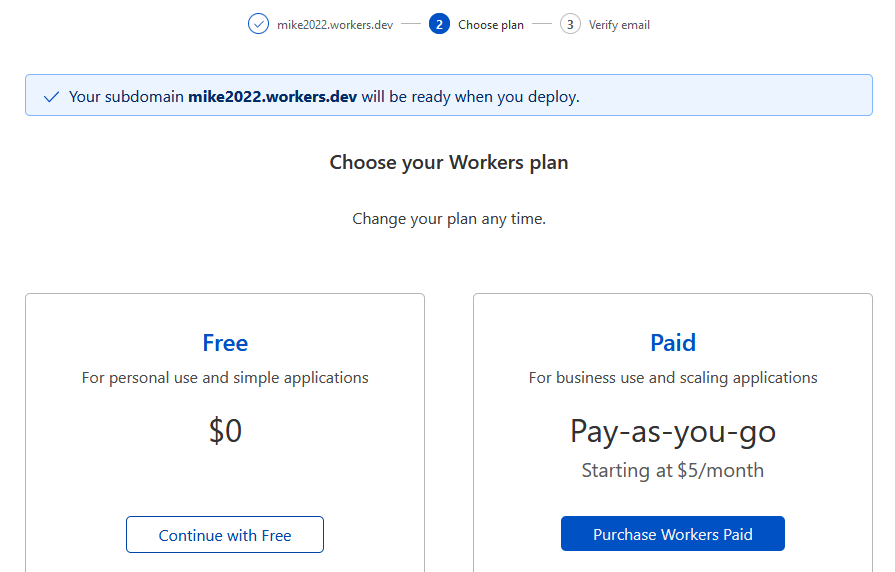
- First log into your Cloudflare account and click on Workers and choose a subdomain name to be created under workers.dev on Cloudflare:
- Select your Workers plan, in this case the Free plan will work just fine.
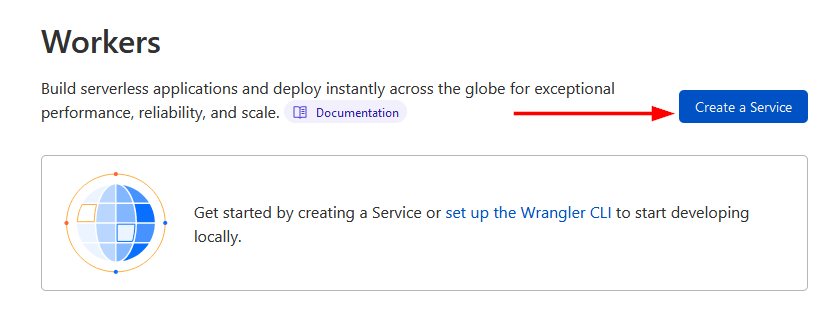
- Click on Create a Service.
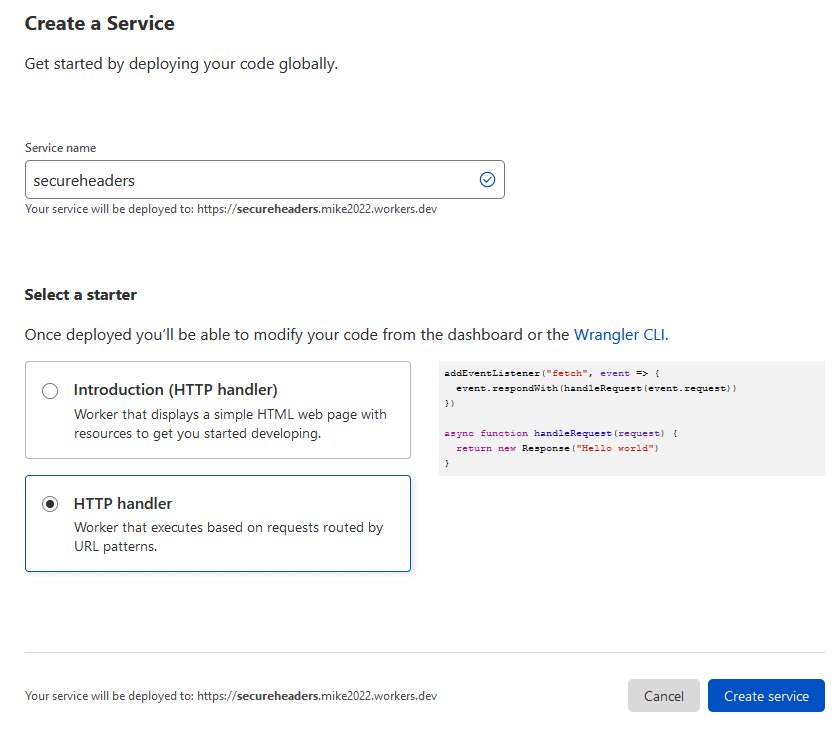
- Now give your new service a name, I called mine “secureheaders” and then select “HTTP handler” as the starter.
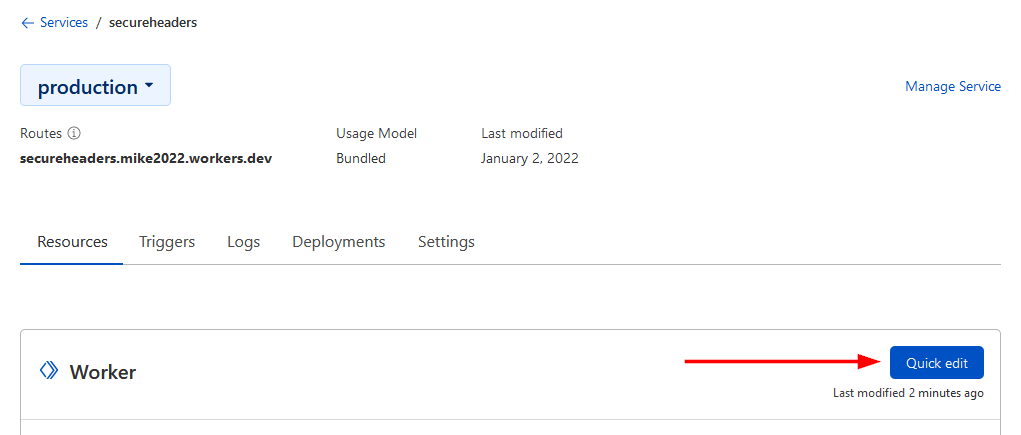
- On the Resources tab click on “Quick Edit“.
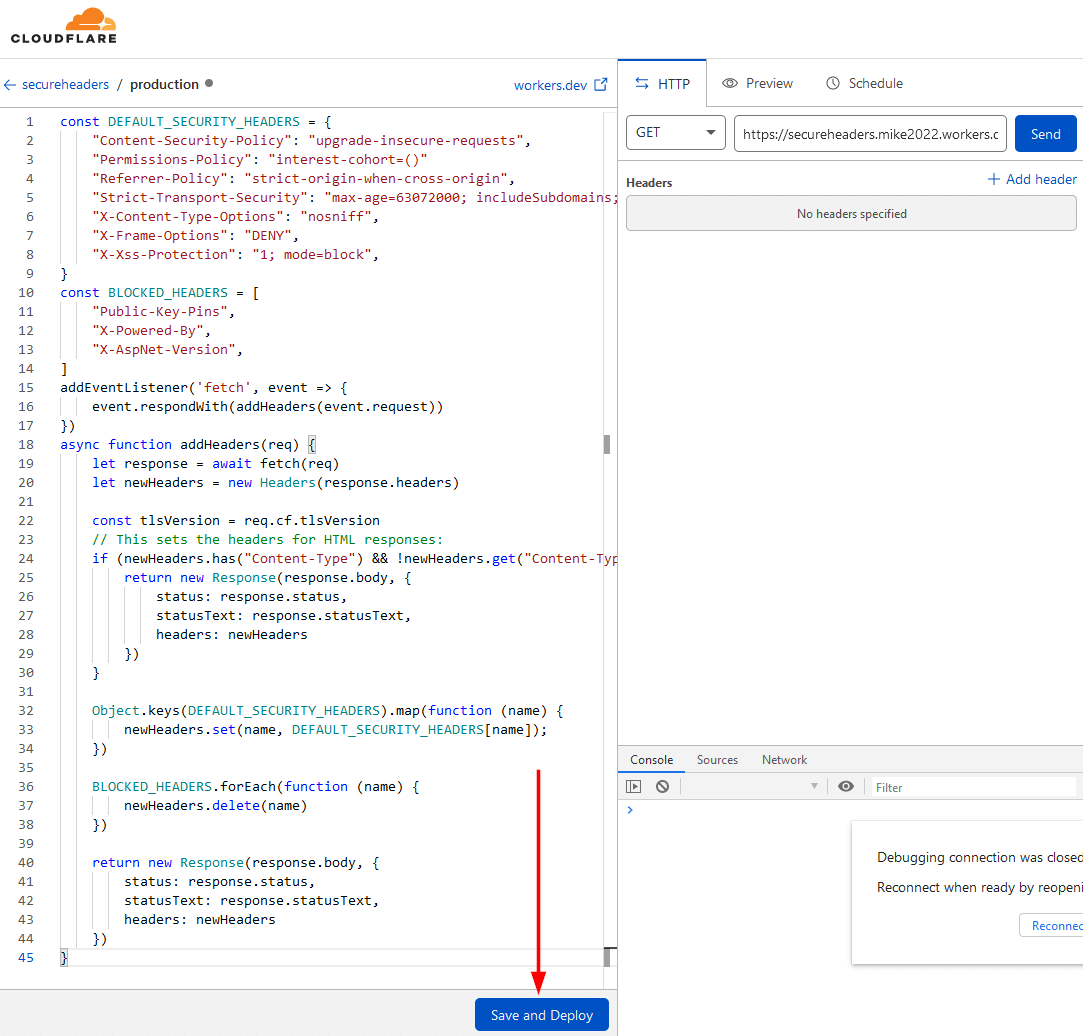
- Now you need to add some code to the worker so that it will add the headers you want. Cloudflare provides an example code here, or you can copy and paste the code below which includes some edits to the Cloudflare example. Mostly un-commenting additional security headers as well as removing the TLS version check as I already enable TLS version control in Cloudflare.
const DEFAULT_SECURITY_HEADERS = { "Content-Security-Policy": "upgrade-insecure-requests", "Strict-Transport-Security" : "max-age=63072000; includeSubDomains; preload", "Permissions-Policy": "interest-cohort=()", "X-XSS-Protection": "1; mode=block", "X-Frame-Options": "DENY", "X-Content-Type-Options": "nosniff", "Referrer-Policy": "strict-origin-when-cross-origin", } const BLOCKED_HEADERS = [ "Public-Key-Pins", "X-Powered-By", "X-AspNet-Version", ] addEventListener('fetch', event => { event.respondWith(addHeaders(event.request)) }) async function addHeaders(req) { let response = await fetch(req) let newHeaders = new Headers(response.headers) // This sets the headers for HTML responses: if (newHeaders.has("Content-Type") && !newHeaders.get("Content-Type").includes("text/html")) { return new Response(response.body, { status: response.status, statusText: response.statusText, headers: newHeaders }) } Object.keys(DEFAULT_SECURITY_HEADERS).map(function (name) { newHeaders.set(name, DEFAULT_SECURITY_HEADERS[name]); }) BLOCKED_HEADERS.forEach(function (name) { newHeaders.delete(name) }) return new Response(response.body, { status: response.status, statusText: response.statusText, headers: newHeaders }) } - After you copy and paste the code, click on “Save and Deploy“
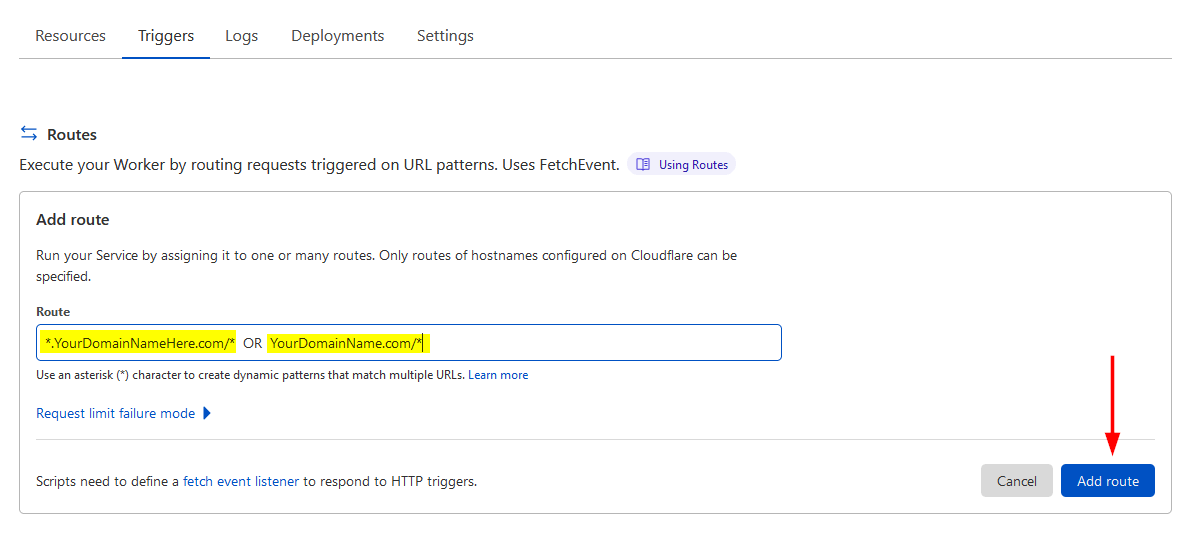
- Now we need to add a route to our new Cloudflare Worker so that it applies the code to the main domain name. So go to the Triggers tab and then click on Add Route.

- Now you need to add ONE of the two routes, either: *.yourdomainname.com/* OR yourdomain.com/*. If your site uses www then you’ll want the first option and if you don’t use www or other subdomains then the second option would be your pick. Then click on Add Route.
- You’re done! Now the only thing left to do is to head over to Securityheaders.com and check out the new headers on your site.