Create a custom VPC with private and public subnets on AWS
In my free time I’ve been working through the AWS Certified Solutions Architect by Ryan Kroonenburg from ACloud.guru. Ryan really drives home the importance of knowing how to create a custom VPC within AWS as part of the exam. For me I learn best by not only doing it but writing it down.
So if for nothing else but my own benefit, this post is going to show step by step how to create a custom VPC in AWS without using the AWS wizard.
Create a custom VPC in AWS
- First, log into your AWS Console and click on VPC under Network & Content Delivery“
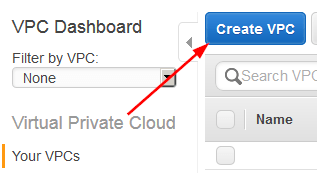
- Click on “Create VPC“.
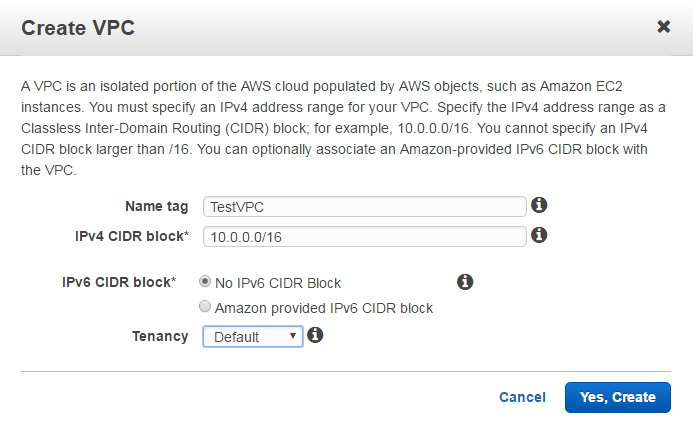
- Enter a Name and CIDR block address, for this VPC I’ll be using 10.0.0.0/16.
- When you create a VPC a Route Table, Network ACL, and Security Group are automatically created.
- Subnets or Internet Gateways are NOT automatically created, so we’ll create those below.
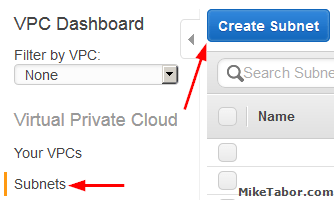
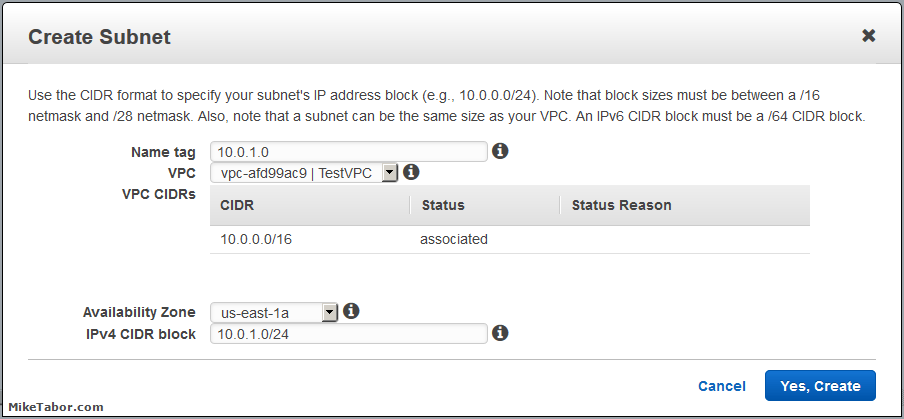
- To create Subnets for our new VPC we need to click on Subnets, then click on “Create Subnet“.
- Enter a name for your subnet then select the VPC and Availability Zone then finally the CIDR block for the subnet. Keep in mind your subnet CIDR blocks need to be smaller than the VPC CIDR block.
Repeat the process to create a second subnet:

Once you’ve created your two subnets you should have something that looks like this:

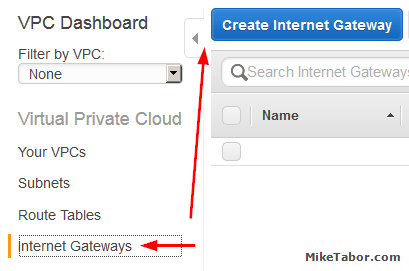
- Next we need to create an Internet Gateway to make this VPC Internet accessible. So click on Internet Gateways from the menu on the left and then click “Create Internet Gateway“
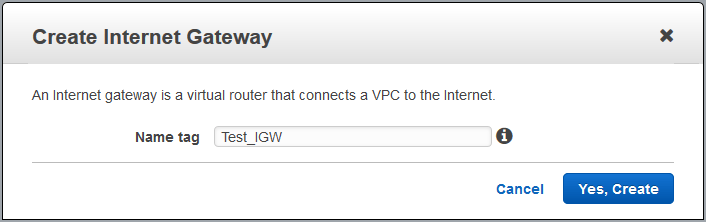
- Give the new Internet Gateway a name, then click on “Yes, Create“.
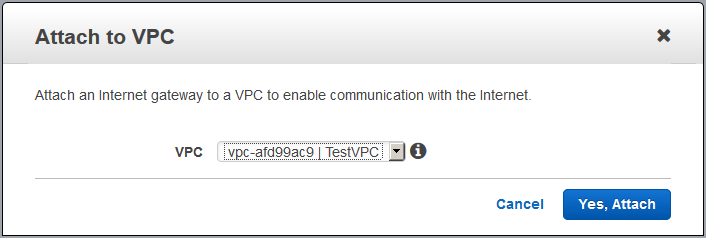
- Attach the newly created Internet Gateway to a VPC by selecting your Internet Gateway and click on “Attach to VPC“.
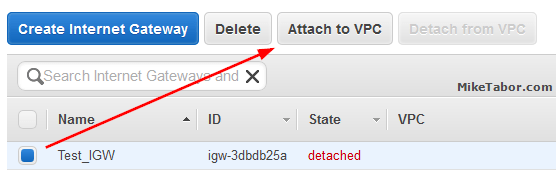
Note: You can only attach ONE Internet Gateway to a VPC. - Then select the VPC you want to connect the Internet Gateway to and click “Yes, Attach“.
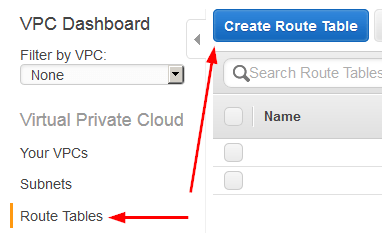
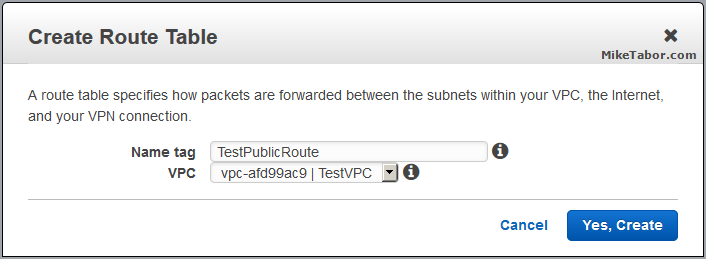
- Now we need to create a new route table by selecting Route Tables and clicking on “Create Route Table“.
- Give the new Route Table a name, then click on “Yes, Create“.
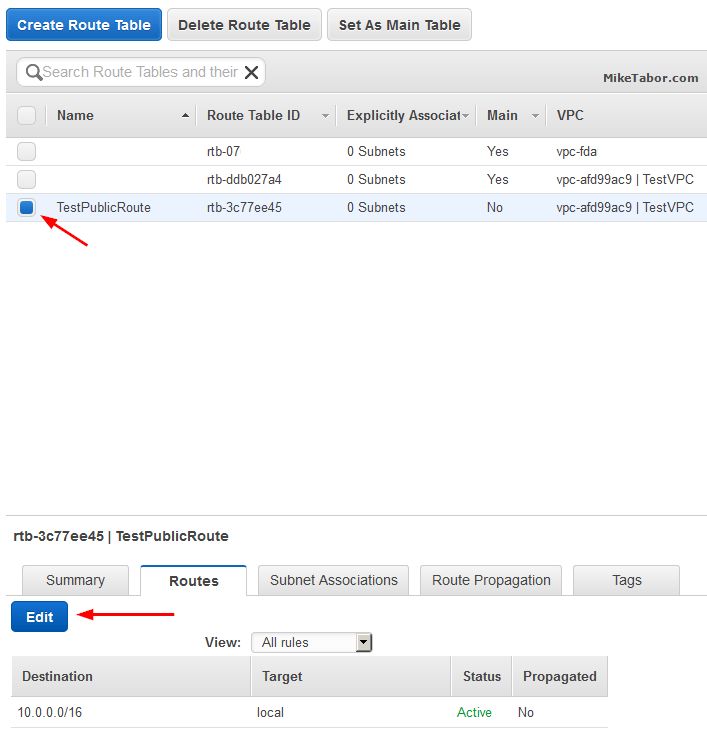
- We now need to give the Route Table (TestPublicRoute) a route to the internet. Select the Route Table and click on Edit.

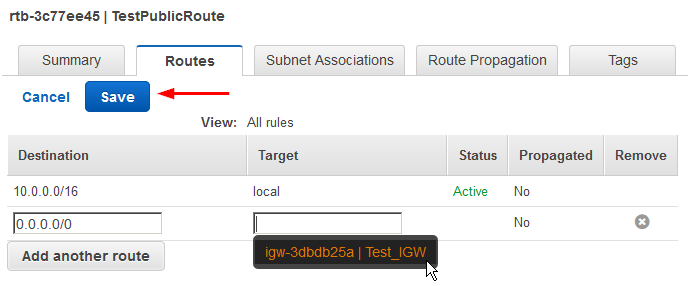
- Lets add a route out to the Internet by clicking on “Add another route“
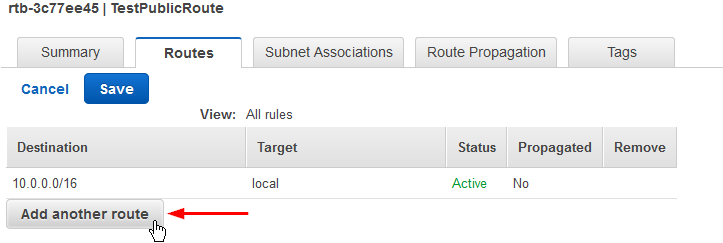
Then enter 0.0.0.0/0 for the Destination and select your Internet Gateway for the Target and click on “Save“:
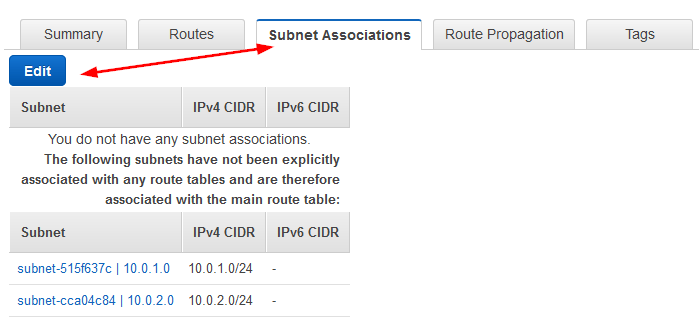
- Lets associate a subnet we want to have internet access by going to the Subnet Associations and clicking on Edit.
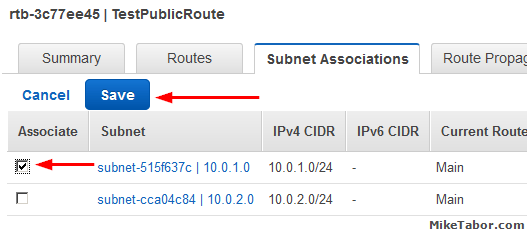
Then select your subnet, in this case 10.0.1.0, and click on “Save“.
- Finally, since this subnet (10.0.1.0) is an internet facing subnet – lets go ahead and change the auto-assign an IP settings so that when EC2 instances are deployed they get a public IP.
So lets click on Subnets then select your public subnet and then click on “Modify auto-assign IP settings” from the Subnet Actions drop down menu.

Then check the box and click on Save.


And with that, we have now created a custom VPC in AWS with a public (10.0.1.0) subnet and a private (10.0.2.0) subnet!
VPC Sizing
Some additional VPC information regarding subnets. The smallest subnet you can create is a /28 and the largest subnet is a /16. AWS also reserves 5 IP addresses in each subnet.
For example, in a subnet with a CIDR block 10.0.0.0/24 (like we created above), the following 5 IP addresses are reserved:
- 10.0.0.0 – Network address.
- 10.0.0.1 – Reserved for the VPC router.
- 10.0.0.2 – Reserved for mapping to the Amazon DNS Server.
- 10.0.0.3 – Reserved for future use.
- 10.0.0.255 – Network broadcast address. AWS does not support broadcast in a VPC, therefore AWS reserves this address.
| CIDR Block | Addresses | Usable |
|---|---|---|
| /28 | 16 | 11 |
| /27 | 32 | 27 |
| /26 | 64 | 59 |
| /25 | 128 | 123 |
| /24 | 256 | 251 |
| /23 | 512 | 507 |
| /22 | 1024 | 1019 |
| /21 | 2048 | 2043 |
| /20 | 4096 | 4091 |
| /19 | 8192 | 8187 |
| /18 | 16384 | 16379 |
| /17 | 32768 | 32763 |
| /16 | 65536 | 65531 |
If you have any interest in learning more about AWS then I would HIGHLY recommend checking out the AWS Certified Solutions Architect course. It’s been extremely helpful and well worth it!

Very useful tutorial that just might help me out with Amazon AWS, thank you very much! I have two questions:
1) I notice that the Availability Zones for the two subnets are different. Does that impact on anything? And
2) When I went to create the route table I noticed there was already a route table defined, and it was set as the main table. Does this make a difference?
Thank you!
David,
Glad to be of some help. To answer your questions:
1. You could put all your subnets in one AZ but then if that AZ goes down you’ve lost all your EC2 machines. Spreading them gives you redundancy.
2. The route table you seen is the default route table. It’s recommended to not change that as it does not have a route to the outside world (internet). When you created the second RT in the steps above you also gave it a route to reach the internet (IGW). This is for your own protection, machines that get deployed into the new VPC will, by default, NOT have a route to the internet. It’s then up to you to move that machine to a subnet that does have access to the internet. This way someone doesn’t accidentally or unknowingly deploy a new machine that immedidly has access to the internet or wasn’t expected to have internet access.
Hope this clears things up a bit.
-Michael
Excellent article of VPC creation but my question and I am yet to full research is does one get charged for Custom VPC even if it i basically domant?