How to manually delete NetApp SnapMirror snapshots

The other day, one of our volumes in the lab environment filled up. This volume has a couple large VM’s on it, coupled with a couple different Veeam backup jobs running using the native Veeam backup methods as well as using NetApp snap mirror to snapshot the volume and then using Veeam to ship it out to Azure.

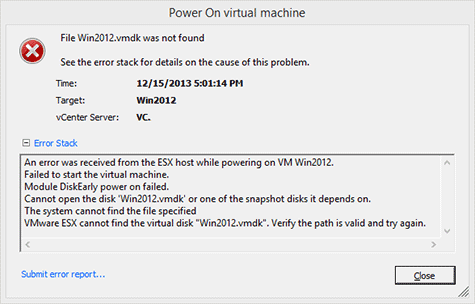
At any rate the volume filled up to the point where vCenter wasn’t allowing me to migrate VM’s off the datastore. I really didn’t want to expand the volume just so I could move VM’s off of it.

Instead, I decided to delete some of the older proof of concept snapshots from SnapMirror. Below are the quick and easy steps to clear up some un-used snapshots and free up some space on the datastore.

How to manually delete NetApp SnapMirror snapshots

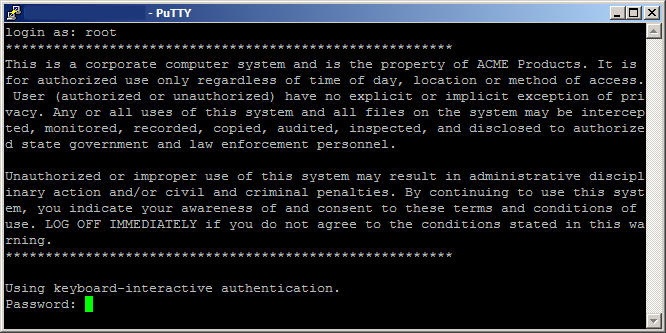
  1. First, SSH into your NetApp using PuTTY or any other preferred terminal.
  2. Then type the following to get a list of all the SnapMirror snapshots.
    snap show

    NetApp snap show

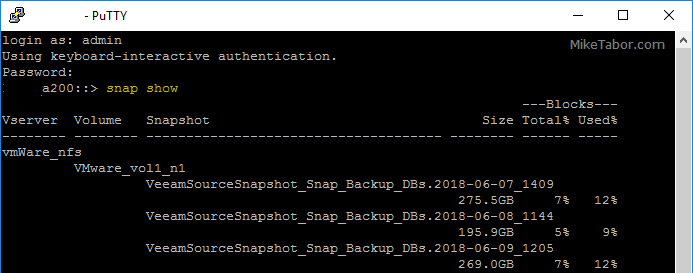
  3. Now we need to enter diagnostic mode by typing:
    set diag

    NetApp set diag

  4. Finally, delete your desired snapshot by typing the below and pressing Y at the confirmation.
    snapshot delete -vserver Vservername -volume Volumename -snapshot nameofsnapshot -ignore-owners true

    NetApp snapshot delete

Deleting the POC snapshot freed up a few hundred gigs of space. From that point I was able to move some VM’s around and everything was back to normal.

Similar Posts

  • Easy ESXi 6.0 upgrade via command line

    VMware has released ESXi 6.0 back in March and I recently posted a guide on how to upgrade your vCenter Server Appliance from 5.x to 6.0 – Now we’re going to look at two ways to upgrade a VMware ESXi 5.x host to ESXi 6.0 via command line.

    The first method will show you how to have each ESXi host download the update directly from VMware and then upgrade itself while the second method shows how to download the update, place it on a datastore accessible to the host, then upgrade the host.

    Read More “Easy ESXi 6.0 upgrade via command line”

  • How to convert VMDK to OVF file format

    Here is a quick and easy way to convert a VMDK to OVF file format using the OVF Tool from VMware.

    1. First download and install the VMware OVF Tool for your operating system.
    2. Open a command prompt as Administrator and navigate to the OVF Tool install directory:
      
      cd C:\Program Files\VMware\VMware OVF Tool
      

      vmdk to ovf command prompt

    3. Next, type in the following command to convert VMDK to OVF:
      
      ovftool.exe \virtualmachine.vmx \virtualmachine.ovf
      

      convert vmdk to ovf command

    After a few minutes time you should you should see a “Transfer Completed, Completed successfully” message and your VMDK to OVF file conversion is complete and ready for use.
    convert vmdk to ovf complete

  • HTML5 Embedded Host Client, this looks promising

    It’s no secret many people have really disliked the vSphere web client, it’s very sluggish, clunky, and based on flash (flash comes with it’s own security issues). It was rumored and highly hoped that vSphere 6 might be re-written in HTML5, but sadly this didn’t and hasn’t happened yet. While vSphere 6 did improve a bit on the web client the issues many people have had with it in the past still remain today.

    Enter the VMware HTML5 Embedded Host Client fling. I’ve been using and following this fling for a while now and have really enjoyed it and with each release it keeps getting better and better.

    The Embedded Host Client fling is based on HTML5 which allows it works great across all kinds of platforms, it’s fast, responsive, and doesn’t require any plug-ins – YES the VM console works great. If this happens to be a look of what’s to come in a new VMware vSphere web client, then a client is looking very promising!

    If you haven’t tried it yet, you should. It’s extremely easy to install and doesn’t even require a reboot just follow these simple instructions.

    Read More “HTML5 Embedded Host Client, this looks promising”

  • VMware Workstation updated to 9.0.2

    VMware is released a maintenance update for VMware Workstation to version 9.0.2. The update is available for free for all VMware Workstation 9.x customers.

    Mostly just bug fixes and a few improvements, here are a few highlights:

    • Fedora 18 supported as a guest operating system
    • Windows 8 host permissions issues fixed
    • VMware Tool updated to support the latest Linux kernels
    • Improved general host resource management
    • OVF Tool has been updated to version 3.0.2
    • Virtual machine sharing improvements
    • Memory leak which impacted Windows hosts has been fixed

    Read More “VMware Workstation updated to 9.0.2”

  • How to run Crashplan in Docker on Synology NAS

    Crashplan running in Docker on Synology

    I am a huge fan of CrashPlan and have been using it for years on my Synology NAS using this install guide I wrote up some time ago.

    Admittedly the process in the old guide wasn’t always roses. Crashplan would push out an update and that update would, at times, break the Synology Crashplan client from PC Load Letter and backups would stop running for a couple days – maybe a week. Patters being the awesome guy he is, usually updated his Synology Crashplan package quickly and all was good again.

    Then last year in DSM 5.2, Synology added support for Docker which opened up the possibility to run all sorts of software in a virtual container running on your Synology NAS. One such software being Crashplan and below I’m going to show how I now have Crashplan running in Docker on my Synology DS1815+ NAS!

    Read More “How to run Crashplan in Docker on Synology NAS”

  • ESXi 5.5 free edition removes 32GB memory limit

    There have been a ton of exciting announcements coming out of VMword 2013, one of which is vSphere 5.5 and all of it’s improvements and additions. Along that note, VMware has changed ESXi 5.5 free version to remove the physical RAM limit which was limited to only 32GB in version 5.1.

    The new virtual hardware, version 10, we can now grow our home labs into more powerful VM’s as most all configuration maximums have been doubled:

    Read More “ESXi 5.5 free edition removes 32GB memory limit”

Leave a Reply

Your email address will not be published. Required fields are marked *