Clone VMware ESXi USB boot drive to another USB flash drive
A few days ago one of my hosts in my home lab was displaying an alarm message:
Lost connectivity to the device mpx.vmhbaXX:XX:XX:XX backing the boot filesystem /vmfs/devices/disks/mpx.vmhbaXX:XX:XX:XX. As a result, host configuration changes will not be saved to persistent storage.The last part of the message (“persistent storage”) made me think it might have something to do with the USB drive due to the fact that a similar message appeared when setting up the home lab on the Intel NUC’s. After some research it appears my assumption was correct and that the USB flash drive I was using to boot from was indeed starting to fail.
After rebooting the host, more warning messages also appeared…
Typically I would recommend just re-installing ESXi on a new USB flash drive, but I haven’t yet created an ESXi 5.5 U1 customized ISO with the needed NIC drivers as I did with ESXi 5.0 and I figured I’d try cloning the original USB flash drive to a new Lexar USB drive instead.
How to clone ESXi USB install to new USB drive
- Download a linux distro of your choice and boot your PC from the CD. (I was already playing with the newly released Ubuntu 14.04 LTS in VMware Workstation, so I’ll be using that)
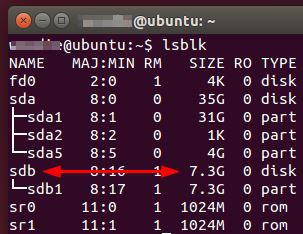
- Plug in the new USB flash drive and get the device address (/sdb).
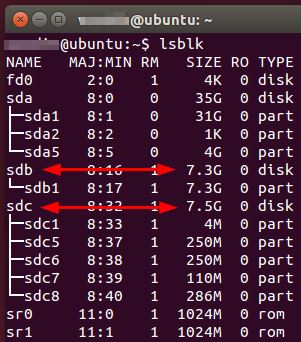
- Plug in the original USB flash drive and get that device address as well (/sdc).
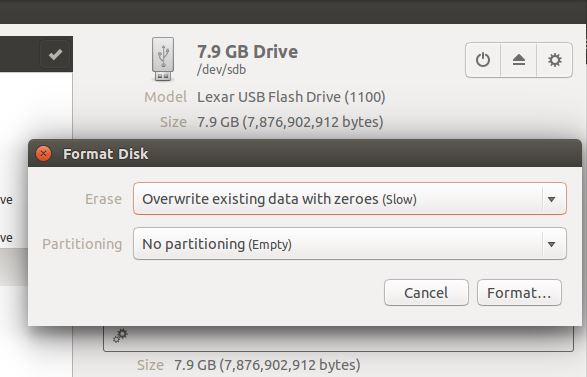
- Remove all the partitions on the NEW USB flash drive (I used Disks Utility)
- Use the dd command to perform a block copy from the original USB flash drive to the new USB flash drive. Type the following command:
dd if=/dev/sdc of=/dev/sdb
That’s it, the imaging took about 10-15 minutes and the new USB drive was ready to be used as an ESXi boot drive.


