VMware Workstation 11 Announced

VMware Workstation 11 box

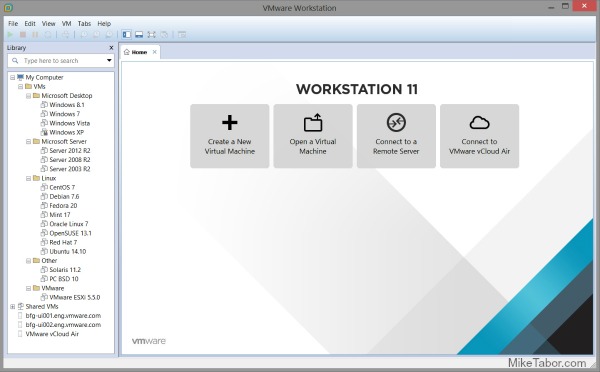
VMware has just announced that VMware Workstation 11 will be released as general availability come December 2014! VMware Workstation 11 will offer support for the latest version of Windows and Linux operating systems, running on the latest CPU’s and computer hardware while also now able to connect to VMware vCloud Air!

VMware Workstation 11

VMware Workstation 11 updates include:

  • Windows 10 Tech Preview Ready: VMware Workstation 11 can run hundreds of operating systems including the latest Microsoft Windows 10 Tech Preview. Technical users can also run the latest Linux distributions including Ubuntu 14.10, RHEL 7, CentOS 7, Fedora 20, Debian 7.6 and many more.
  • Improved State of the Art Performance: VMware Workstation supports the latest Intel 64-bit x86 processors, including the new Haswell microarchitecture for maximum performance. Taking advantage of key new Intel Haswell extensions, Workstation 11 also delivers up to 45 percent improvement in CPU intensive operations like multimedia and encryption/decryption compared to Workstation 10.
  • Large Virtual Machines and Better Graphics: Workstation 11 will now support virtual machines with up to 16 vCPUs, 8 TB virtual disks, 64GB memory, and now 2GB of video memory which graphics intensive applications will take advantage of the additional boost of video memory.
  • Connection to VMware vCloud Air: Connect to VMware vCloud Air to extend and scale virtual machines on a public cloud. Developers can easily connect to VMware vCloud Air and upload, run, and view virtual machines right from the Workstation interface to easily collaborate with remote team members and scale through a public cloud.

VMware Workstation 11 will be available for purchase in December for $249.99 while upgrades from Workstation 9 and 10 to Workstation 11 for $149.99. Those who buy Workstation 10 between October and December 2014 will receive the Workstation 11 upgrade for free! For more info about the free upgrade be sure to view the upgrade page.

VMware Player 7 Pro

In addition to the VMware Workstation announcement, VMware has also announced VMware Player 7 will be available in December as well. VMware Player 7 Pro is licensed for commercial use and is enabled to run restricted virtual machines created by VMware Workstation 11 and Fusion Pro 7.

VMware Player 7 Pro Features
  • Enhanced Operating System Compatibility: VMware Player 7 Pro will run on the latest release of Windows including Windows 8.1 and will support prevalent operating systems like Windows XP and Windows 7 in a virtual environment so users can continue to run legacy applications as long as they need.
  • Greater Hardware Compatibility: VMware Player 7 Pro will be optimized to run on today’s modern hardware including the latest PC laptops and high-resolution tablets.
  • Updated VMware Compatibility: VMware Player 7 Pro will be able to run restricted virtual machines created by VMware Workstation 11 or VMware Fusion 7 Pro. Restricted virtual machines secure corporate desktops with encryption, runtime password protection, USB access restriction, isolation between the host and guest OS, and time limitation.

VMware Player 7 Pro will be avilable for $149.99 and upgrades from Player 6 Pro running $79.99.

Similar Posts

  • My VMware View Windows 7 Optimization Guide

    These are the few steps I do when creating a new "Golden" image. Luckily I don’t have to do these steps all the time as I’ll create the "Golden" image when there is a new upgrade such as when we went from View 4.6 to View 5.0.1. I like to have a new fresh machine using new virtual hardware from the start. You could certainly just upgrade the virtual hardware on the "Golden" image, I just prefer to start clean.

    At any rate, here’s my list. Hopefully someone might find it somewhat useful and maybe even others can improve upon it.

    Preparing a new virtual machine

    1. Create New Virtual Machine – FILE > NEW > VIRTUAL MACHINE (CTRL+N)
    2. Under Configuration select CUSTOM.
    3. Select a Name, Folder, Host, Cluster, and Storage.
    4. Under Guest Operating System select Windows and then Windows 7 32bit under the Version drop down.
    5. Select which Network (VLAN) and under Adapter select VMXNET 3.
    6. Configure disk size to 30GB THIN provisioned.

    Read More “My VMware View Windows 7 Optimization Guide”

  • Update vCenter Server Appliance 6.7 to 6.7 Update 1

    VMware has released vCenter Server 6.7 Update 1 and with comes with a number changes.

    One most notable change is the feature complete HTML5 vSphere client. The vSphere client in vCenter 6.7 Update 1 now includes the ability to manage:

    • Host profiles
    • Auto deploy
    • Full vSphere Update Manager (VUM)
    • A new dark theme
    • and vCenter High Availability.

    That’s no where near all of the changes though, there are many more changes and updates in the 6.7 Update 1 update. Be sure to read the full release notes here.

    In this post we’ll see just how easy it is to upgrade from VCSA 6.7 to VCSA 6.7 Update 1 in just a couple steps!

    Read More “Update vCenter Server Appliance 6.7 to 6.7 Update 1”

  • VMware Certified Professional 6 (VCP6-DCV) now available

    VMware VCP DCV

    VMware has just recently announced that the VMware Certified Professional 6 (VCP6-DCV) is now available. The new VCP6 exam is similar to the others in the past whereas the VCP6 aims to validate your ability to deploy, configure, administer and scale a vSphere virtualized data center, including administering and troubleshooting virtualization technologies such as:

    • vSphere HA and DRS Clusters
    • Storage virtualization using VMFS
    • Storage DRS and Storage I/O Control
    • Network virtualization using vSphere standard and distributed switches and Network I/O Control
    • vSphere management using vCenter Server and vRealize Operations Manager Standard
    • Virtual Machines

    Read More “VMware Certified Professional 6 (VCP6-DCV) now available”

  • HTML5 Embedded Host Client, this looks promising

    It’s no secret many people have really disliked the vSphere web client, it’s very sluggish, clunky, and based on flash (flash comes with it’s own security issues). It was rumored and highly hoped that vSphere 6 might be re-written in HTML5, but sadly this didn’t and hasn’t happened yet. While vSphere 6 did improve a bit on the web client the issues many people have had with it in the past still remain today.

    Enter the VMware HTML5 Embedded Host Client fling. I’ve been using and following this fling for a while now and have really enjoyed it and with each release it keeps getting better and better.

    The Embedded Host Client fling is based on HTML5 which allows it works great across all kinds of platforms, it’s fast, responsive, and doesn’t require any plug-ins – YES the VM console works great. If this happens to be a look of what’s to come in a new VMware vSphere web client, then a client is looking very promising!

    If you haven’t tried it yet, you should. It’s extremely easy to install and doesn’t even require a reboot just follow these simple instructions.

    Read More “HTML5 Embedded Host Client, this looks promising”

  • How to update VMware ESXi 6.7 to 6.7 Update 1

    To go along with the newly released VMware vCenter 6.7 Update 1 release, comes VMware ESXi 6.7 Update 1 as well.

    As you might expect with an Update 1 release there are a number of patches, fixes and new additions with ESXi 6.7 U1. If you haven’t already seen, check out the release notes here.

    Below are two ways to easily upgrade your ESXi 6.0-6.7 hosts to ESXi 6.7 U1 using the command line or by using VMware Update Manager.
    Read More “How to update VMware ESXi 6.7 to 6.7 Update 1”

  • How to manually delete NetApp SnapMirror snapshots

    The other day, one of our volumes in the lab environment filled up. This volume has a couple large VM’s on it, coupled with a couple different Veeam backup jobs running using the native Veeam backup methods as well as using NetApp snap mirror to snapshot the volume and then using Veeam to ship it out to Azure.

    At any rate the volume filled up to the point where vCenter wasn’t allowing me to migrate VM’s off the datastore. I really didn’t want to expand the volume just so I could move VM’s off of it.

    Instead, I decided to delete some of the older proof of concept snapshots from SnapMirror. Below are the quick and easy steps to clear up some un-used snapshots and free up some space on the datastore.

    Read More “How to manually delete NetApp SnapMirror snapshots”

Leave a Reply

Your email address will not be published. Required fields are marked *

2 Comments