How to upgrade vCenter Server Appliance 6.7 to 7.0
VMware vCenter 7.0 has been released for several months now and figured it was about time I upgraded my home lab to the latest version.
This post will detail all the steps needed to upgrade vCenter Server Appliance 6.7 to 7.0 without any issues.
Getting Started
Before beginning, I HIGHLY recommended you first check the VMware Interoperability Matrix before performing any upgrade to check compatibility of other VMware products.
Then go download the VCSA 7.0 ISO if you haven’t already and lets get started with the upgrade!
How to Update VMware vCenter Server Appliance (VCSA) 6.7 to VCSA 7.0
- Mount the vCenter 7.0 ISO to your computer and start the vCenter Server 7.0 installer located at /vcsa-ui-installer/win32/installer.exe

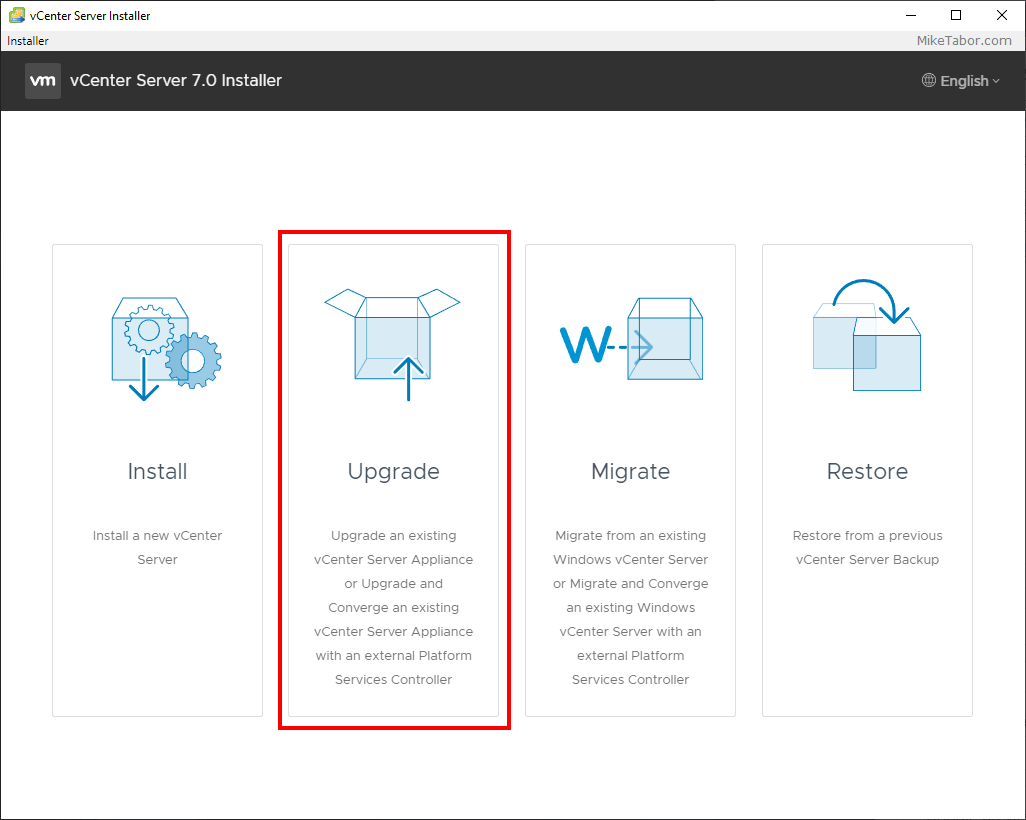
- When the vCenter Server 7.0 installer starts, click on Upgrade.
- Click Next through the Introduction.

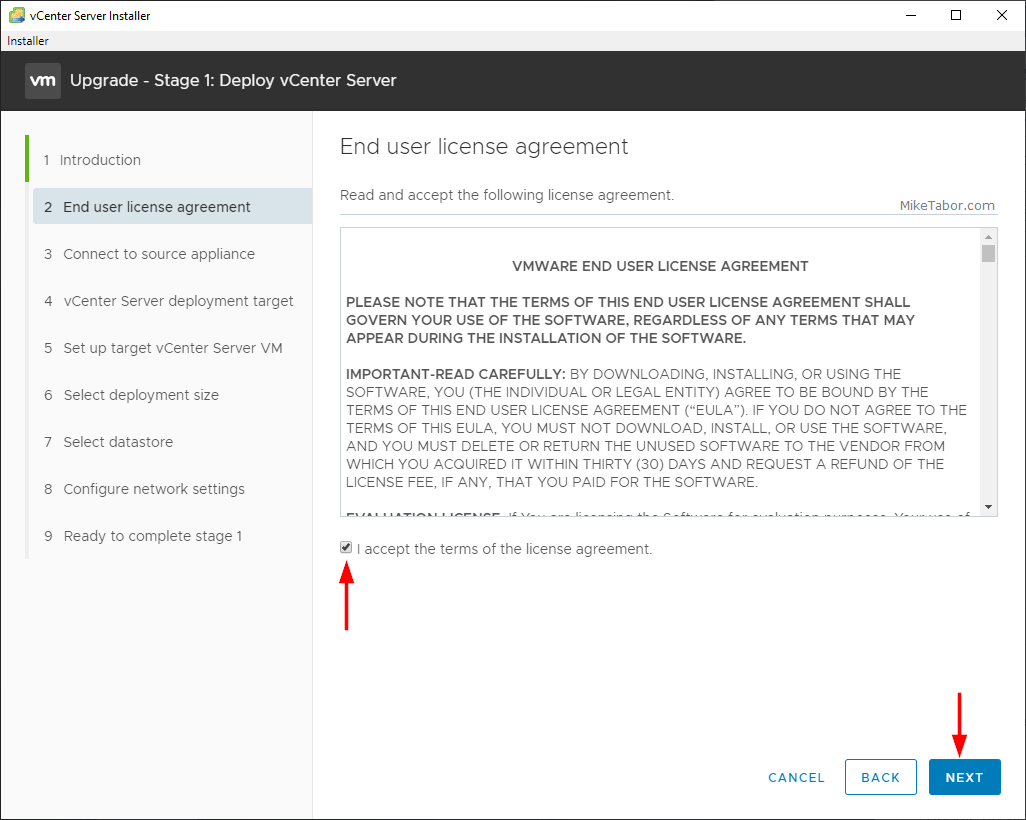
- Agree to the End User License Agreement and click Next.
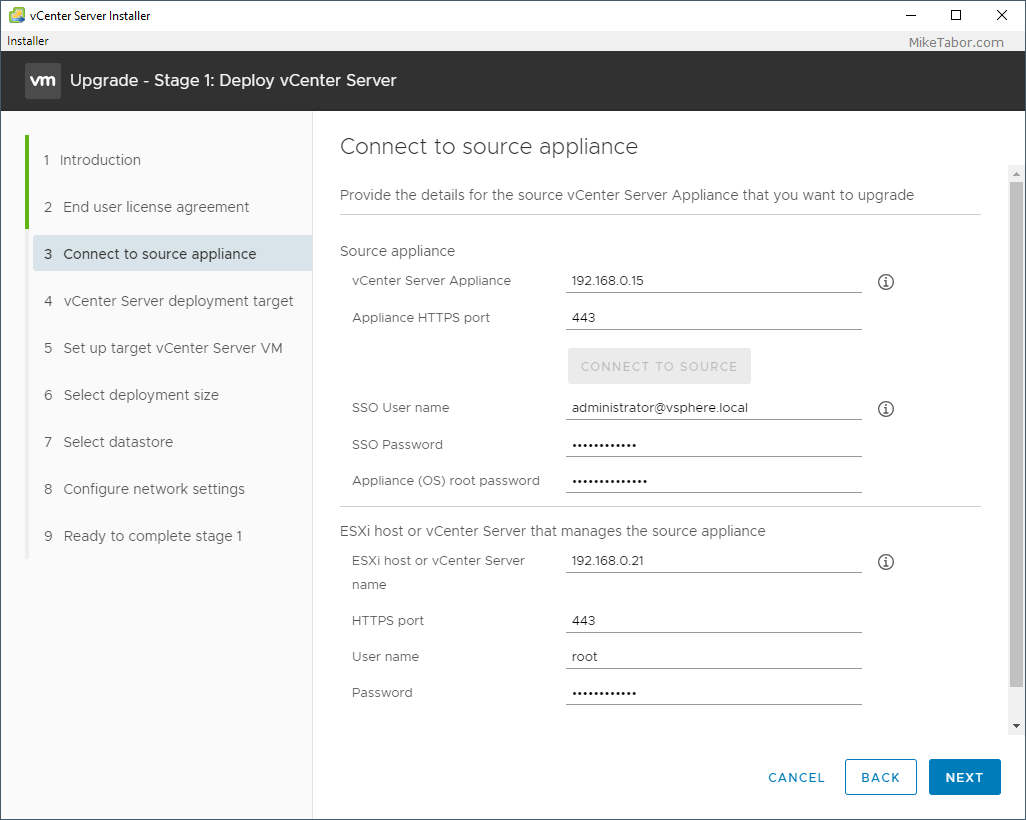
- Next enter the EXISTING VCSA FQDN or IP address as well what ESXi host the existing VCSA is running on, along with all of the login credentials for the existing VCSA and ESXi host.
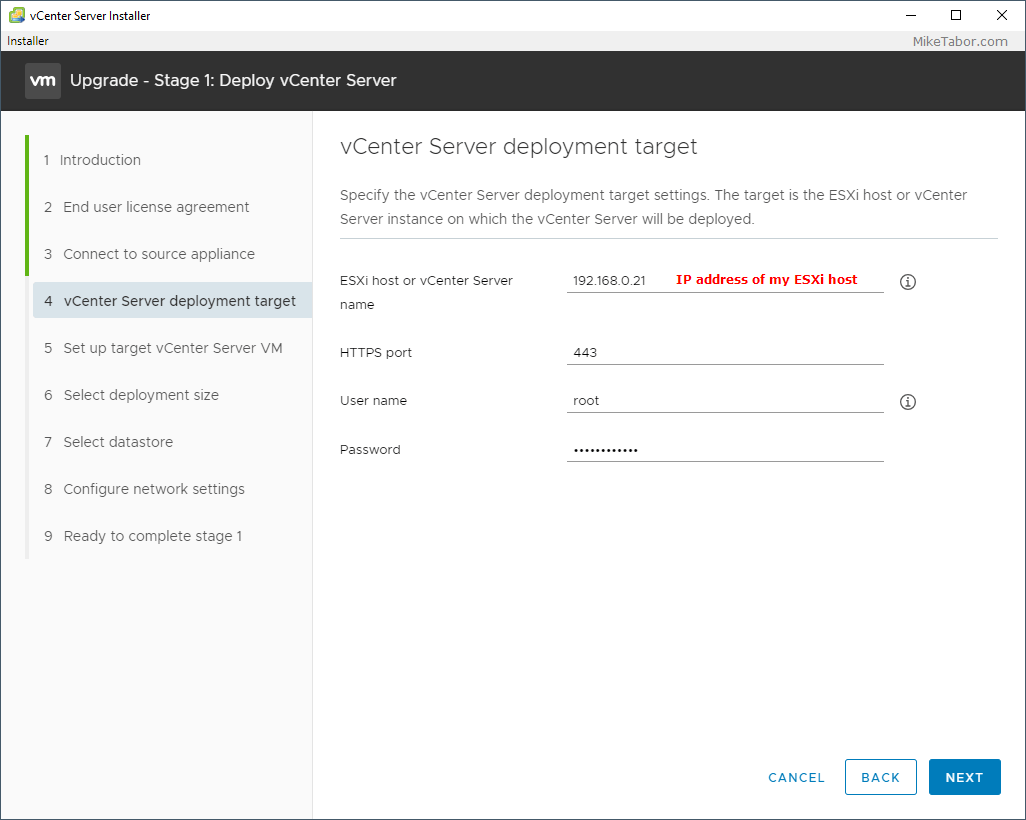
- Now enter the ESXi host or vCenter server where you would like the new VMware vCenter Server 7.0 appliance to be deployed.
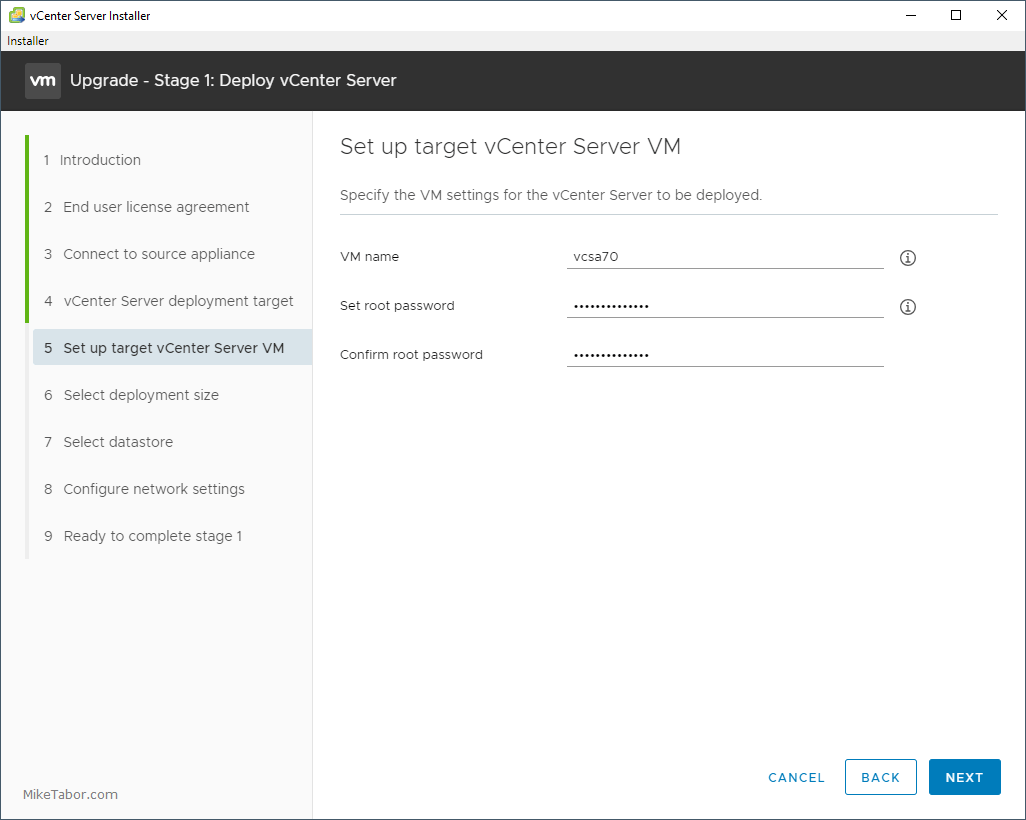
- Next specify a VM name and root password for the new 7.0 VCSA.
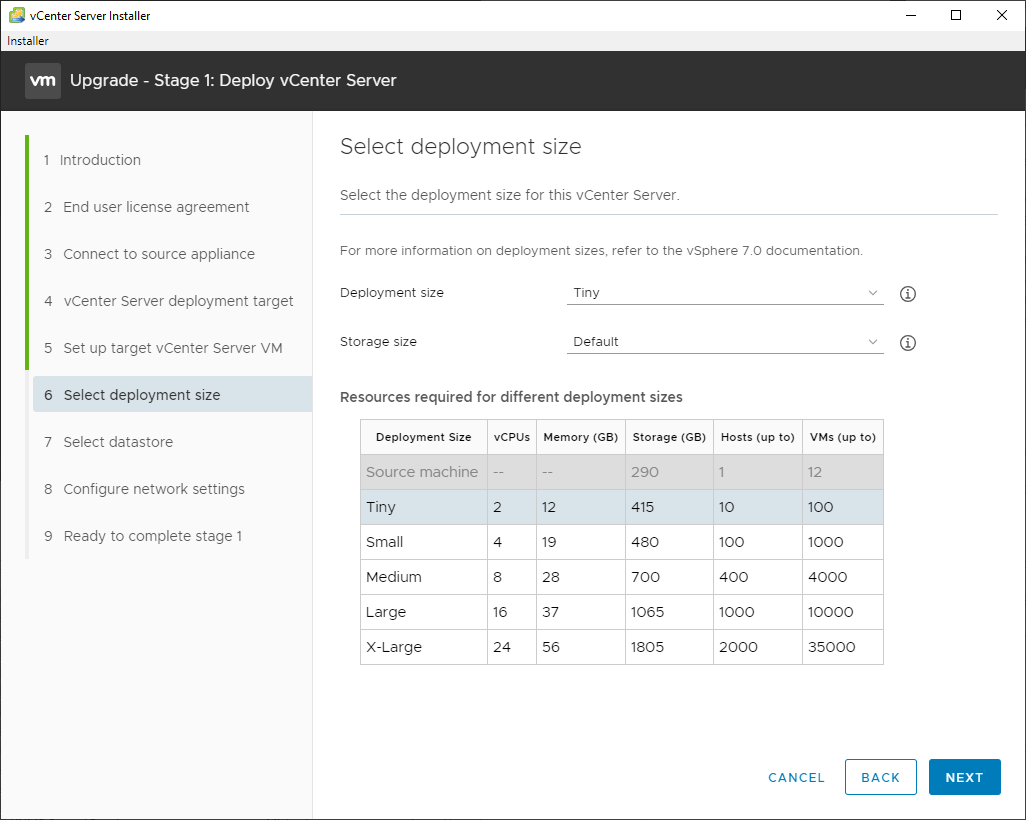
- Select an appropriate deployment size for your environment.
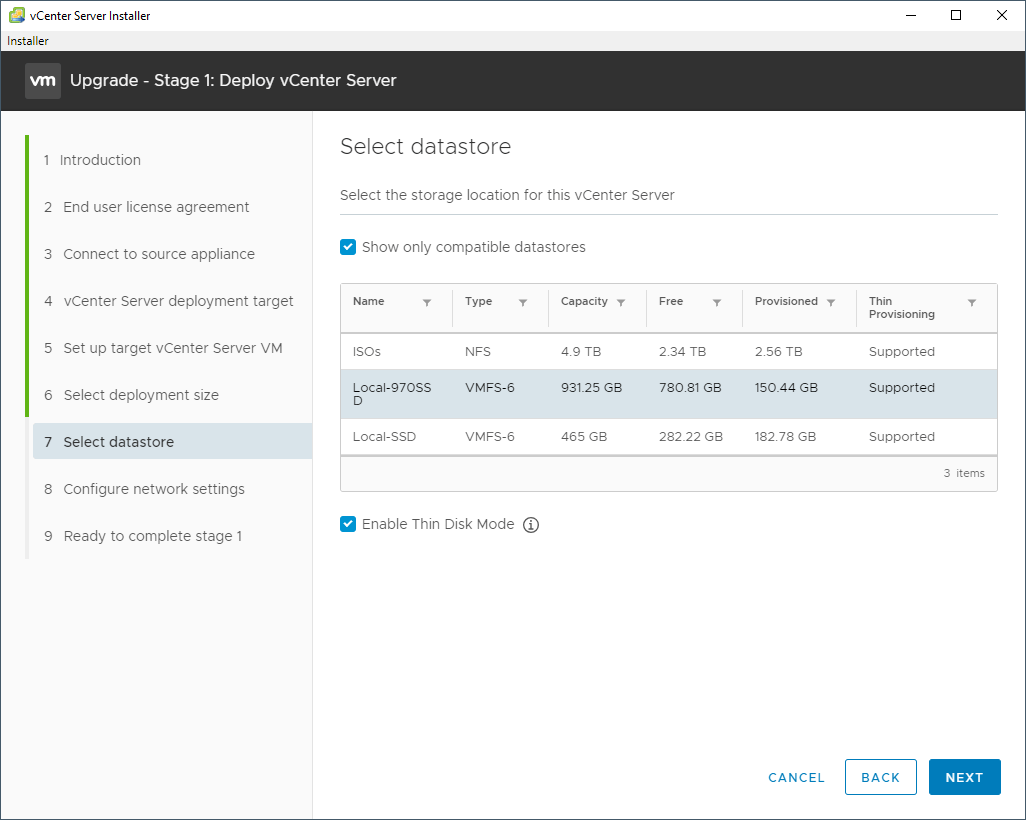
- Select a datastore you want the new vCenter 7.0 appliance to be stored.
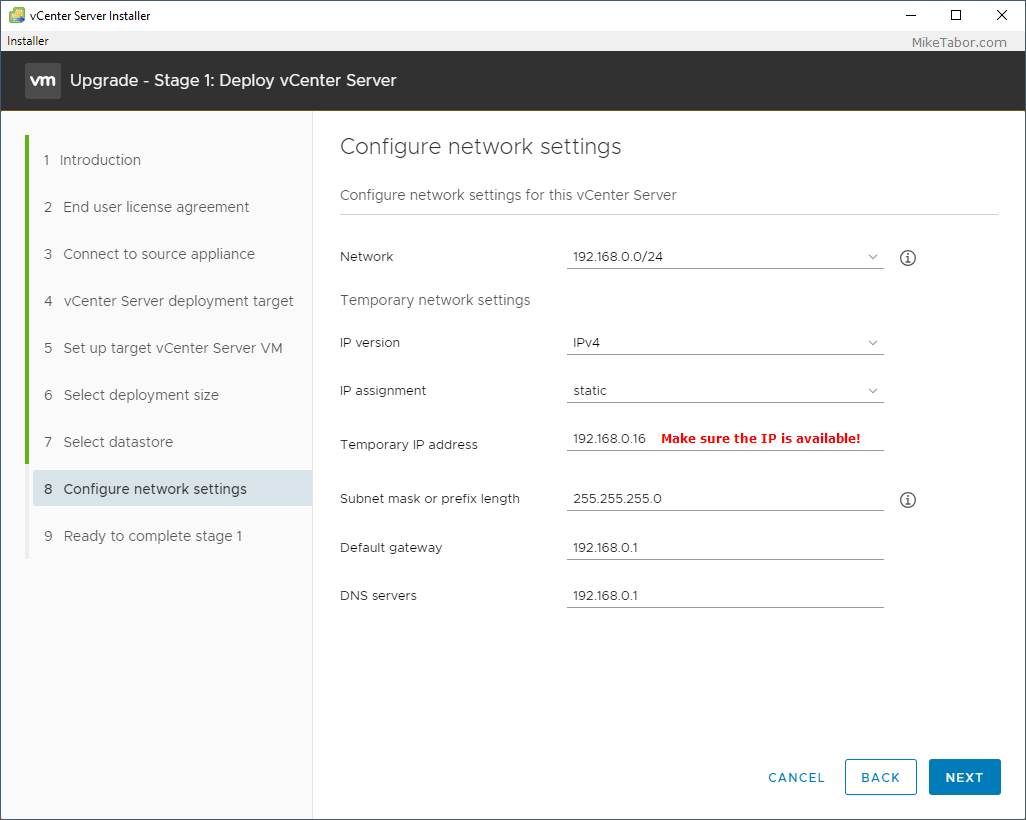
- Next configure a temporary network configuration. Once Stage 2 of the upgrade has been completed the new 7.0 VCSA will take the network identity of the old existing VCSA.
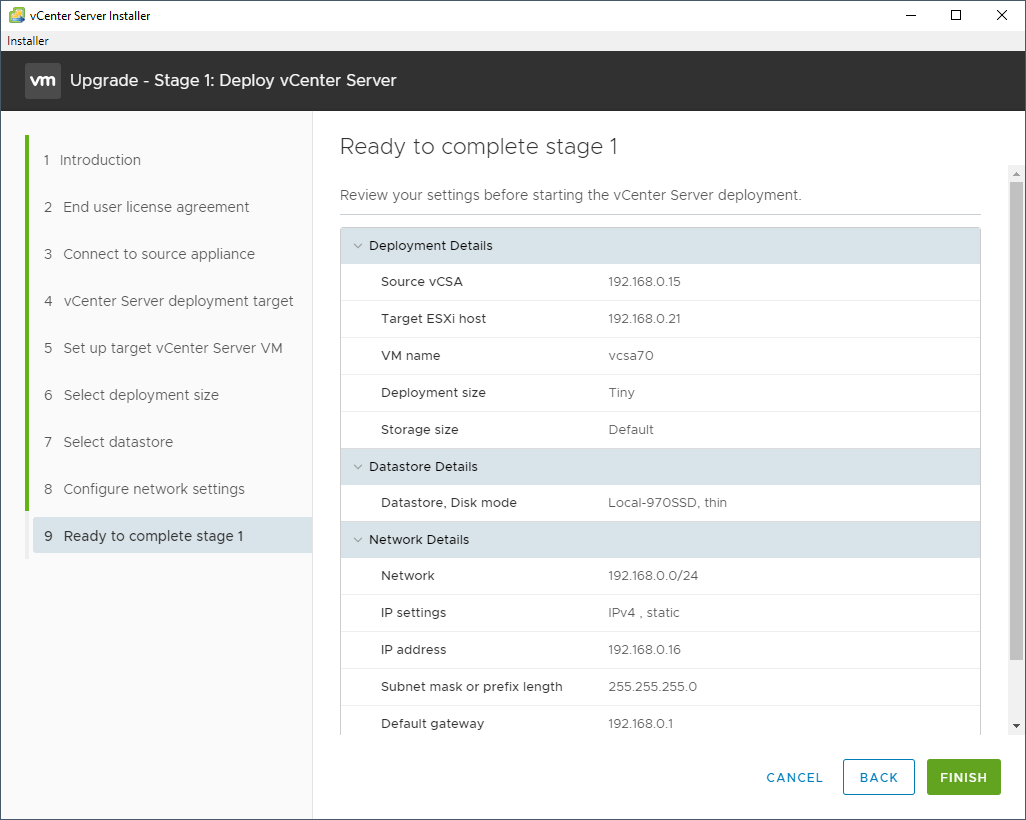
- Review the Stage 1 summary and click on Finish.
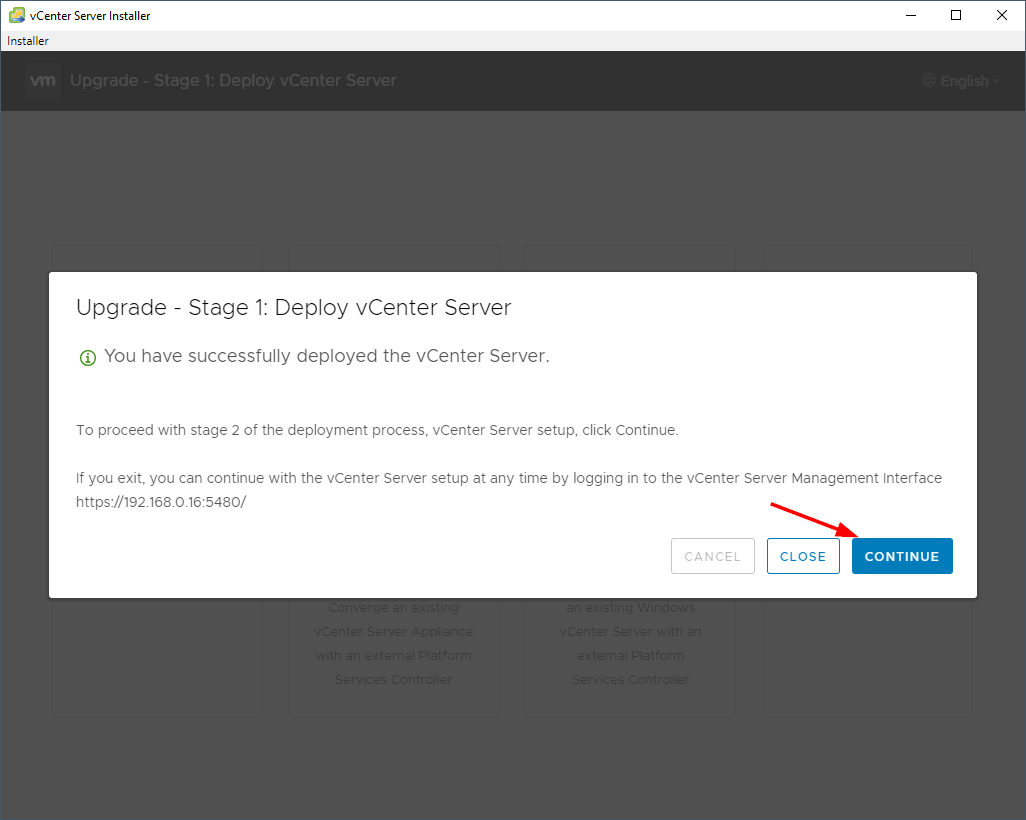
- Once Stage 1 of the vCenter 7.0 upgrade completes, click on Continue to move on to Stage 2.
Stage 2 – Upgrade vCenter Server Appliance 6.7 to 7.0, copying VMware vCenter data
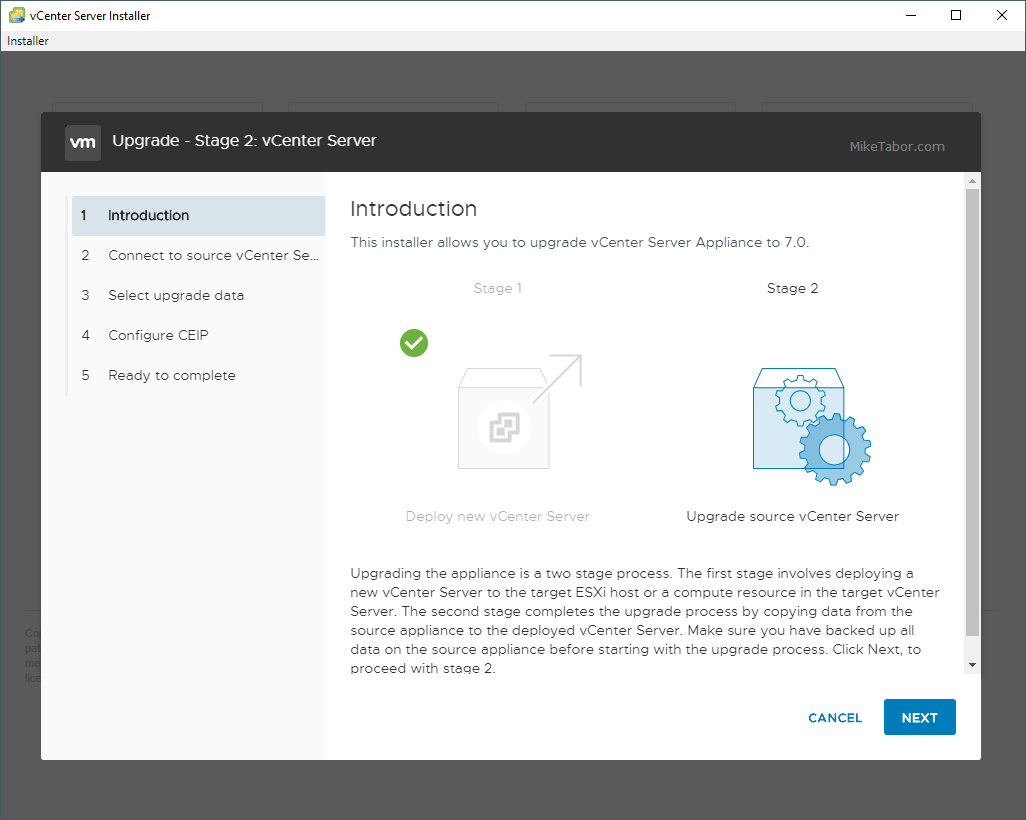
- Click on Next through the VCSA Stage 2 Introduction.
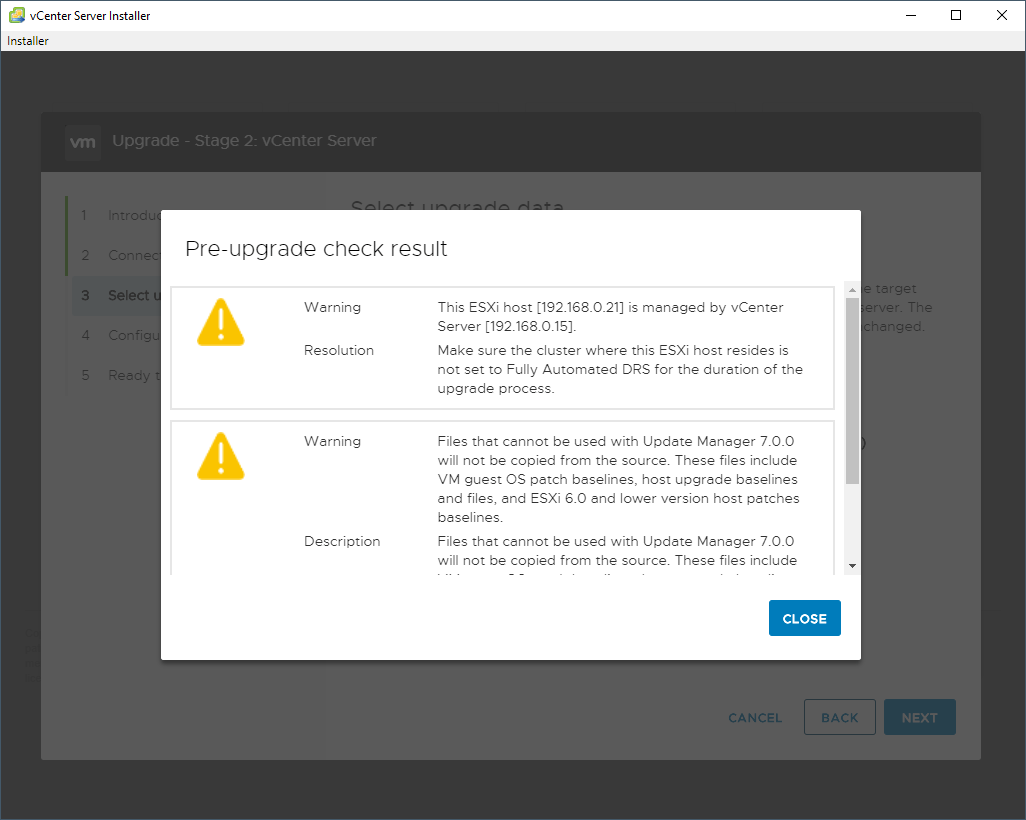
- The installer will then automatically run a Pre-Upgrade check on your existing VCSA. Make sure to review those results, then click on Next. Note: Be sure that DRS is disabled if you have more than one host. I only have one host, so DRS isn’t an issue.
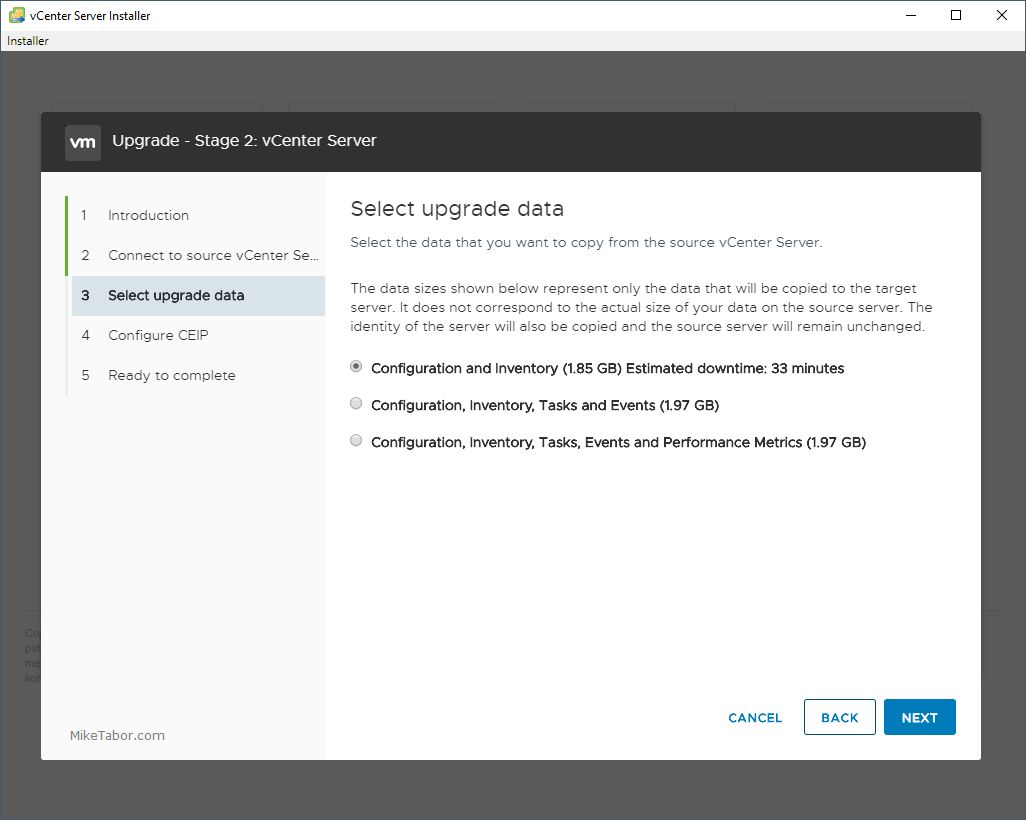
- Next select which data you would like to copy from the existing VCSA 6.7 to the new VCSA 7.0 appliance.
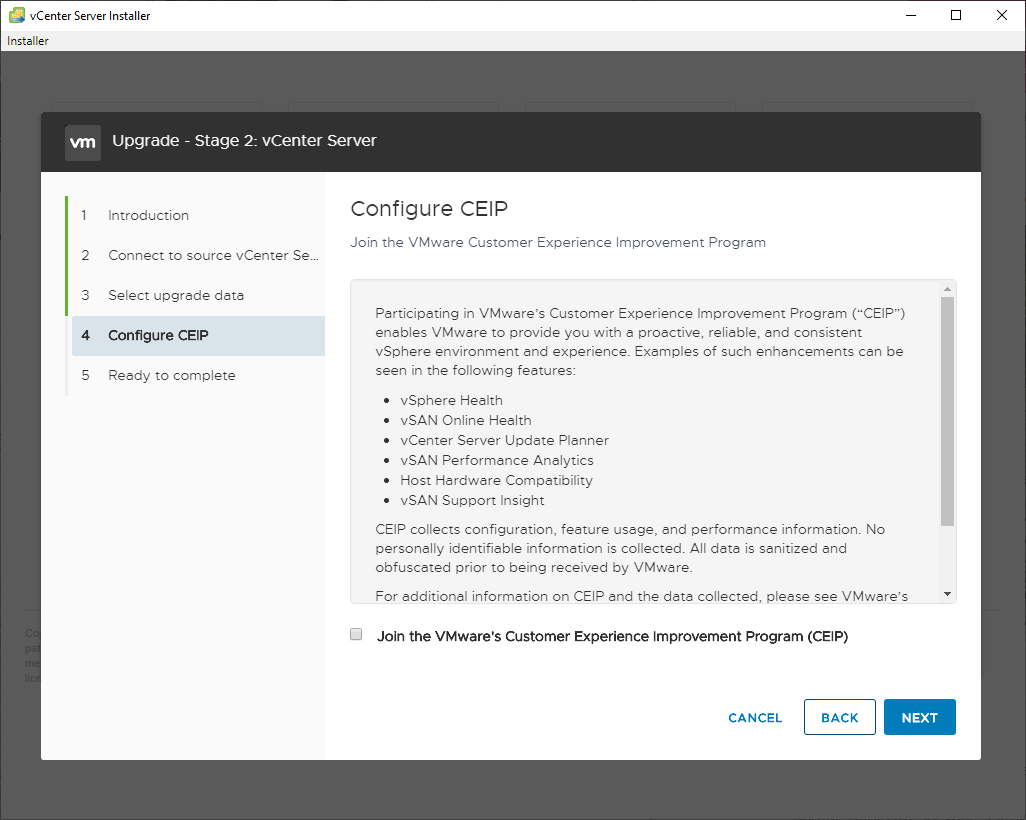
- Join the VMware customer experience improvement program, or don’t, and click Next.
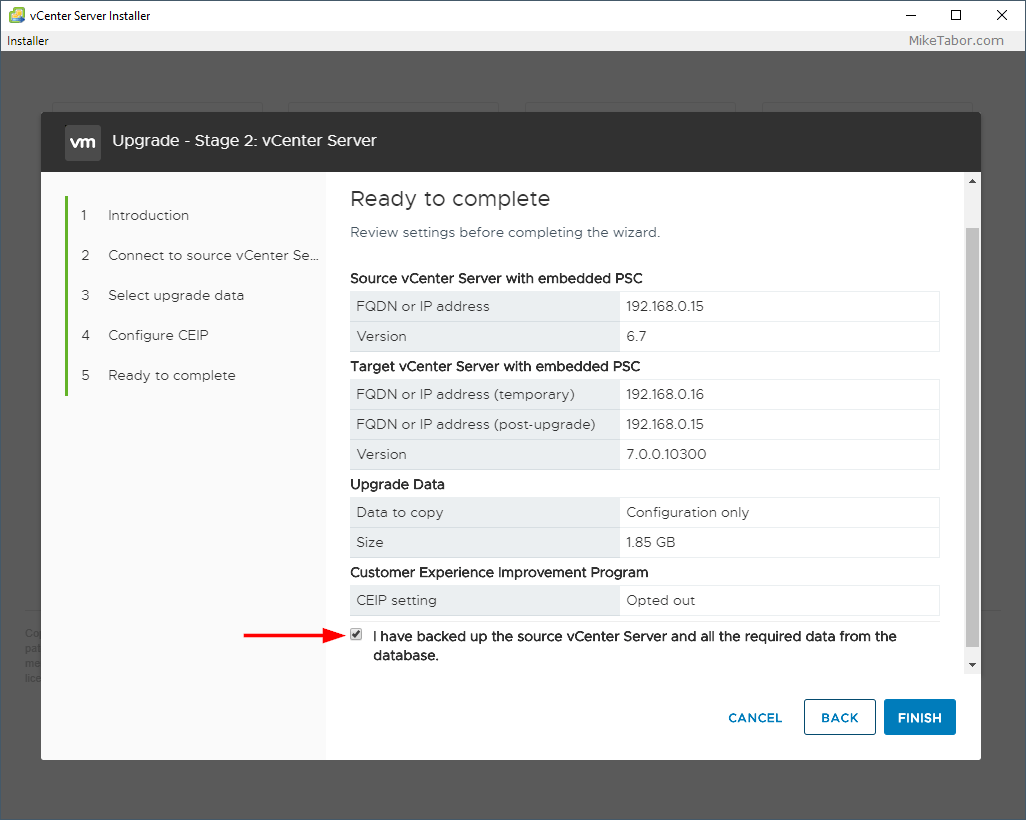
- Finally, review the Stage 2 summary and check “I have backed up the source vCenter Server and all the required data from the database” and click Finish.
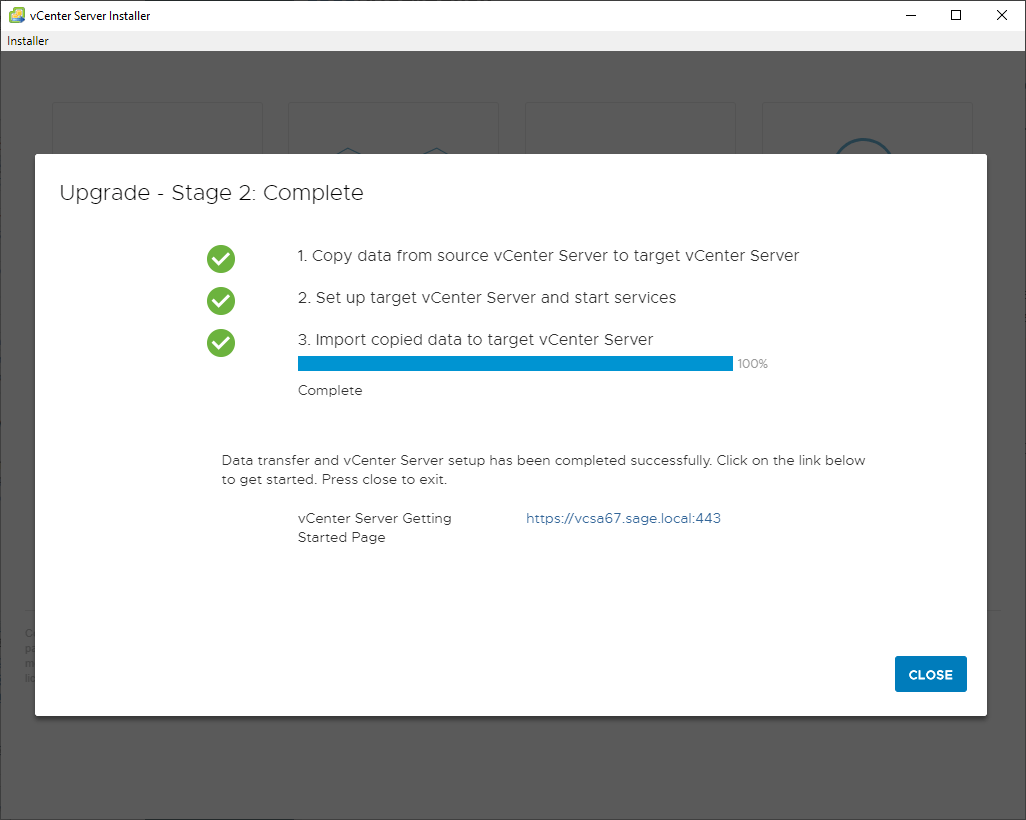
- Now at this point, Stage 2 of the upgrade will start copying the data from the old 6.7 vCenter over to the new 7.0 vCenter appliance. After some time, depending on how much data needs to be copied, the upgrade will complete.
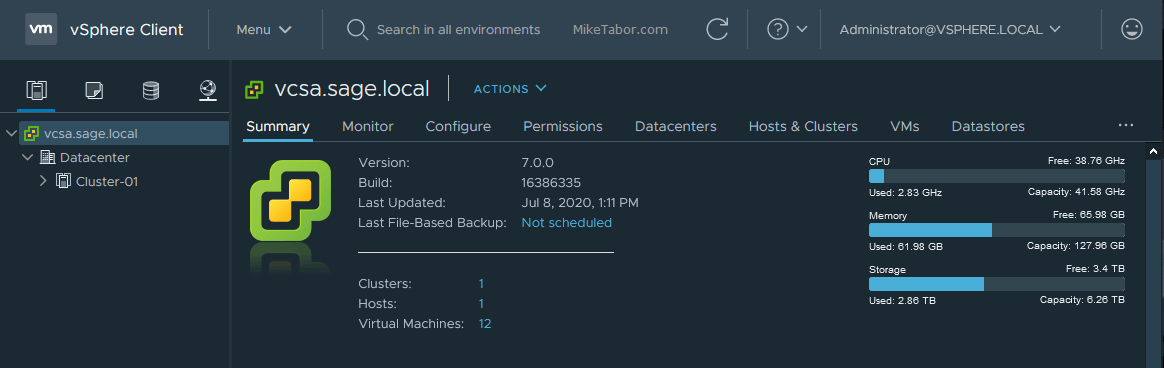
Now enjoy the new dark theme and all the other improvements that VMware vCenter 7.0 brings. You’re also ready to start upgrading your VMware ESXi hosts to 7.0.
How did your vCenter 6.7 to 7.0 upgrade go? Let me know in the comments below!

Hey Mike, great blog post, really nicely written.
Will you need a new vcenter lic for v7. I have a VMware vCenter Server 6 Standard lic, so I guess I’ll need to get a new one?
Thanks
Yes that is correct, you’ll get new v7 licenses from your MY VMware portal page (https://my.vmware.com).
-Michael
Thank you for this how to! Everything worked well.
I am sorry about the confusion, but when you say “you’ll get new v7 licenses from your MY VMware portal page” will the license appear automatically in there or will I have to purchase a 7 key?
From your My VMware portal page you’ll have to upgrade your existing v6 license to a v7.
-Michael
Also the license question.
I understand the license need to be upgraded but when should I do this step?
Upgrading the key and re-enter the vCenter License before the upgrade?
Is there a specific procedure dealing with the vCenter license?
Paul,
You can do this at any time. Before or after the upgrade. Doing it before won’t effect your current license or running vCenter. Or you can do it after and after the upgrade vCenter will just run on a trial license.
-Michael
noticed that some plugins may not be compatible. Will the rollback be simply shutting down the new Applicance and bootup the new
Hi Mike, what if my vCenter source appliance is running inside VMWare workstation instead of ESXi in step 5? what should I fill in for “ESXi or vCenter server”?
Vic,
In your nested/virtual lab I would assume you have 1,2,3 or more virtual ESXi hosts running within VMware Workstation. The process would remain the name you would just enter the IP address of one of those virtual ESXi hosts within Workrstation.
-Michael
If the upgrade fails, how can I roll back ?
Fabiano,
Pending where the upgrade failed and why, but at worst case the old vCenter appliance at most would just be turned off. At no point does the upgrade delete your old vCenter. So you’ll want to power down the new one (certainly so if it’s already assumed the IP of the old one) and then power up the old vCenter.
-Michael
Hi, I have a production environment with external PSC with v6.7.
last time when I tried to upgrade v6.0 to v6.7, convergence failed due to stale psc2 appliance which is actually not in use. After logging a VMware case, tried to clean up psc2 but still it got failed. Hence, we left as is v6.7 VC with external PSC till now.
My question is will psc2 will create a problem again during v7.0 upgrade?
I had the same problem.
Had 2 windows vcenter servers, with external Platform Services Controller.
After upgrade from 6.0 to 6.7, I ended up with a “dead” PSC.
Contacted VMWare support and was very disappointed in their support and expertise.
In the end, I decided by myself to install a brand new VCSA 6.7 and removed the old 2 windows vcenter servers.
PSC is End Of Life: https://kb.vmware.com/s/article/60229
Windows vcenter is End of Life.
VCSA is the way VMware goes.
@Mike: thanks for sharing this article!
Hi Mike,
thank you for your great blog post, very useful !
one question, i would like to conserve my VCSA hostname after the migration.
But in the procedure, step 7, i suppose we have to enter a new VCSA VM name (different than the old one, right ?)
What is the best way ?
Thank you
Best regards
Daniel
Daniel,
There are two ways you could tackle this depending on why you might want to keep the old domain name. The first being to simply update your DNS record to point to the new server IP. This would be helpful if you have bookmarks that point to: https://MyvCenter.companydomain.com
Otherwise if the actual hostname must remain the same, complete the steps I’ve outlined in the post above to completion. Then once the upgrade is completed you can log into the VAMI and change the actual vCenter Server Appliance hostname by going to: https://url(or IP)-to-vcenter:5480/, enter your new vCenter root user/password and then go to Networking > At the top of “Network Settings” click on EDIT. Follow that wizard, in Step 2 you’ll be able to change the hostname. Pay special attention to the last step (Ready to complete).
After you complete the wizard the vCenter services will stop and re-start and then you’re good to go!
Hope this helps.
-Michael
Thanks a lot for Your guide!
Hello Mike,
used your guide and the upgrade runs perfect. Thank you, it was very useful for me !
Maybe you should point at the end to update the automatic start settings of the old and new vCenter and update the the Backup System (like Veeam Backup ect.).
Regards
Kurt
Mike , thanks for your detailed process here, you mentioned when inputting new dats, the machine name
does the vCenter get a new host name ( you entered vcsa70 ) does this become the machine host name ? or is the 6.7 host name also restored along with the IP address ??
Hi Mike,
should i have to create new vcenter ssl certificate after upgrade from 6.7 to 7.0?
Thanks
it is not allowing me to choose the datastore. I had to cancel the first attempt to which after that it is now not showing datasstores when i go through the upgrade wizard
Thanks for this article, all works good.
I had those little issues (update from 6.7U3 to 7.0U3):
On Phase 2 precheck :
SSL Trust certificate does not match the current MACHINE_SSL_CERT for one of the service registrations >> follow this https://kb.vmware.com/s/article/79741
Deprecated IWA : https://kb.vmware.com/s/article/78506 >> use AD over LDAP.
/ Partition running out of space : http://vmwareinsight.com/Articles/2020/7/5803061/The-default-partiition-has-only-4-4-GB-of-available-space-Enter-a-new-export-directory-on-the-source-machine-below
After update, you have to upgrade and reassign licences and it’s allright.
Thanks again
Another Note, on esxi cluster with dvswitch, have to have a “Port binding Ephemeral – no binding” network.
Thanks for this article.
In my setup, I hade to go into the vCenter Server Appliance Management interface and enable SSH and Shell in order to pass the “Unable to connect to port 22” error I was hitting.
Hi Mike, thanks for the good post.
Just wondering, how do you upgrade to 7 if VCSA 6.7 OVF was deployed onto VMware Workstation Pro 16 without DNS?
Hi Mike
Really great guide, well explained and usefull. I will use it when uppgrading our production vcenter appliance.
After the uppgrade of the appliance the next step is removal of 2 older server in the cluster and replace those with never ones.
Q: Is it possible to install esxi 7 on those but keeping the 6,5 on the other 2 for a while until I can upgrade those 2 as well?
We running both HA and DRS in our cluster with a attached SAN as storage.
Thanks for any comments about this.
Can you run this ISO from a virtual server in the environment? I know dumb question but thought I should ask.
Thank you very much for this!
Also if you run into a space issue (not covered here) for your export directory use /storage/upgrademgr
In most cases you will have plenty of room. 6GB is average you need and 80GB is average free in that path.
I have an problem with:
Insufficient disk space for thick provisioning. It requires 1992 GB
I dont know why because my existant vcenter 6.7 has only 292 GB
and i dont want to Enable Thin Disk Mode
what i can do to reconfigure it or should I delete vcenter 6.7 make a new 7.0 Installation?