How to shadow a VMware Horizon View desktop

Ever work on a View 5.x Desktop issue and needed access to the desktop it self while in use? While not a feature that is easily enabled say via the vmTools or the View Administrator console – it can however be easily enabled via Group Policy, similar to some other settings that I mention in the Windows 7 Optimization Guide.

Enable PCoIP Shadowing

  • Import the pcoip.adm GPO Template.
  • Navigate to: Computer Configuration > Administrative Templates > Classic Administrative Templates (ADM) > PCoIP Session Variables.
  • Enable “Enable access to PCoIP session from a vSphere console”.
  • Link the GPO to the OU where your View Desktops reside.
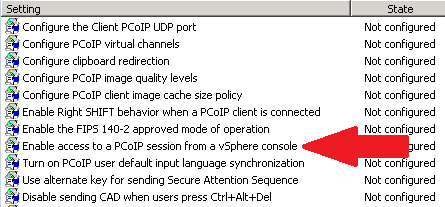
shadow pcoip policy

NOTE: The pcoip.adm template file is located on the Horizon View Connection Server: “install_directory\VMware\VMware View\Server\extras\GroupPolicyFiles”

Enable View Desktop Shadowing – vSphere 4

If you’re still running VMware vSphere 4, you’ll instead need to change a registry setting on the master image and/or the individual desktops that you wish to shadow:

HKLM\SOFTWARE\VMware, Inc.\VMware SVGA DevTap\NoBlankOnAttach: DWORD: 1

Important Note: Enabling either of these settings will allow you to open a vSphere console of said desktop and view it without any user interactions or notification. Privacy could certainly be a concern if used inappropriately.

Similar Posts

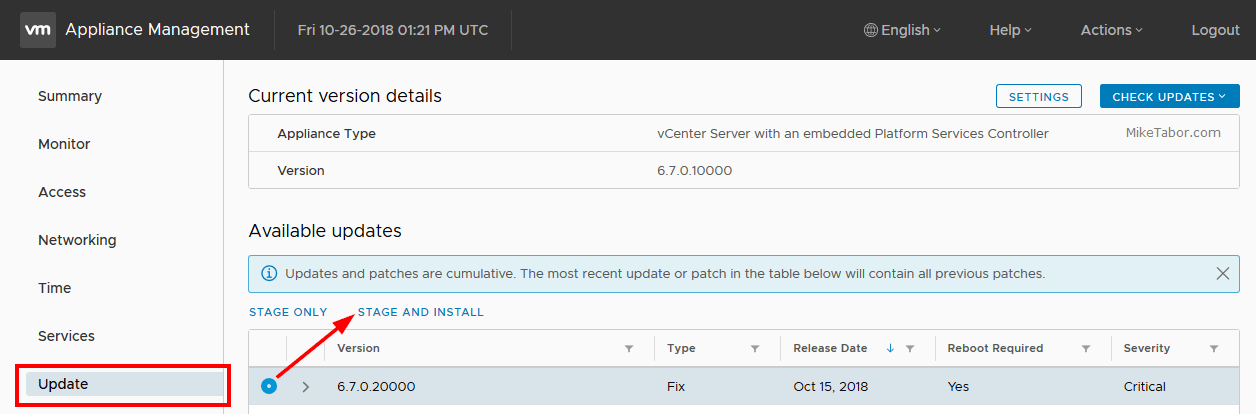
  • Update vCenter Server Appliance 6.7 to 6.7 Update 1

    VMware has released vCenter Server 6.7 Update 1 and with comes with a number changes.

    One most notable change is the feature complete HTML5 vSphere client. The vSphere client in vCenter 6.7 Update 1 now includes the ability to manage:

    • Host profiles
    • Auto deploy
    • Full vSphere Update Manager (VUM)
    • A new dark theme
    • and vCenter High Availability.

    That’s no where near all of the changes though, there are many more changes and updates in the 6.7 Update 1 update. Be sure to read the full release notes here.

    In this post we’ll see just how easy it is to upgrade from VCSA 6.7 to VCSA 6.7 Update 1 in just a couple steps!

    Read More “Update vCenter Server Appliance 6.7 to 6.7 Update 1”

  • VCP5 Exam: Passed

    Pass

    This morning I took the VCP510 exam and passed it on my first go at it!

    Overall I felt the exam was a nice challenge, while I can’t go into details of the exam, per the NDA. I will say I was surprised at the number of multiple answer questions and the VPC510 was certainly more “real-world” based and not so much memorizing config maximums.

    That said, I’ll do as others have done and list what I used in my preparation for the VCP510 exam…

    Read More “VCP5 Exam: Passed”

  • Install ESXi 5.1 from a USB Flash Drive

    Many servers already come with a DVD/CD-ROM drive or some kind of ability to virtually mount an ISO image from a network share onto your server to then install ESXi. However, not all do or you just want to have your ESXi image readily available. Here’s a quick step by step instructions on how to use a USB flash drive to install ESXi.

    1. Download ESXi 5.1 from VMware (if you haven’t already) as well as UNettbootin.
    2. Plug in your USB Flash Drive.
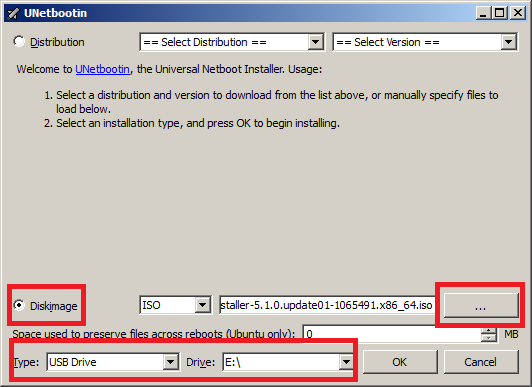
    3. Open UNetbootin and select “Diskimage”, set Type to “USB Drive”, select Drive letter of your USB flash drive, and set the path of your ESXi 5.1 ISO image. Then click on “OK”.
      unetbootin setup
    4. Read More “Install ESXi 5.1 from a USB Flash Drive”

  • vSphere 5.5 Update 1 has been released, includes VSAN.

    VMware vSphere 5.5 update 1

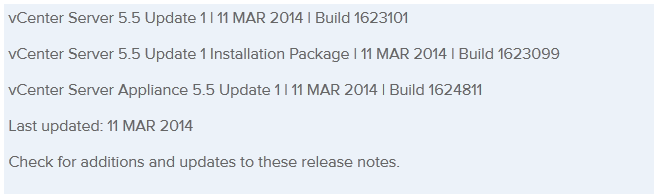
    VMware has officially released vSphere 5.5 U1 which includes a number of improvements, fixes, and most excitedly the production ready version of VSAN!

    What’s new

    • vCloud Hybrid Service vSphere Client Plug-in, is now available in vSphere Web Client.
    • vCenter Server is now supported on Windows Server 2012 R2.
    • A number of resolved issues

    Read More “vSphere 5.5 Update 1 has been released, includes VSAN.”

  • My VMware View Windows 7 Optimization Guide

    These are the few steps I do when creating a new "Golden" image. Luckily I don’t have to do these steps all the time as I’ll create the "Golden" image when there is a new upgrade such as when we went from View 4.6 to View 5.0.1. I like to have a new fresh machine using new virtual hardware from the start. You could certainly just upgrade the virtual hardware on the "Golden" image, I just prefer to start clean.

    At any rate, here’s my list. Hopefully someone might find it somewhat useful and maybe even others can improve upon it.

    Preparing a new virtual machine

    1. Create New Virtual Machine – FILE > NEW > VIRTUAL MACHINE (CTRL+N)
    2. Under Configuration select CUSTOM.
    3. Select a Name, Folder, Host, Cluster, and Storage.
    4. Under Guest Operating System select Windows and then Windows 7 32bit under the Version drop down.
    5. Select which Network (VLAN) and under Adapter select VMXNET 3.
    6. Configure disk size to 30GB THIN provisioned.

    Read More “My VMware View Windows 7 Optimization Guide”

  • Increase incremental backup speed by enabling CBT

    In a recent VMware environment I was working in, we noticed that our incremental backups was taking a long time (like up to 7-8 hours) to complete. After digging around it was found that VMware actually has a feature built-in since version 4 called Change Block Tracking (CBT). CBT will track any blocks that were changed since the last backup and tag them and stores the information in a -CTK file. The obvious benefit is that now the third party software only backs up the changed block and not the entire VM each time, reducing the amount of data being backed thus speeding up backups and even lowers the CPU utilization on the VM host.

    CBT is disabled by default though there are some backup tools that will enable it automatically or you can enable it manually which can easily be done following these steps:

    Read More “Increase incremental backup speed by enabling CBT”

Leave a Reply

Your email address will not be published. Required fields are marked *