VMware vCenter Service Appliance Update

Update vCenter Server Appliance 6.7 to 6.7 Update 1

VMware has released vCenter Server 6.7 Update 1 and with comes with a number changes.

One most notable change is the feature complete HTML5 vSphere client. The vSphere client in vCenter 6.7 Update 1 now includes the ability to manage:

  • Host profiles
  • Auto deploy
  • Full vSphere Update Manager (VUM)
  • A new dark theme
  • and vCenter High Availability.

That’s no where near all of the changes though, there are many more changes and updates in the 6.7 Update 1 update. Be sure to read the full release notes here.

In this post we’ll see just how easy it is to upgrade from VCSA 6.7 to VCSA 6.7 Update 1 in just a couple steps!

Prep work before upgrading to VCSA 6.7 Update 1

Before you do any VMware update I highly recommend checking out the VMware Interoperability Matrices to check compatibility of other VMware products.

It’s also a good idea to check the VMware Compatibility Guide for compatibility of the hardware in your environment.

Once you’ve done that, lets begin!

How to update VCSA 6.7 to 6.7 Update 1

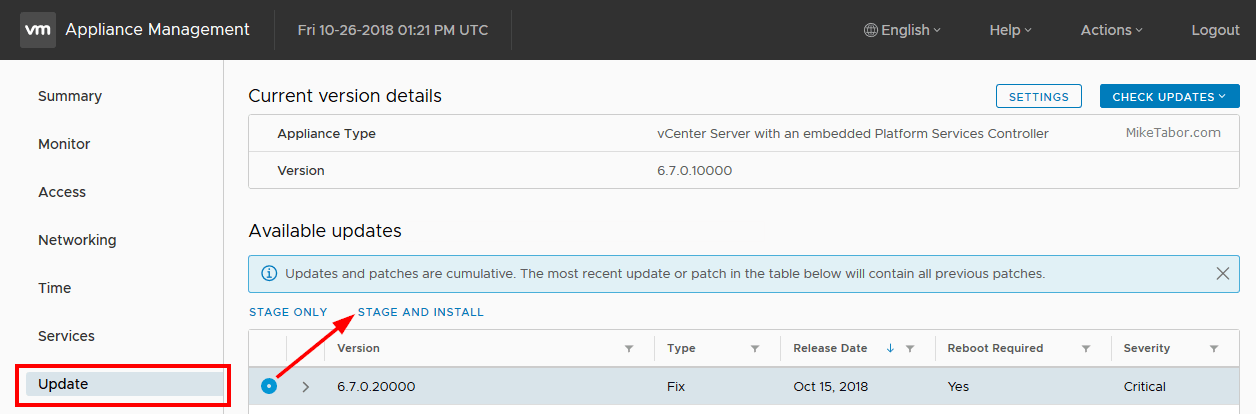
  1. Log into your VCSA VAMI by opening your browser and going to: https://FQDN-of-VCSA:5480 and entering your root credentials.
  2. From the left side menu, click on Update. This will automatically check for and display any available updates. Select 6.7.0.20000 and click on “Stage and Install“.
    VMware vCenter Service Appliance Update
  3. Next accept the EULA, join the CEIP (or not) and finally check “I have backed up vCenter Server and its associated databases.” and click on Finish.
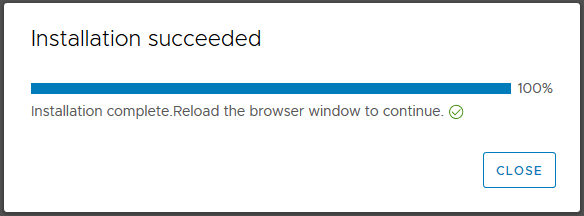
  4. After a few minutes, depending on the size of your environment, the VCSA 6.7 Update 1 update will complete. Simply click on Close.
    VCSA 6.7u1 update complete
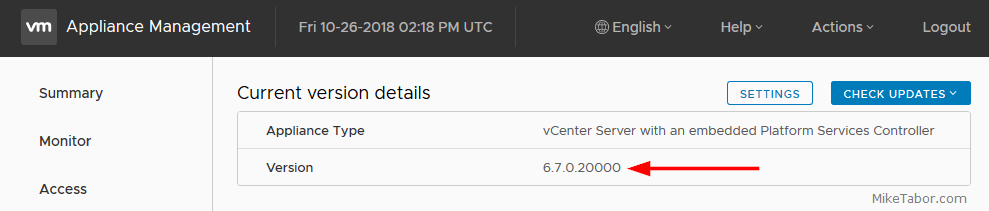
  5. You’ll be taken back to the VAMI update screen which should show your running version as 6.7.0.2000. If so, you are now running VMware vCenter Service Appliance 6.7 Update 1. Enjoy!
    vmware vcsa update 6.7u1

That’s it. You should now be running VMware vCenter Server Appliance 6.7 U1 and now ready to upgrade the remaining items in your environment, such as upgrading your ESXi hosts to ESXi 6.7 U1.

Similar Posts

  • How to convert VMDK to OVF file format

    Here is a quick and easy way to convert a VMDK to OVF file format using the OVF Tool from VMware.

    1. First download and install the VMware OVF Tool for your operating system.
    2. Open a command prompt as Administrator and navigate to the OVF Tool install directory:
      
      cd C:\Program Files\VMware\VMware OVF Tool
      

      vmdk to ovf command prompt

    3. Next, type in the following command to convert VMDK to OVF:
      
      ovftool.exe \virtualmachine.vmx \virtualmachine.ovf
      

      convert vmdk to ovf command

    After a few minutes time you should you should see a “Transfer Completed, Completed successfully” message and your VMDK to OVF file conversion is complete and ready for use.
    convert vmdk to ovf complete

  • My VMware ESXi Home Lab Upgrade

    Although the focus in my career right now is certainly more cloud focused in Amazon Web Services and Azure, I still use my home lab a lot.

    For the last 5+ years my home lab had consisted of using 3x Intel NUC’s (i5 DC53427HYE), a Synology NAS for shared storage and an HP ProCurve switch. This setup served me well for most of those years. It has allowed me to get many of the certifications I have, progress in my career and have fun as well.

    At the start of this year I decided it was time to give the home lab an overhaul. At first I looked at the newest generation of Intel NUC’s but really wasn’t looking forward to dropping over $1,300 on just partial compute (I’d still need to be RAM for each of the 3 NUC’s). I also wanted something that just worked, no more fooling around with network adapter drivers or doing this tweak or that tweak.

    I also no longer needed to be concerned about something that had a tiny footprint. I also questioned if I really needed multiple physical ESXi hosts. My home lab isn’t running anything mission critical and if I really wanted I could always build additional nested VMware ESXi hosts on one powerful machine if I needed.

    So in the end, the below is what I settled on. Replacing all of my compute, most of my networking and adding more storage!

    Read More “My VMware ESXi Home Lab Upgrade”

  • Another CBT bug found in VMware ESXi 6.0

    VMware

    VMware just published KB 2136854 regarding a new bug found in ESXi 6.0 that causes virtual machine backups, which use Changed Block Tracking (CBT), to be inconsistent. VMware says the cause of the issue is this:

    This issue occurs due to an issue with CBT in the disklib area, this causes the change tracking information of I/Os that occur during snapshot consolidation to be lost. The main backup payload data is never lost and it is always written to the backend device. However, the corresponding change tracking information entries which occur during the consolidation task are missed. Subsequent QueryDiskChangedAreas() calls do not include these missed blocks, hence a backup based on this CBT data is inconsistent.

    Read More “Another CBT bug found in VMware ESXi 6.0”

  • VMware P2V Permission to perform this operation was denied fix

    Just the other day we had a Windows Server 2008 R2 Standard physical server that needed to be P2V’ed, and after trying to use VMware Converter Standalone 6.1.1 we ran into the error message “Permission to perform this operation was denied” after entering the source machine details.

    vmware p2v permission denied

    Even after trying to start VMware Converter as “Run as administrator” the error persisted. Below is the workaround we performed to quickly allow us to P2V the physical server.

    Read More “VMware P2V Permission to perform this operation was denied fix”

  • Easy ESXi 5.5 upgrade via command line

    ESXi 5.5 was just released general availability (GA) on Sunday (9/22) and I’m itching to upgrade the home lab to run the latest version with all it’s goodies. I wanted to try upgrading my hosts without having to go through the same process that I followed setting up ESXi on the NUC in the first place, injecting custom NIC drivers, etc.

    Enter the command line…

    1. Move all VM’s from the host and then put the host into Maintenance Mode.
    2. Go to the Configuration tab > Security Profile and Enable SSH under Services.
      ssh enabled
    3. Under Firewall, enable httpClient (outbound http).
      httpClient enable
    4. Open PuTTY (or other SSH client) and SSH into your host.
    5. Read More “Easy ESXi 5.5 upgrade via command line”

Leave a Reply

Your email address will not be published. Required fields are marked *

2 Comments