How to update VMware ESXi 6.7 to 6.7 Update 1

To go along with the newly released VMware vCenter 6.7 Update 1 release, comes VMware ESXi 6.7 Update 1 as well.

As you might expect with an Update 1 release there are a number of patches, fixes and new additions with ESXi 6.7 U1. If you haven’t already seen, check out the release notes here.

Below are two ways to easily upgrade your ESXi 6.0-6.7 hosts to ESXi 6.7 U1 using the command line or by using VMware Update Manager.

However, before upgrading any of your VMware ESXi hosts, you should have already upgraded your VMware vCenter Server Appliance to 6.7 Update 1.

If you are running VCSA 6.5 you can find instructions on how to upgrade VCSA 6.5 to 6.7 U1 as well.

How to update ESXi 6.7 to 6.7 Update 1 via command line

  1. Place the ESXi host you are about to upgrade into Maintenance Mode.
  2. Now SSH into the host using PuTTY (or any other SSH client/terminal).
  3. Type the following command to open the firewall for outgoing HTTP requests:
    upgrade esxi allow http firewall

    esxcli network firewall ruleset set -e true -r httpClient
  4. Type the following to download and upgrade to ESXi 6.7 U1
    upgrade esxi update esxi 6.7 u1

    esxcli software profile update -d https://hostupdate.vmware.com/software/VUM/PRODUCTION/main/vmw-depot-index.xml -p ESXi-6.7.0-20181002001-standard
  5. After the update has finished disable the HTTP firewall rule by typing:
    upgrade esxi block http firewall

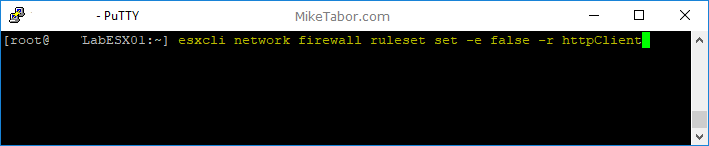
    esxcli network firewall ruleset set -e false -r httpClient
  6. Finally, reboot the ESXi host to complete the upgrade.
    reboot

Note: Once the reboot is completed, I would also recommend disabling SSH on the host for security purposes.

How to upgrade VMware ESXi 6.0-6.7 to ESXi 6.7 U1 using VMware Update Manager (VUM)

You will need the ESXi 6.7 U1 ISO, so download that now if you haven’t already.

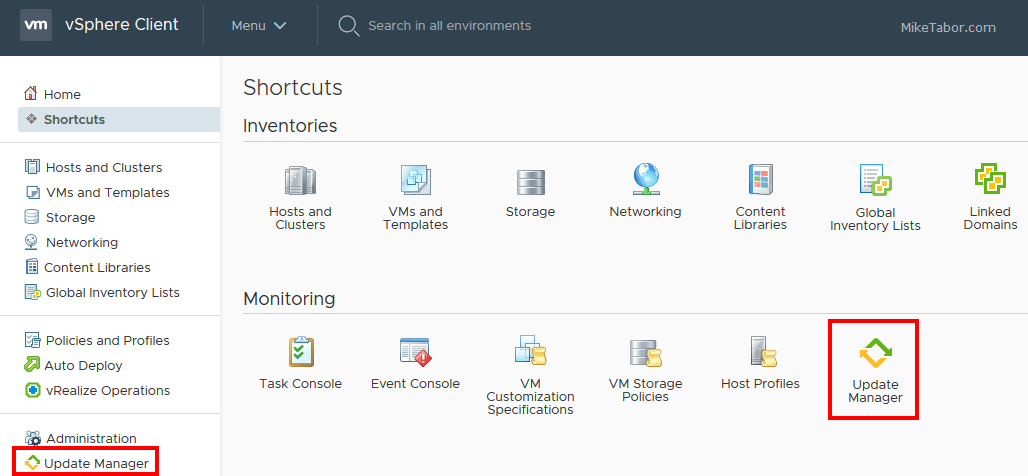
  1. First log into your VCSA and click on Update Manager.
    upgrade esxi 6.7 vum
  2. Next click on ESXi images and then IMPORT.
    upgrade esxi 6.7 import image
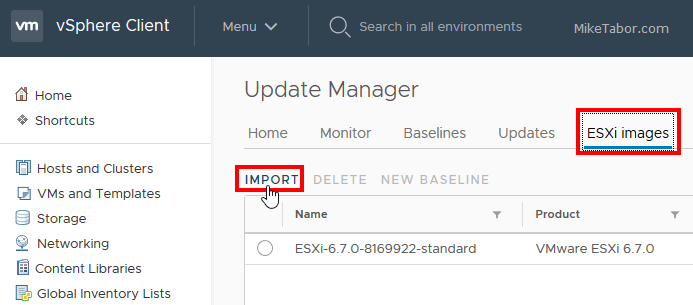
  3. Browse to the location where you saved the ESXi 6.7 U1 ISO.
    upgrade esxi 6.7 upload image
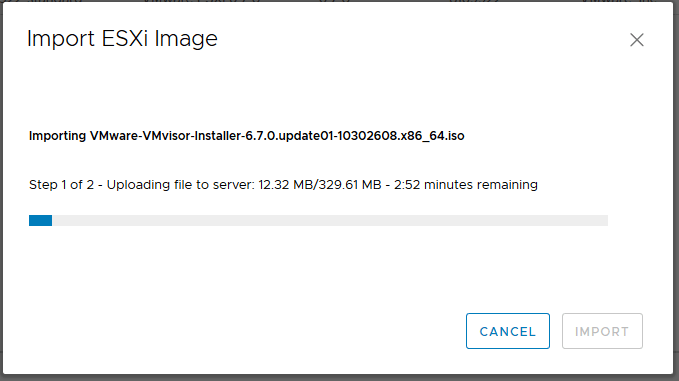
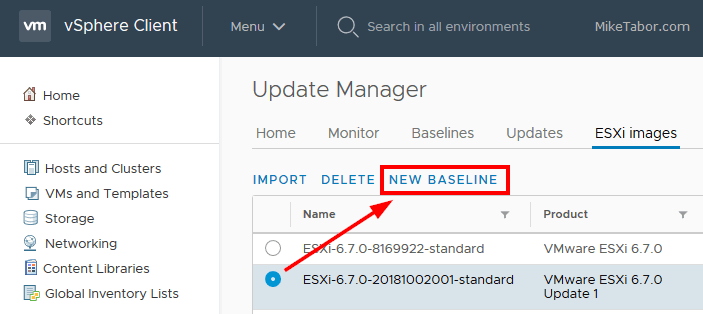
  4. Once the import completes, select the new image and click on New Baseline.
    upgrade esxi 6.7 new baseline
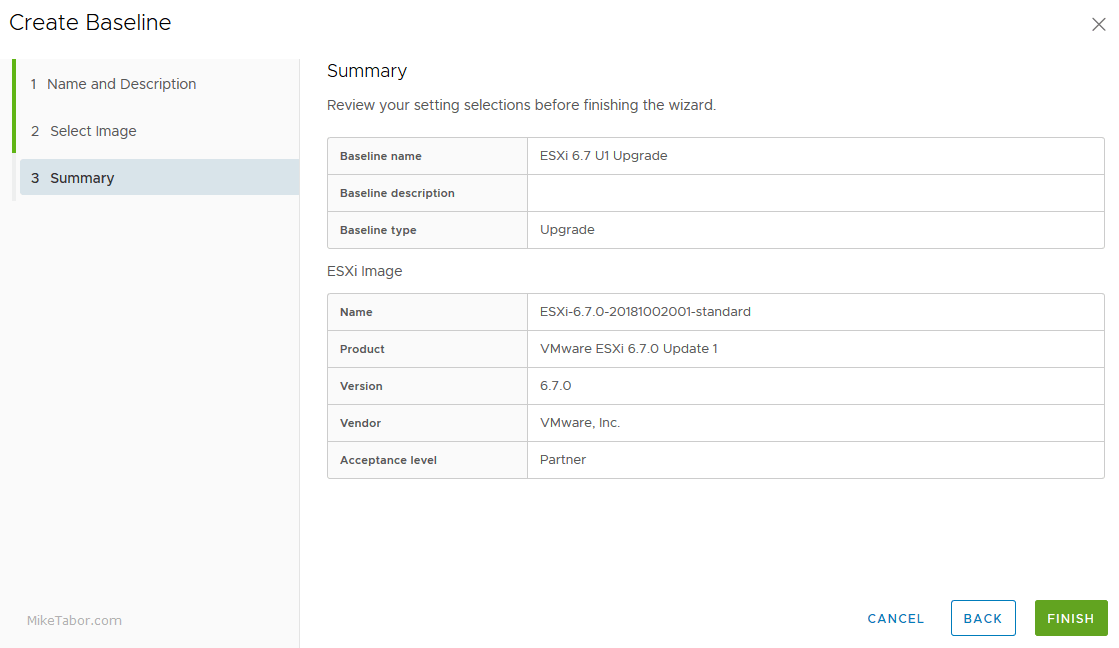
  5. Give your new baseline a name and description and ensure the new ESXi 6.7 U1 image is selected and click on Finish.
    upgrade esxi 6.7 baseline details
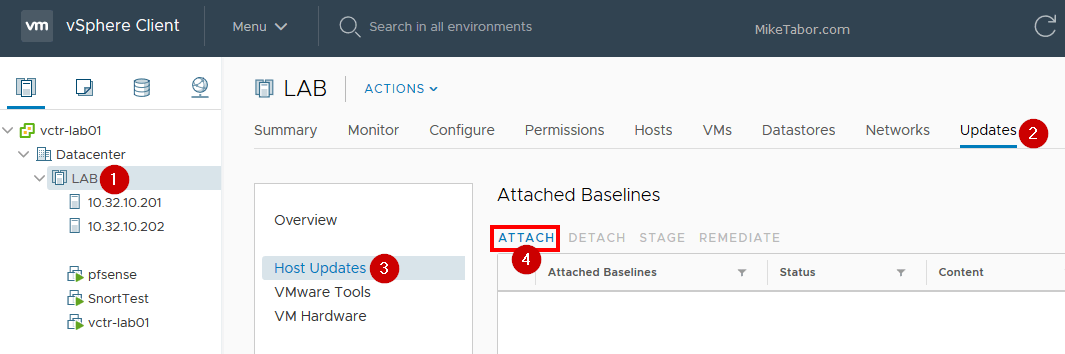
  6. Now we need to attach the new baseline to our hosts. I’m going to add the baseline to the Cluster by selecting the Cluster (#1), then going to the Updates tab (#2), clicking on Host Updates (#3) and finally Attach (#4).
    upgrade esxi 6.7 attach baseline
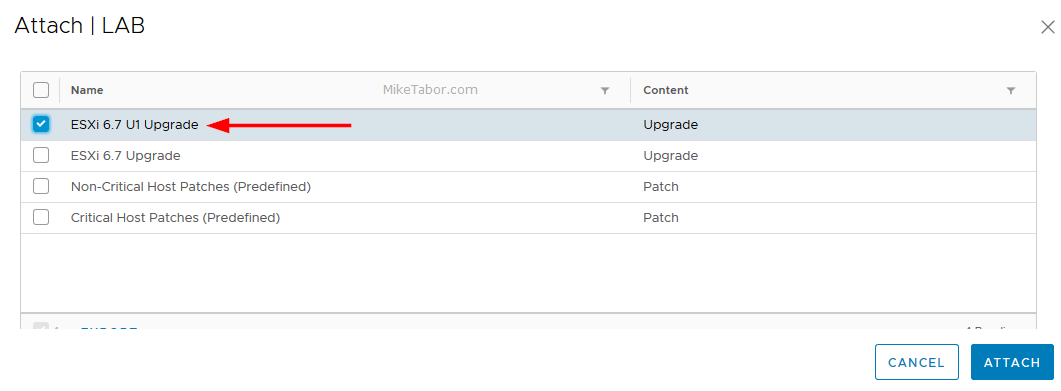
  7. Select the newly created baseline that you created from above and click on Attach.
    upgrade esxi 6.7 attach baseline cluster
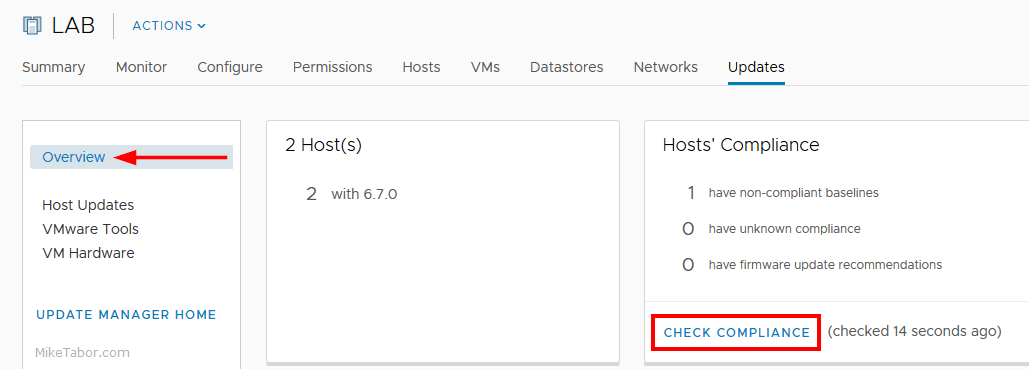
  8. Next click on the Overview link in VUM and then click on Check Compliance.
    upgrade esxi 6.7 vum check compliance
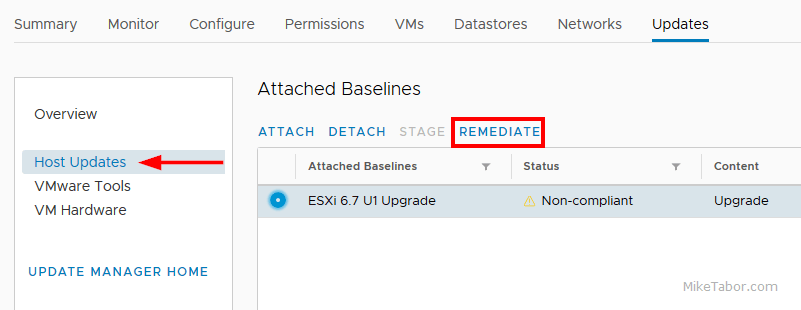
  9. Once the compliance scan finishes, it’s time to actually do the ESXi 6.7 U1 upgrade. From the Updates tab, click on Host Updates, select the baseline and then click on Remediate.
    upgrade esxi 6.7 vum remediate
  10. Accept the EULA and review the host that’s about to be upgraded. If everything looks good, click on Remediate.
    upgrade esxi 6.7 vum remediate confirm

That’s it!

At this point VUM will move any VM’s off of the host (if DRS is enabled) and put the host into maintenance mode and start the upgrade and reboot the host automatically.

If you wish you can also schedule the upgrades via VUM if you don’t wish to remediate them right away.

Similar Posts

  • Download VMware vCenter & ESXi 6.0 Update 2

    VMware has released vCenter Server 6.0 Update 2 and ESXi 6.0 Update 2 (build: 3620759) which include a number of new features and fixes. VMware has also released the much anticipate VSAN 6.2 which includes it’s own bunch of new features such as deduplication, compression, QoS, and RAID5/RAID6 Erasure coding.

    Read More “Download VMware vCenter & ESXi 6.0 Update 2”

  • VMware View client now availabe for Android!

    VMware has announced that they have released a View Client for Android tablets available on the Android Market now. Here are just a few of the features found on the new client.

    • A new look and feel – The View Client for Android features the NEW blue look and feel of the VMware View clients!
    • Multiple broker support – If you have more than one VMware View broker in your organization, you can can easily access your desktop from all of them via the Android client
    • Desktop Shortcuts – Quickly connect with as many as four recent desktop via shortcuts
    • Virtual trackpad – Control your desktop on a granular level just like you would control the mouse on a laptop
    • Custom keyboard toolbar – Super easy access to all of the special keys not found on the Android default keynboard
    • Honeycomb 3.x support – Made from the ground up for the new generation of Android tablets
    • Custom gestures – Invoke keyboard, scrolling, etc are as easy as ever and simple to use
    • VMware View Security Server support (best experience) – No need to have VPN when you use VMware View Security Server
    • Background tasking – Switch between apps on your tablet and come right back
  • VMware ESXi 6.0 CBT bug fix released

    VMware

    You may remember ESXi 4.x-5.x had a CBT bug, as mentioned here, that could potentially cause your backups to be pretty useless. Well it seems ESXi 6.0 isn’t without it’s own CBT bug which could cause the following to possibly occur:

    • Backing up a VM with CBT enabled fails.
    • Powering on virtual machines fails.
    • Expanding the size of a virtual disk fails.
    • Taking VM quiesced snapshots fails.

    Prior to the fix, the workaround was to disable CBT. Thankfully VMware has released a fix for the ESXi 6.0 CBT bug and it’s recommended that anyone who uses CBT apply this patch regardless if it was a clean install of VMware ESXi 6.0 or an upgrade to ESXi 6.0.

    Read More “VMware ESXi 6.0 CBT bug fix released”

  • How to install VMware vSphere Update Manager 5.5

    If you don’t already know, VMware Update Manager (aka, VUM) is a tool which allows you to easily automate patching and upgrading VMware hosts as well as virtual machine hardware and VMware tools. It’s a wonderful tool and makes upgrading and patching so much easier and allows you to quickly see how compliant/up-to-date your environment is with the built in pie graph.

    Recently we had some pretty serious array issues which corrupted the VUM database taking Update Manager down. Since we was going to have to rebuild Update Manager I opted to move from Windows Server 2008 to Windows Server 2012, in the steps below I’ll document step by step how to install VMware Update Manager 5.5 on Server 2012 and a separate database.

    Read More “How to install VMware vSphere Update Manager 5.5”

  • How to update VMware Windows VM’s DNS using PowerCLI

    This post will show you how to update a VMware Windows virtual machine’s DNS IP addresses using PowerCLI.

    You’ll also see how I went from a starting point to a fully working script – all thanks to the awesome #vCommunity!

    Here at work we’ve been doing a number of networking, AD, and DNS changes. In doing so, our DNS IP address have changed. Changing the DNS settings for our workstations was easy, simply edit the DHCP scope.

    The servers on the other hand all had static IP’s and static DNS IP’s entered, each of which needed to be updated.

    Read More “How to update VMware Windows VM’s DNS using PowerCLI”

Leave a Reply

Your email address will not be published. Required fields are marked *

4 Comments