How to update VMware ESXi 6.7 to 6.7 Update 1
To go along with the newly released VMware vCenter 6.7 Update 1 release, comes VMware ESXi 6.7 Update 1 as well.
As you might expect with an Update 1 release there are a number of patches, fixes and new additions with ESXi 6.7 U1. If you haven’t already seen, check out the release notes here.
Below are two ways to easily upgrade your ESXi 6.0-6.7 hosts to ESXi 6.7 U1 using the command line or by using VMware Update Manager.
However, before upgrading any of your VMware ESXi hosts, you should have already upgraded your VMware vCenter Server Appliance to 6.7 Update 1.
If you are running VCSA 6.5 you can find instructions on how to upgrade VCSA 6.5 to 6.7 U1 as well.
How to update ESXi 6.7 to 6.7 Update 1 via command line
- Place the ESXi host you are about to upgrade into Maintenance Mode.
- Now SSH into the host using PuTTY (or any other SSH client/terminal).
- Type the following command to open the firewall for outgoing HTTP requests:

esxcli network firewall ruleset set -e true -r httpClient - Type the following to download and upgrade to ESXi 6.7 U1

esxcli software profile update -d https://hostupdate.vmware.com/software/VUM/PRODUCTION/main/vmw-depot-index.xml -p ESXi-6.7.0-20181002001-standard - After the update has finished disable the HTTP firewall rule by typing:

esxcli network firewall ruleset set -e false -r httpClient - Finally, reboot the ESXi host to complete the upgrade.
reboot
Note: Once the reboot is completed, I would also recommend disabling SSH on the host for security purposes.
How to upgrade VMware ESXi 6.0-6.7 to ESXi 6.7 U1 using VMware Update Manager (VUM)
You will need the ESXi 6.7 U1 ISO, so download that now if you haven’t already.
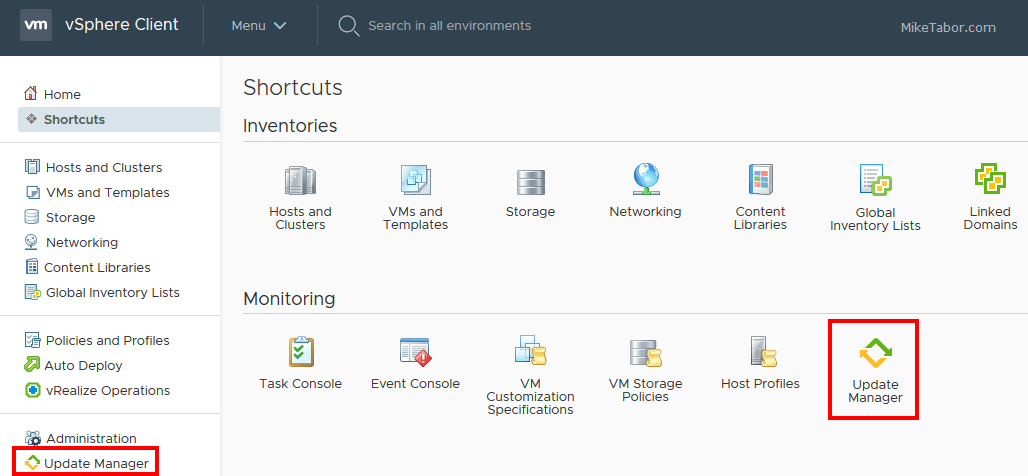
- First log into your VCSA and click on Update Manager.
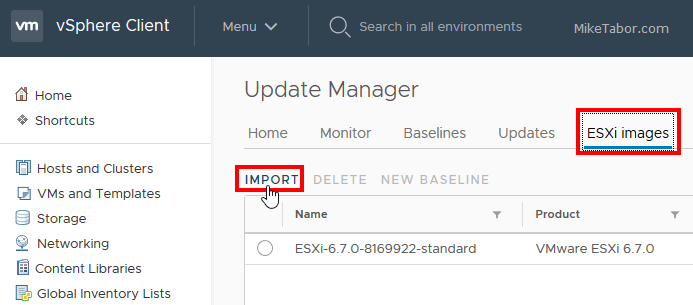
- Next click on ESXi images and then IMPORT.
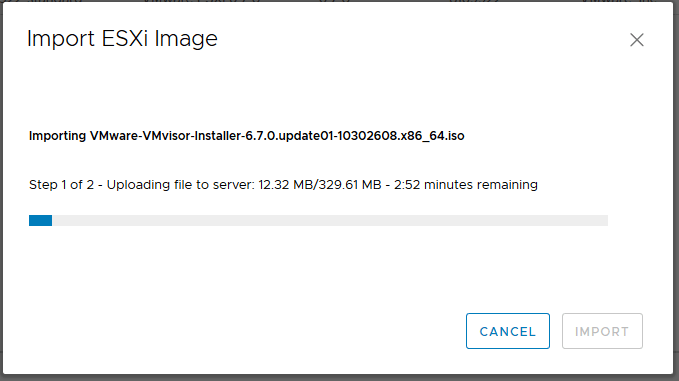
- Browse to the location where you saved the ESXi 6.7 U1 ISO.
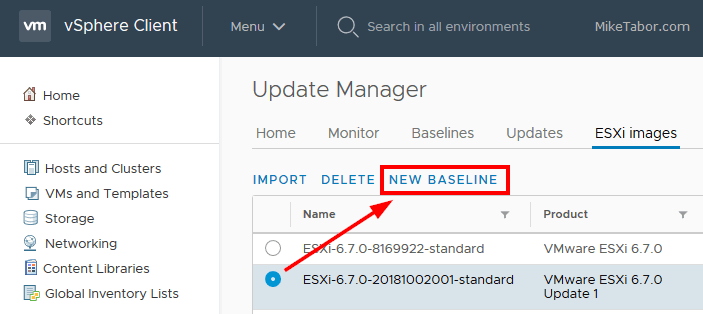
- Once the import completes, select the new image and click on New Baseline.
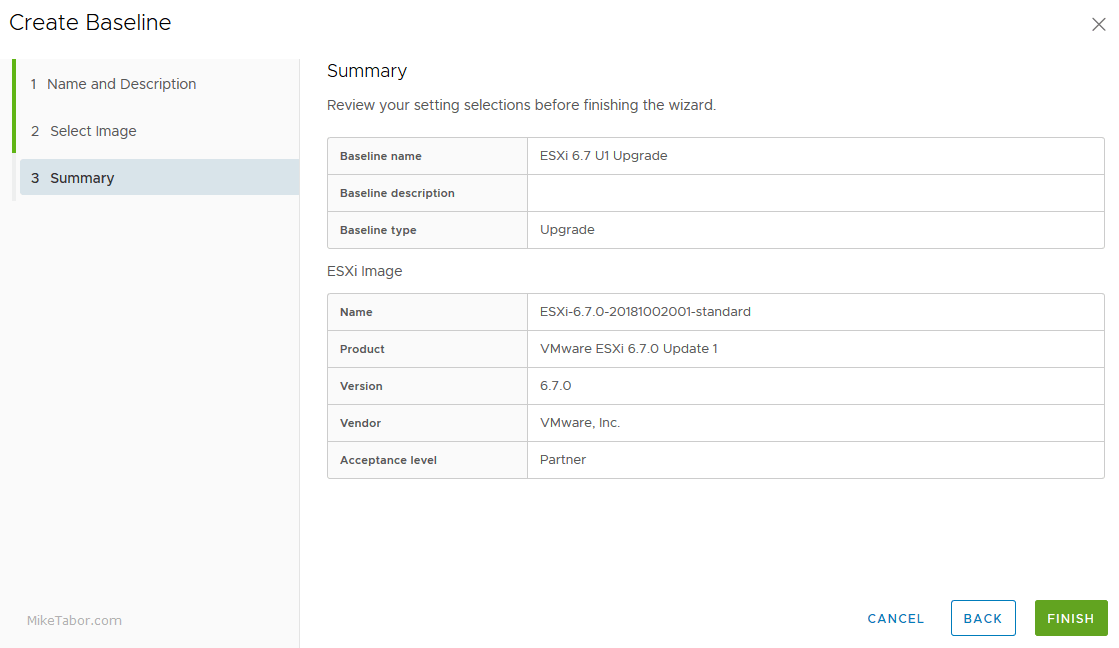
- Give your new baseline a name and description and ensure the new ESXi 6.7 U1 image is selected and click on Finish.
- Now we need to attach the new baseline to our hosts. I’m going to add the baseline to the Cluster by selecting the Cluster (#1), then going to the Updates tab (#2), clicking on Host Updates (#3) and finally Attach (#4).

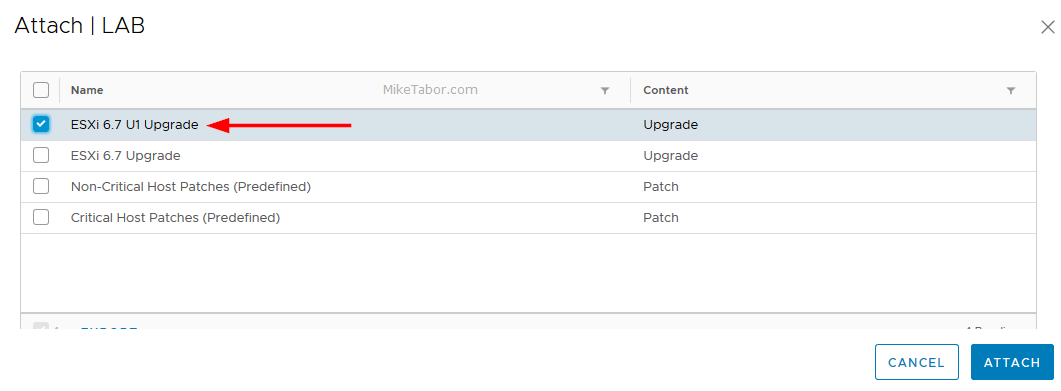
- Select the newly created baseline that you created from above and click on Attach.
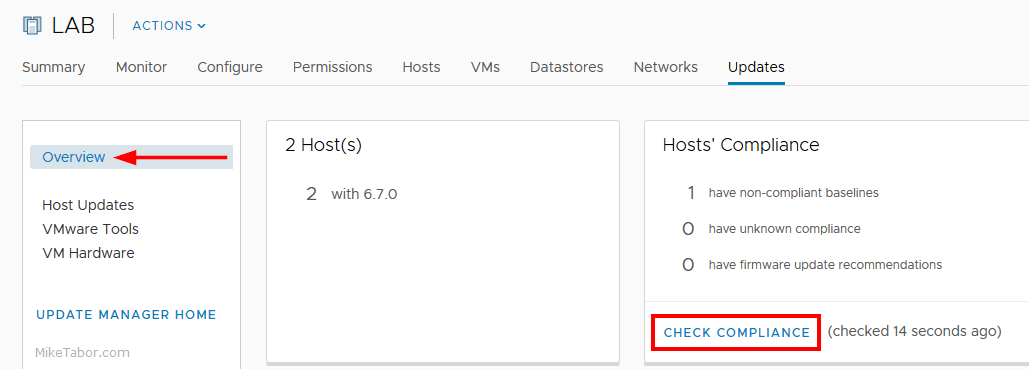
- Next click on the Overview link in VUM and then click on Check Compliance.
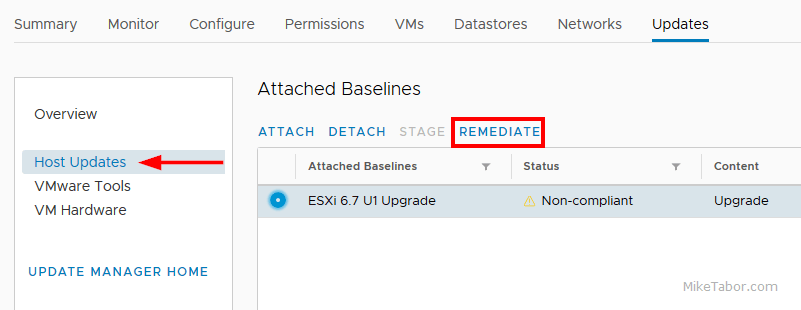
- Once the compliance scan finishes, it’s time to actually do the ESXi 6.7 U1 upgrade. From the Updates tab, click on Host Updates, select the baseline and then click on Remediate.
- Accept the EULA and review the host that’s about to be upgraded. If everything looks good, click on Remediate.

That’s it!
At this point VUM will move any VM’s off of the host (if DRS is enabled) and put the host into maintenance mode and start the upgrade and reboot the host automatically.
If you wish you can also schedule the upgrades via VUM if you don’t wish to remediate them right away.


Thank you, very helpful!
You are most welcome. Glad to be of some help!
esxcli software sources profile list -d https://hostupdate.vmware.com/software/VUM/PRODUCTION/main/vmw-depot-index.xml | grep “6.7.0”
Excellent guide. Thanks.