How to upgrade vCenter Server Appliance from 5.x to 6.0
VMware vSphere 6.0 has finally been released as GA on March 12th and with it out of beta I hope to post several “how-to” posts, this being the first on how to upgrade your vCenter Server Appliance from 5.1/5.5 to vCSA 6.0. So lets get started…
Prerequisites:
- vCSA 6.0 ISO downloaded and mounted or burned to disc.
- Installed Client Integration Plugin (located in the vcsa folder on the ISO).
Upgrading vCSA 5.x to 6.0
In a nutshell the upgrade process will install a new vCSA using a temporary network and on a host of your choice. Once installed the new vCSA will then import all the data from the existing vCSA as well as it’s network settings over to the new 6.0 vCSA.
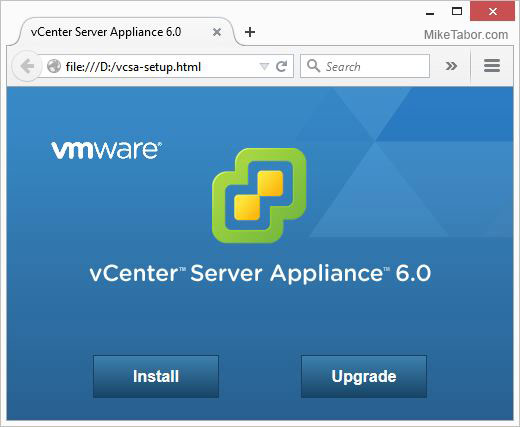
- Double click on the vcsa-setup.html file and select “Upgrade“.
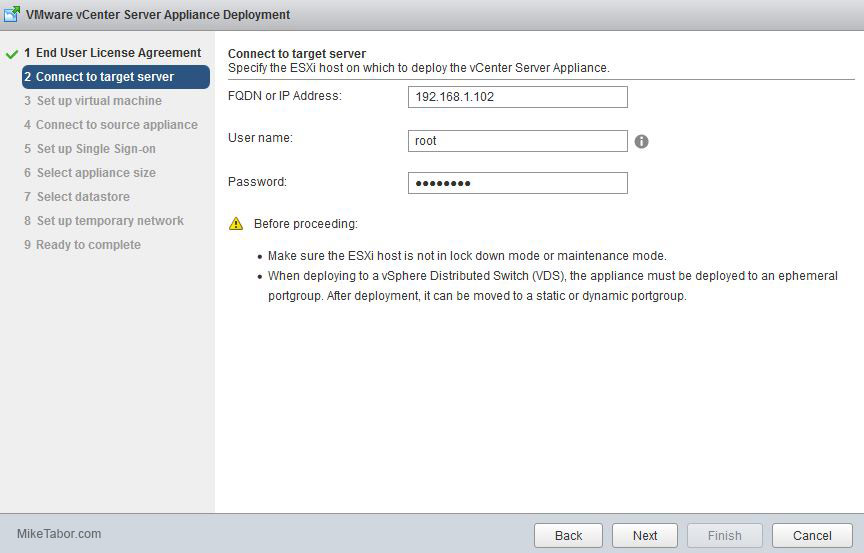
- After agreeing to the User License Agreement you are then prompted to enter the FQDN or IP address and credentials of the ESXi host you wish to deploy the vCenter Server Appliance to.
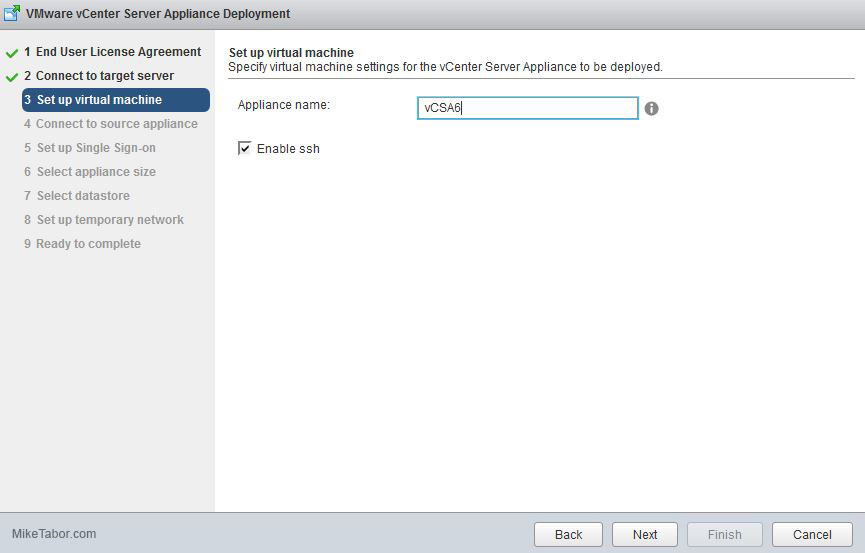
- Now give the new appliance a name, you can also choose to enable SSH if you wish.
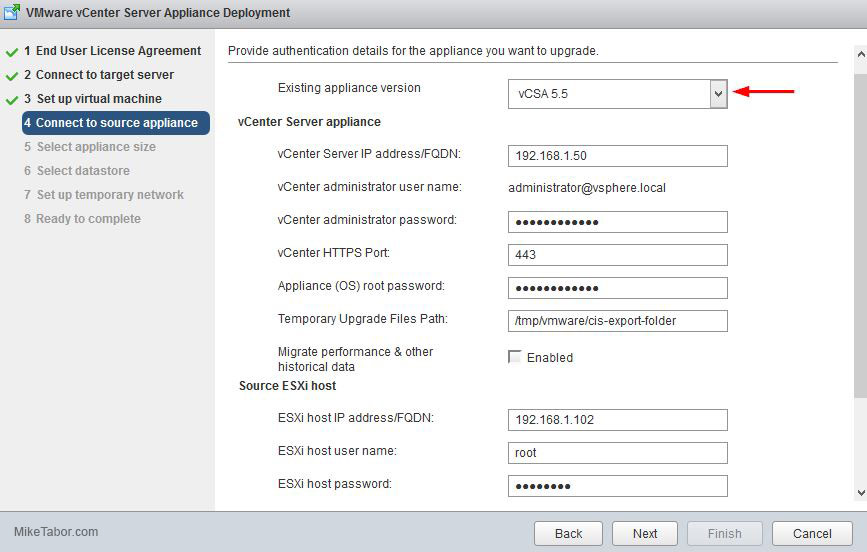
- Next you need to select from the drop down menu what version of vCSA you are upgrading from then enter the IP or FQDN of the existing vCSA credentials as well as the host the old vCSA is currently located on.
Note: Since this is just a lab I choose not to migrate performance and historical data, this will also speed up the upgrade.
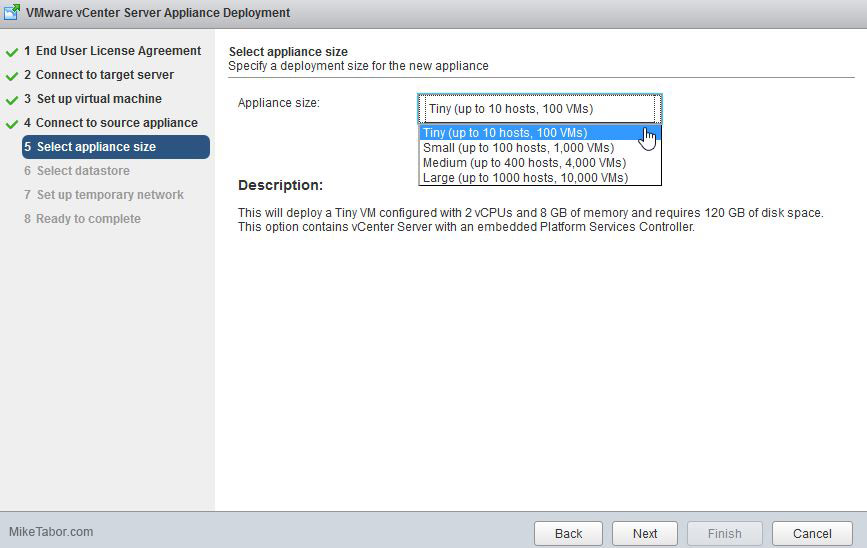
- Select the size of your appliance that fits your environment, Tiny with 100 VM’s up to Large with 10,000 VM’s.
- Next select the datastore you want the new appliance to be installed on.

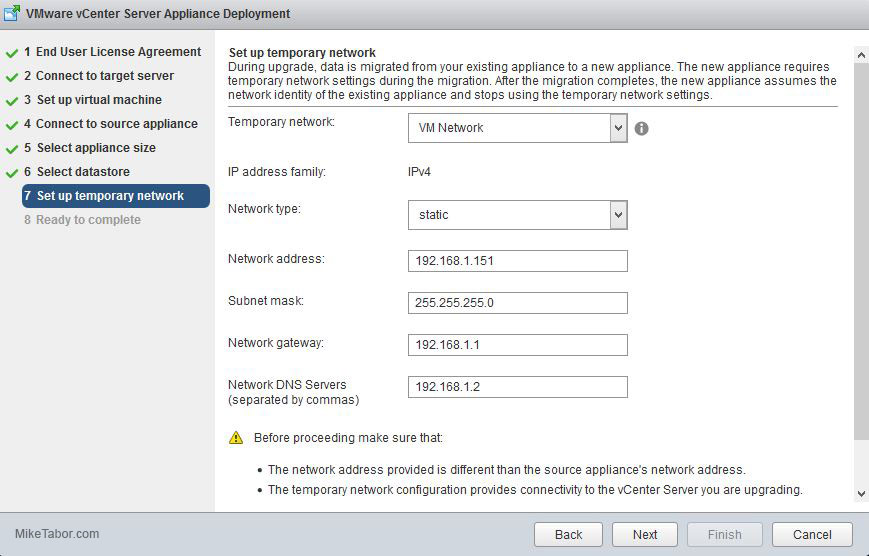
- Now we just need to enter the temporary network information, obviously ensuring this temporary IP is not already in use somewhere.
- The final step is to confirm all the settings and click on “Finish“.
The process worked very nicely and only took just a few minutes for me to complete in my home lab.