Installing VMware vCenter Server Appliance 6.5

VMware has announced that VMware vSphere 6.5 has gone general available this week. Now installing VMware vCenter Server Appliance 6.5 (VCSA) is even easier as the requirement for the client integration plugin has been removed and now the VCSA appliance is delivered via an ISO image with an installation wizard that’s been broken up into two stages.

The VCSA 6.5 ISO offers two types of installation methods, CLI and GUI install – both availalbe for Windows, Mac and Linux machines. In this guide I’ll walk through the steps of installing VCSA 6.5 using the Windows GUI install.

How to install vCenter Server Appliance 6.5

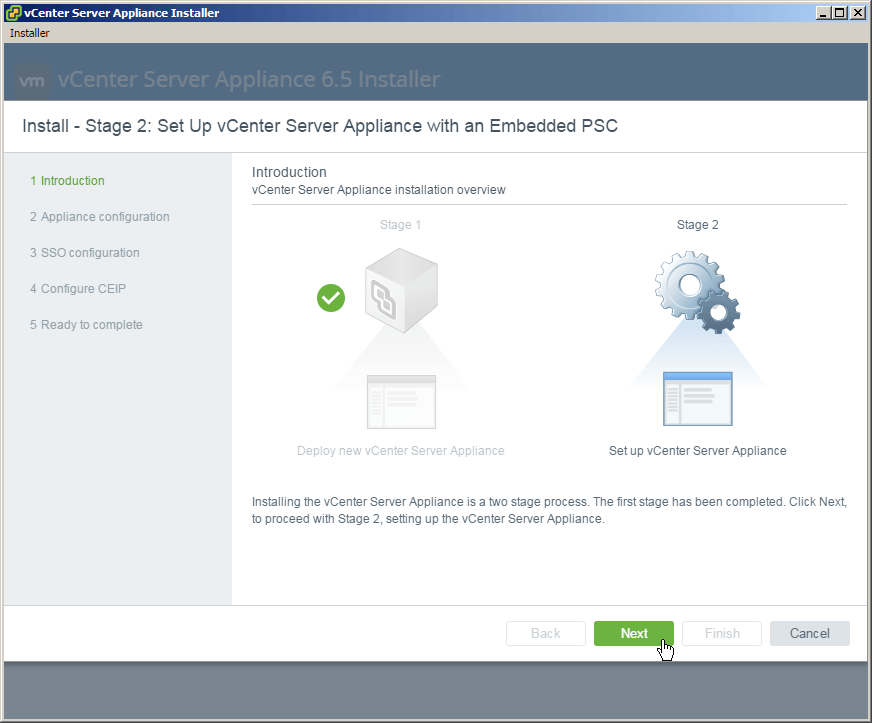
New to VCSA 6.5, the installer has now been broken up into two stages. Stage 1 will deploy the appliance (OVA) based on type and size, configure networking. Stage 2 will configure the VCSA with NTP and SSO settings.

If you haven’t already, go ahead and download the VCSA 6.5 ISO and lets get started.

Stage 1 – Deploying VCSA 6.5

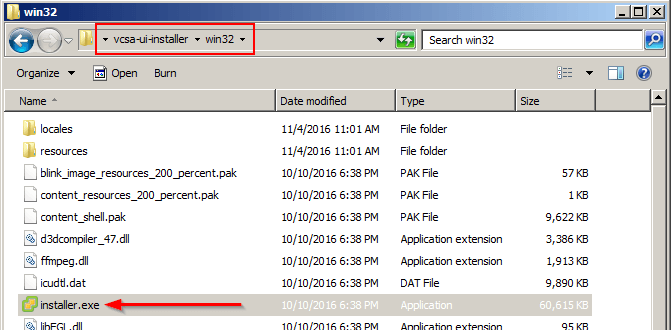
  1. Mount the ISO and start the vCenter Server Appliance 6.5 installer located at \vcsa-ui-installer\win32
    vcsa installer install
  2. Select Install from the VMware vCenter Server Appliance 6.5 Installer.
    vcsa 6.5 installer
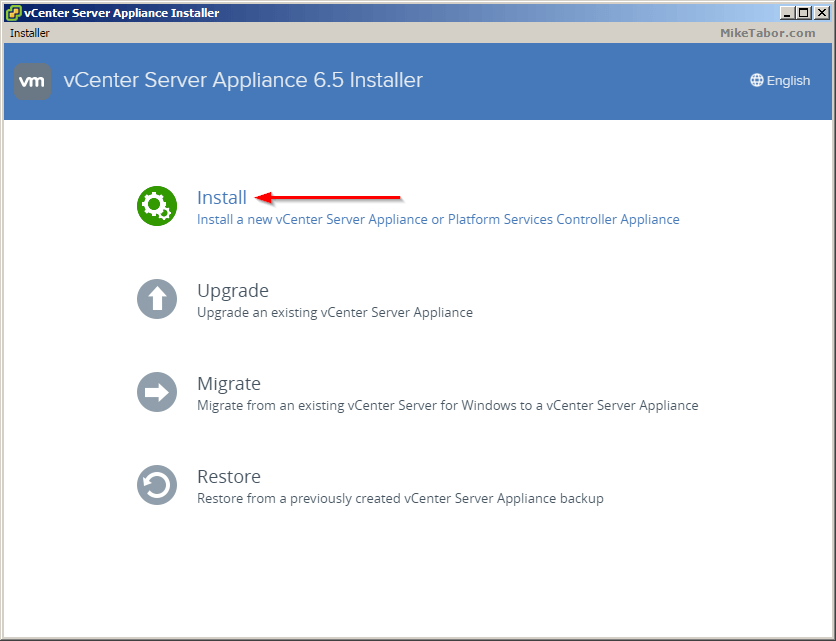
  3. The introduction shows what I stated above, that the installer is broken up into two stages – deploy and then configure. Click on Next.
    vcsa 6.5 install introduction
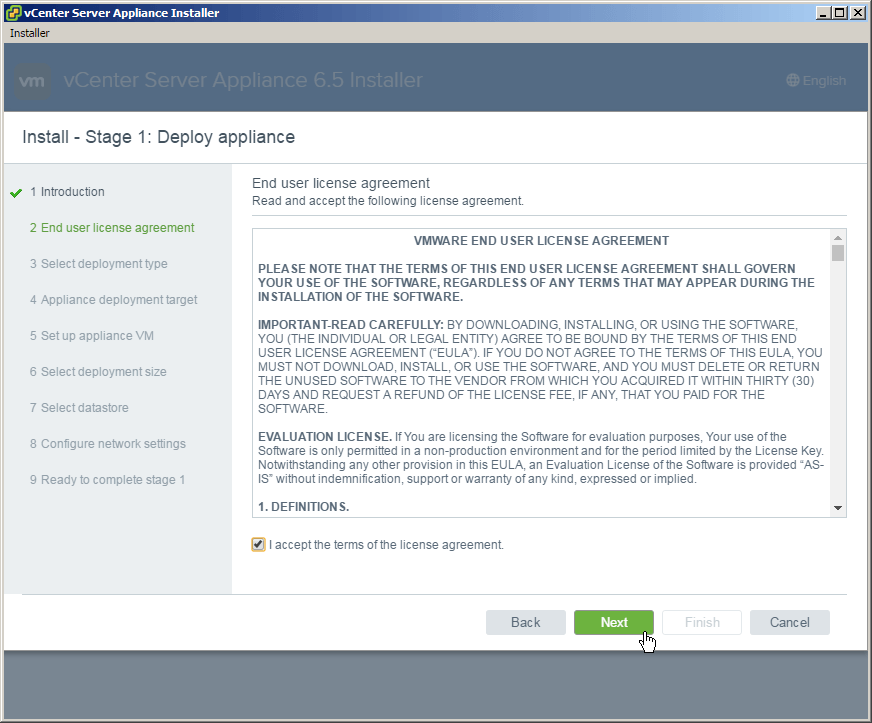
  4. Accept the End User Licence Agreement.
    vcsa 6.5 install eula
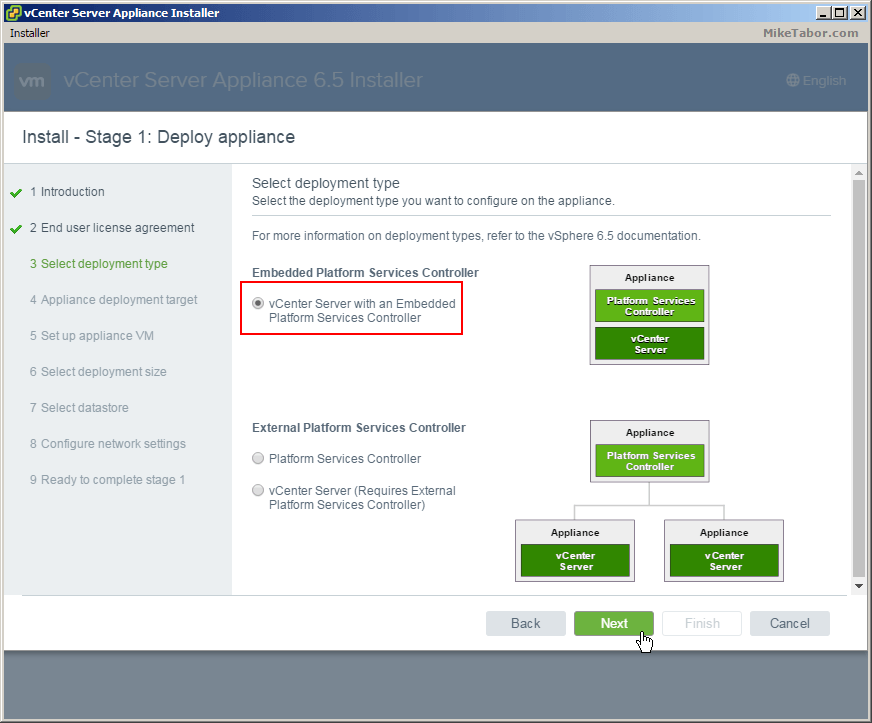
  5. Now you will need to decide to use embedded or an external Platform Services Controller. Since this is my home lab I’ll be selecting embedded. For a production environment I would go with external.
    vcsa 6.5 install deployment type
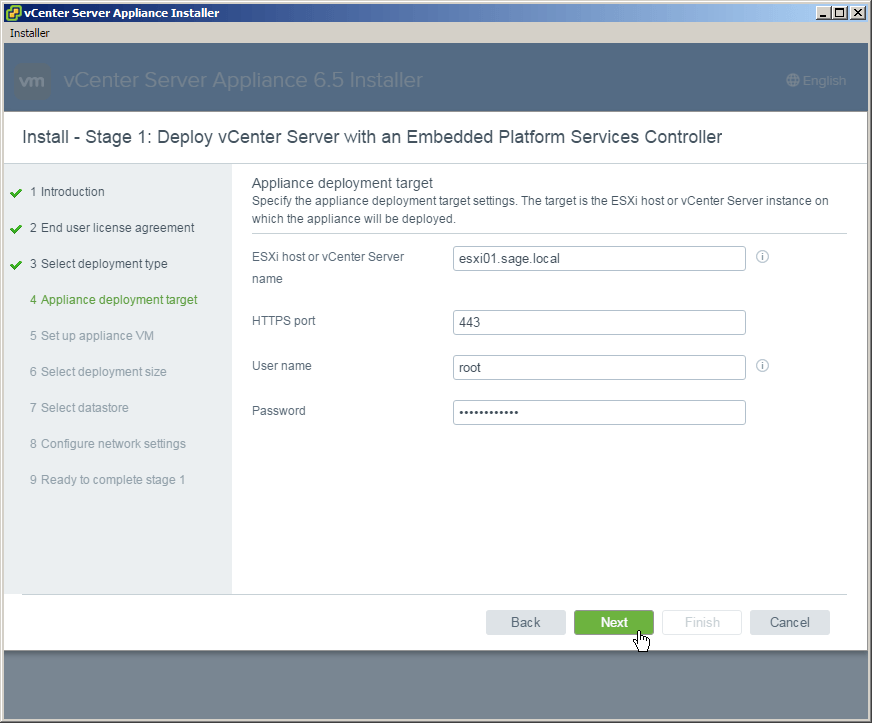
  6. Now enter the ESXi host where you want to have the VCSA deployed and enter your host credentials.
    vcsa 6.5 install appliance deployment
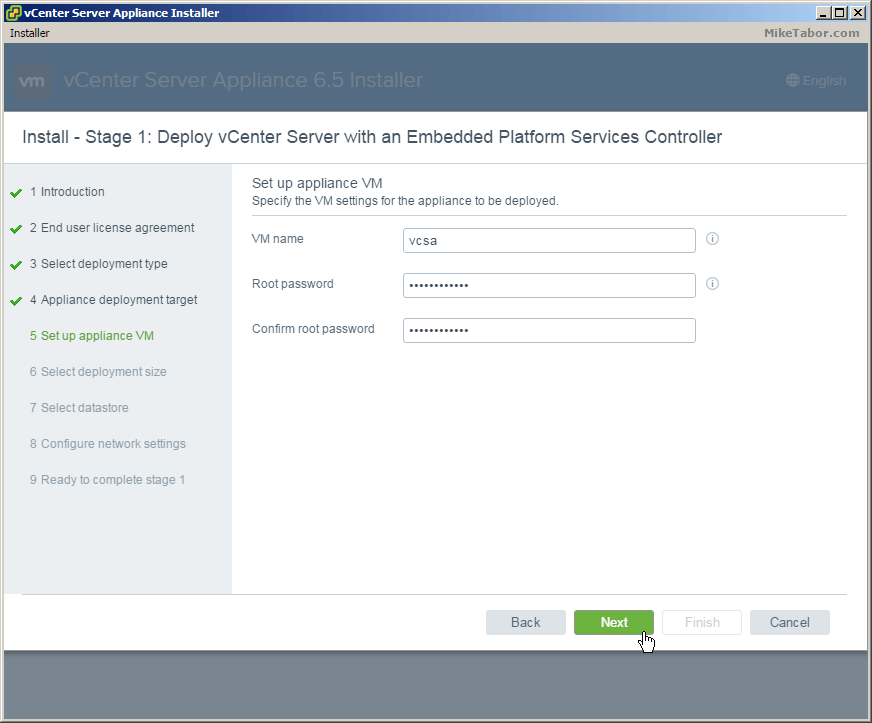
  7. Enter the name you would like for the appliance VM to be called as well as set a root password.
    vcsa 6.5 install set appliance-vm
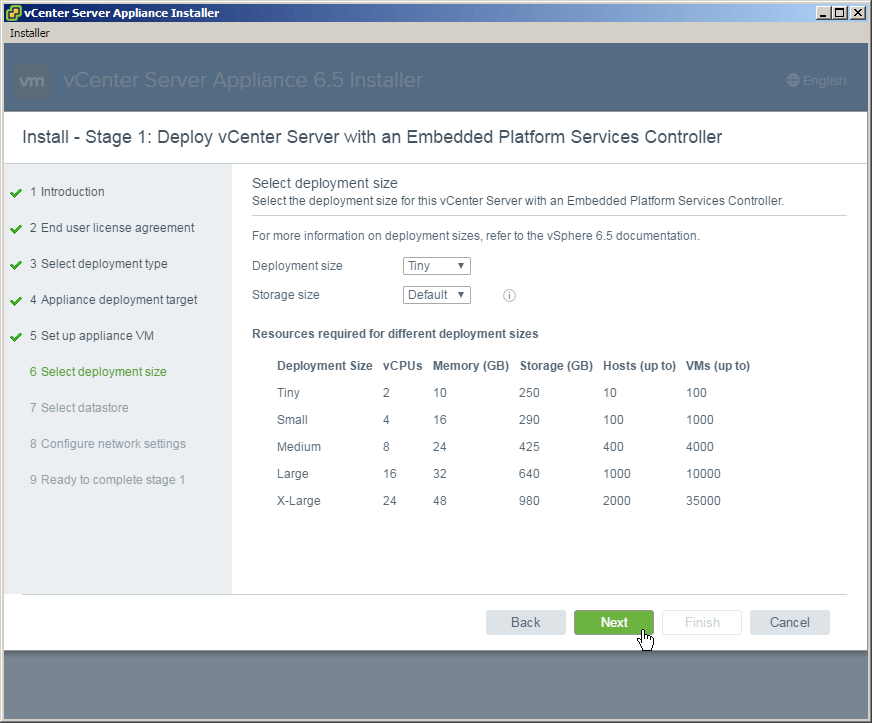
  8. Select the deployment size that best matches your environment. For my home lab I’m selecting Tiny.
    vcsa 6.5 install deployment size
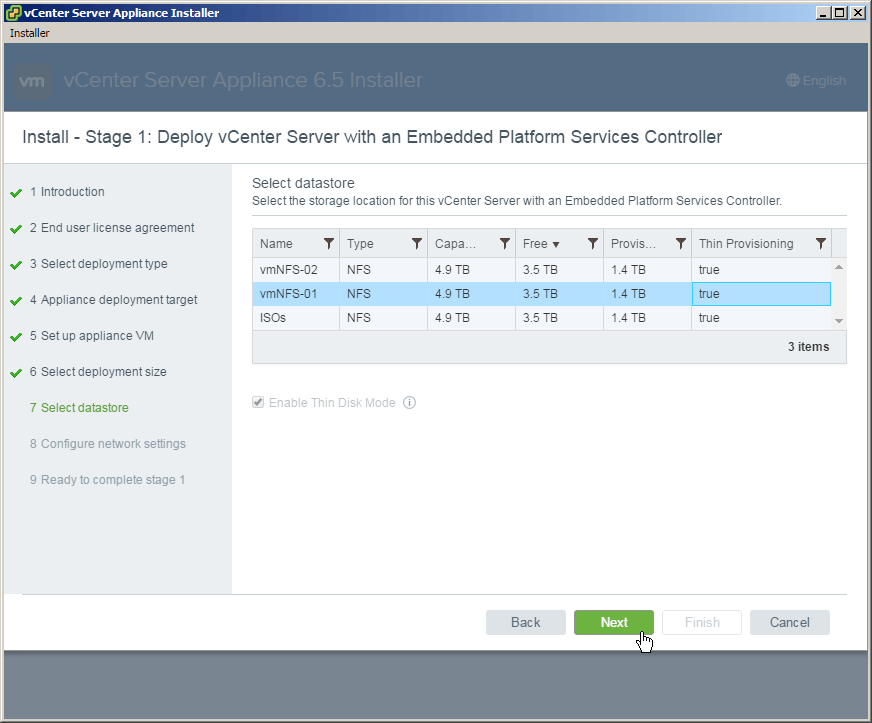
  9. Select what datastore you want the VCSA appliance to be stored.
    vcsa 6.5 install select datastore
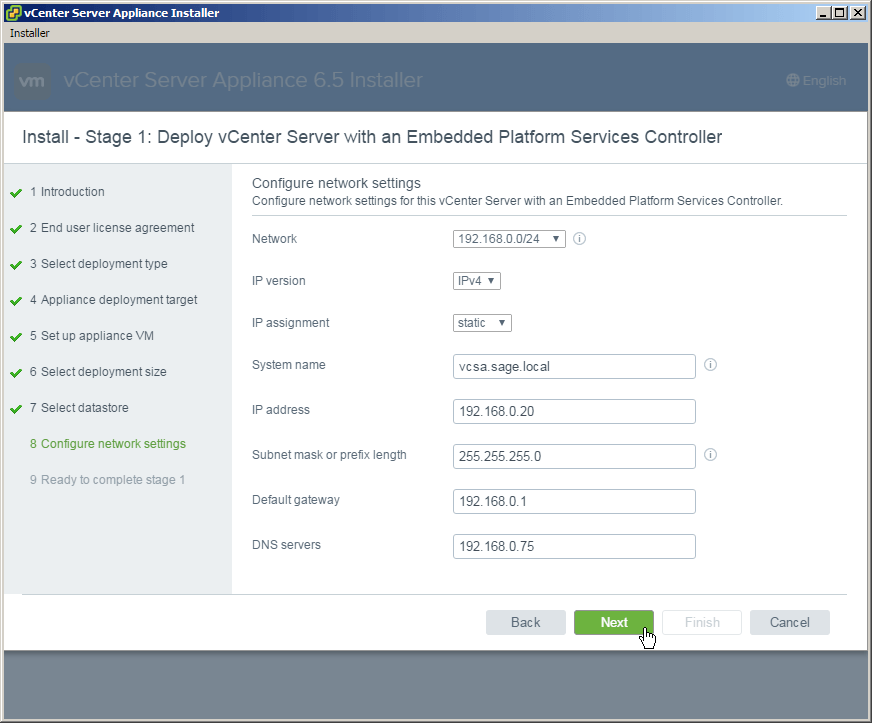
  10. Now configure the networking the VCSA appliance should use. It’s important to note that DNS for the IP used should both forward and reverse resolve else you will run into errors.
    vcsa 6.5 install network settings
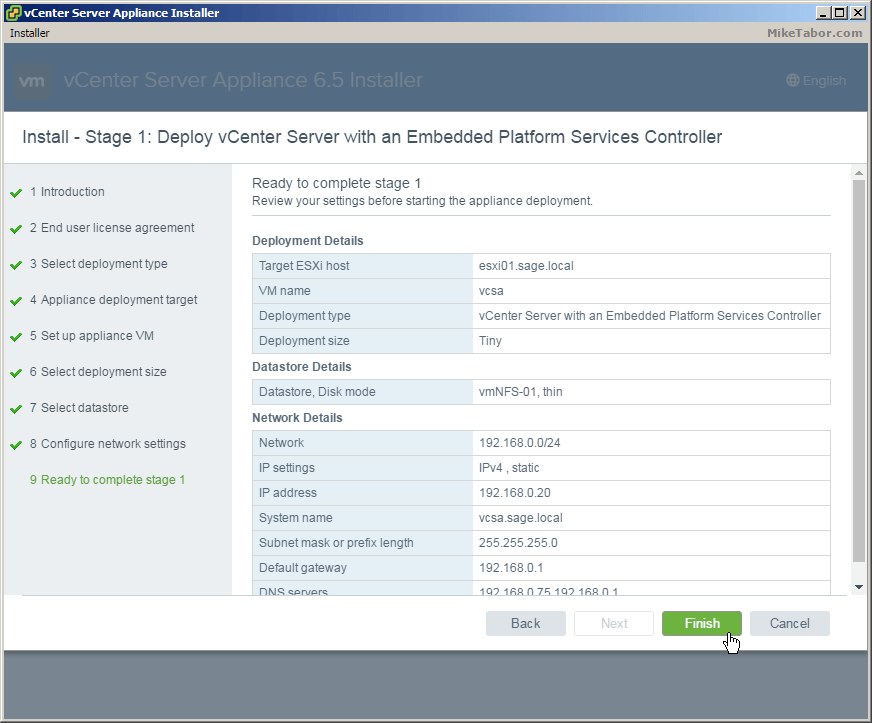
  11. The final step of the vCenter Server Appliance 6.5 deployment process is to review the summary and click on Finish.
    vcsa 6.5 install complete stage1
  12. Once completed you will have the option to continue onto Stage 2 or close. If you close then you can finish the VCSA config by going to https://<VCENTER_IP>:5480
    vcsa 6.5 install deploying stage 1 complete

Stage 2 – Configuring VCSA 6.5

  1. After clicking Continue from Stage 1 you will be taken to the Stage 2 introduction page, click Next.
    vcsa 6.5 stage2 intro
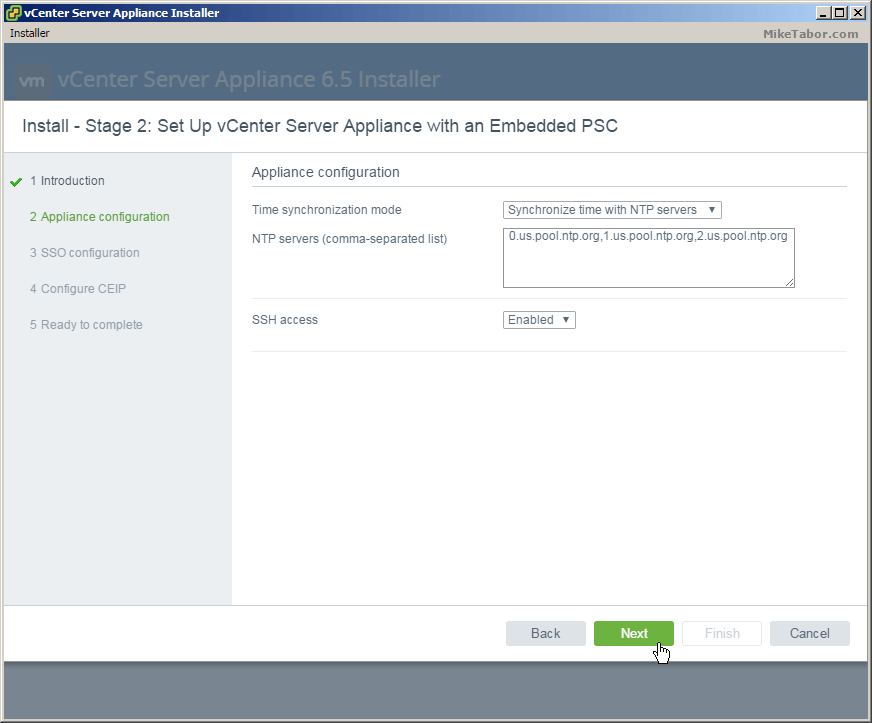
  2. First option to configure of the VCSA is Time synchronization. You can either sync with the ESXi host or user defined NTP servers as well as enable or disable SSH.
    vcsa 6.5 stage2 appliance config
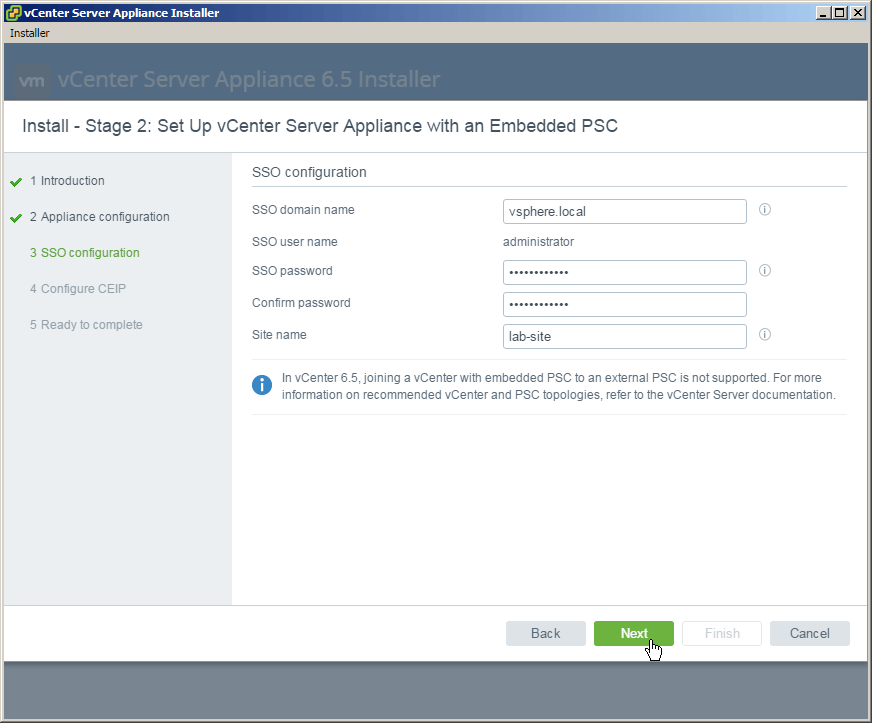
  3. Next configure Single Sign On (SSO) by giving it a domain name, password and site name.
    vcsa 6.5 stage2 sso config
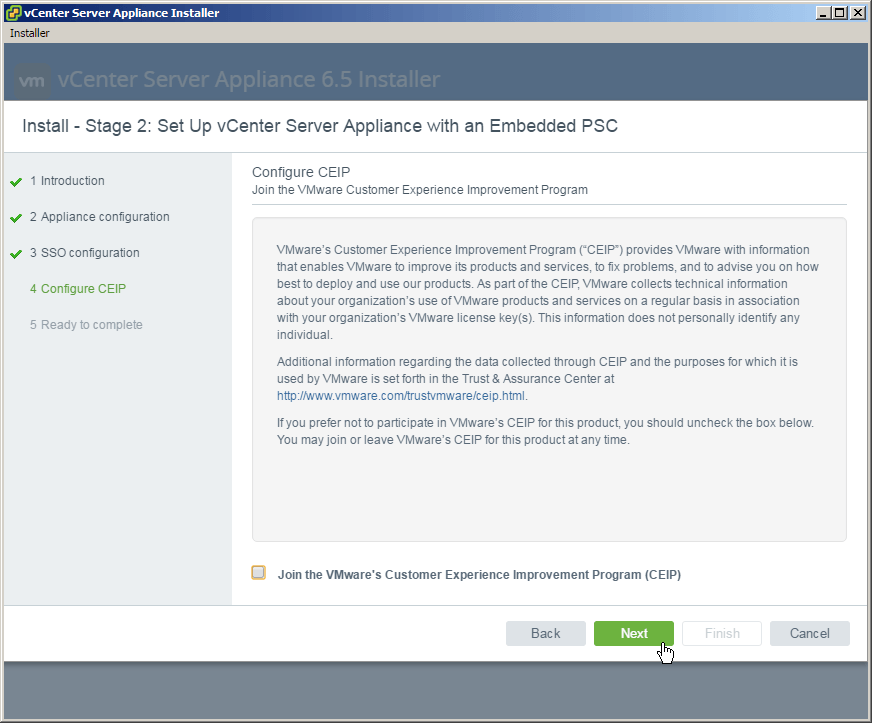
  4. Now decide if you’d like to join the Customer Experience Improvement Program (CEIP) and click Next.
    vcsa 6.5 stage2 ceip
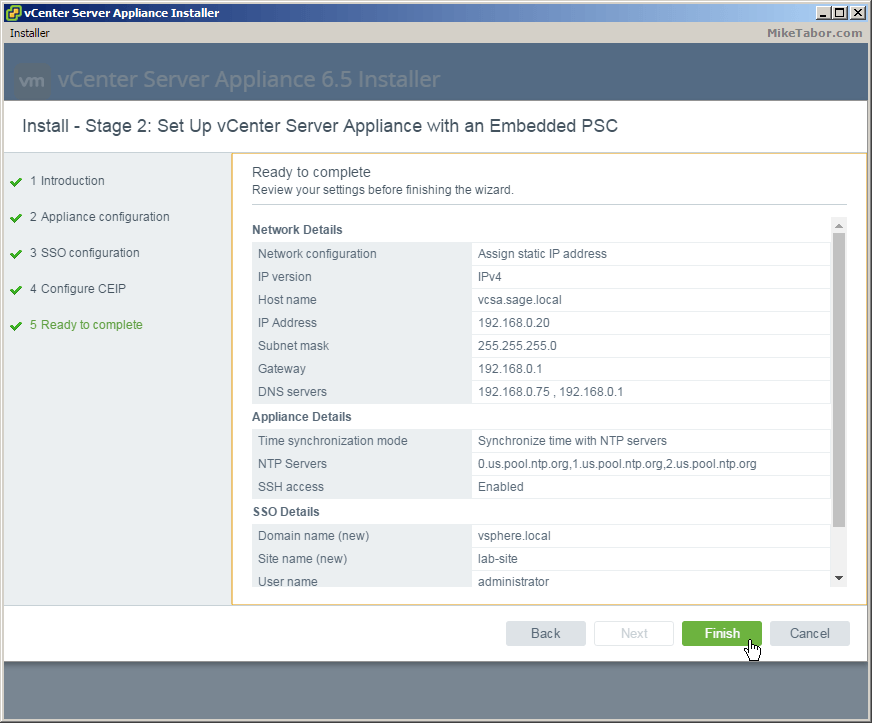
  5. Again review the summary and click Finish.
    vcsa 6.5 stage2 ready complete

After the Stage 2 has completed you can then log into the vCenter web client, https://<VCENTER_IP>/vsphere-client (Flash – YUCK!) or the HTML5 client, https://<VCENTER_IP>/ui which currently only offers partial functionality. The vSphere thick client is gone in vSphere 6.5.

If you want more details about vSphere 6.5 check out the VMware vSphere 6.5 release notes here.

Similar Posts

  • Install ESXi 5.1 from a USB Flash Drive

    Many servers already come with a DVD/CD-ROM drive or some kind of ability to virtually mount an ISO image from a network share onto your server to then install ESXi. However, not all do or you just want to have your ESXi image readily available. Here’s a quick step by step instructions on how to use a USB flash drive to install ESXi.

    1. Download ESXi 5.1 from VMware (if you haven’t already) as well as UNettbootin.
    2. Plug in your USB Flash Drive.
    3. Open UNetbootin and select “Diskimage”, set Type to “USB Drive”, select Drive letter of your USB flash drive, and set the path of your ESXi 5.1 ISO image. Then click on “OK”.
      unetbootin setup
    4. Read More “Install ESXi 5.1 from a USB Flash Drive”

  • VMware Recertification Policy

    VMware certified

    Starting today, March 10 2014, new VCP certifications must be re-certified within two years of it’s earned date. Anyone who currently has their VCP certification prior to March 10 2013 has until March 10, 2015 to re-certify.

    The new policy gives you three options to re-certify:

    1. Take the current exam for your existing VCP certification solution track. For example, if you are a VCP3, you could take the current VCP5-Data Center Virtualization (VCP5-DCV) exam.
    2. Earn a new VCP certification in a different solution track. For example, if you are a VCP-Cloud, you could recertify by earning VCP5-Desktop (VCP5-DT) certification.
    3. Advance to the next level by earning a VMware Certified Advanced Professional (VCAP) certification. For example, if you are a VCP5-DCV you could earn VCAP5-DCA certification.

    I can understand why they are doing this but I don’t agree with the changes. As per the announcement if you let your certification expire, “Your certification will be revoked,and you will no longer be entitled to use the certification logo or represent yourself as VMware certified“. Really? You mean everything that was done prior and after taking the exam means nothing?

    Read More “VMware Recertification Policy”

  • VMware vSphere 7 announced

    VMware vSphere 7

    Some pretty big news coming out of VMware today. The announcement of VMware vSphere 7 to become available May 1, 2020! One of the biggest item coming out of this news so far is that vSphere 7 will come in two options.

    The first being vSphere 7 as we all have known it to be for years and then the second being vSphere 7 with Kubernetes which will be available through VMware Cloud Foundation and is a new generation of vSphere for containerized applications.

    Other notables is that the flash based vSphere client is FINALLY no more! From here on out, only the HTML 5 will exist. vCenter Server on Windows will also finally be put to rest and new deployments of vCenter server will be done using the tried and tested vCenter Server Appliance (VCSA) based on PhotonOS linux.

    Read More “VMware vSphere 7 announced”

  • Shrink a thin provisioned VMDK disk

    When maintaining a Horizon View environment I like to keep my parent images as small as possible and over time a thin provision disk can start to grow on you if you don’t watch it – be it from downloading installers, updates, or even running disk defrag. While there isn’t a simple, one click button in the View Administrator Console there is a fairly easy manual method using vmfkstools.

    Before we can use “vmkfstools” to shrink the VMDK file we must zero out any unused space on the thin provisioned disk. A simple way of doing this is by using a free utility called SDelete from Sysinternals.

    Read More “Shrink a thin provisioned VMDK disk”

  • Upgrade vCenter Server Appliance 6.0 to 6.5

    VMware vSphere 6.5 has been released as general available and earlier this week I posted about Installing VMware vCenter Server Appliance 6.5 as a new install, this post will walk through upgrading an existing vCenter Server Appliance 6.0 to 6.5!

    Similar to a fresh VCSA 6.5 install, the VCSA 6.5 upgrade is also broken up into two stages. The first stage is deploying a new vCenter Server Appliance and the second stage is copying data from the 6.0 VCSA to the newly deployed 6.5 VCSA.

    Read More “Upgrade vCenter Server Appliance 6.0 to 6.5”

Leave a Reply to Invino Veritas Cancel reply

Your email address will not be published. Required fields are marked *

2 Comments

  1. Hello Mike. I need help downloading the vCenter Server Appliance 6.5. I tried from all the links you provided but they kept only allowing me to download the Windows vCenter Server version.

  2. Great job – very informative and helpful. Setup in no time. For the download, choose “vSphere Server” in your my.vmware.com login pages and download the appliance ISO file (about 3.3 GB).