Installing VMware vCenter Server Appliance 6.5

VMware has announced that VMware vSphere 6.5 has gone general available this week. Now installing VMware vCenter Server Appliance 6.5 (VCSA) is even easier as the requirement for the client integration plugin has been removed and now the VCSA appliance is delivered via an ISO image with an installation wizard that’s been broken up into two stages.

The VCSA 6.5 ISO offers two types of installation methods, CLI and GUI install – both availalbe for Windows, Mac and Linux machines. In this guide I’ll walk through the steps of installing VCSA 6.5 using the Windows GUI install.

How to install vCenter Server Appliance 6.5

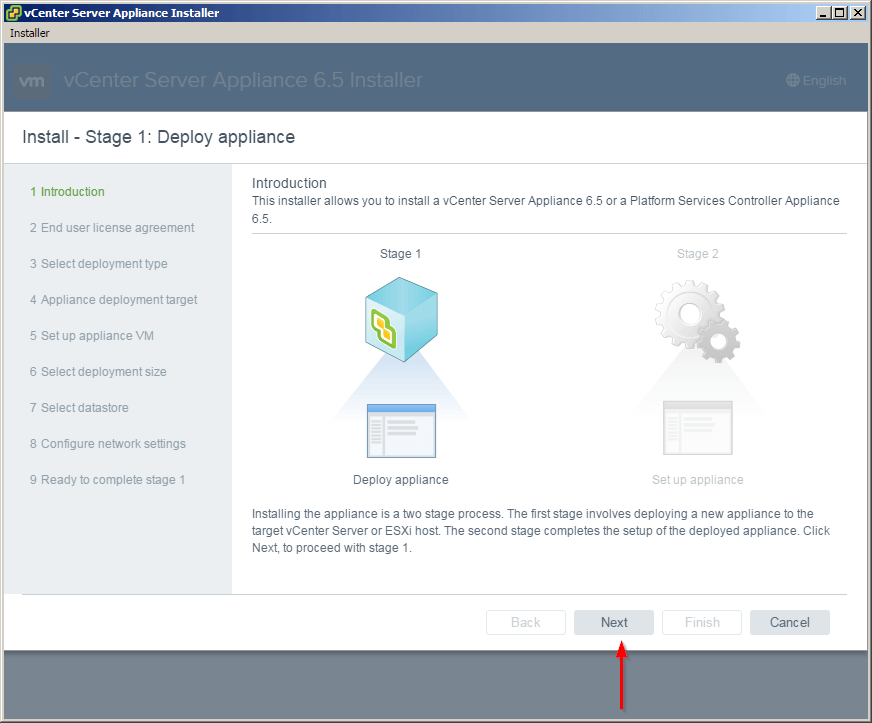
New to VCSA 6.5, the installer has now been broken up into two stages. Stage 1 will deploy the appliance (OVA) based on type and size, configure networking. Stage 2 will configure the VCSA with NTP and SSO settings.

If you haven’t already, go ahead and download the VCSA 6.5 ISO and lets get started.

Stage 1 – Deploying VCSA 6.5

  1. Mount the ISO and start the vCenter Server Appliance 6.5 installer located at \vcsa-ui-installer\win32
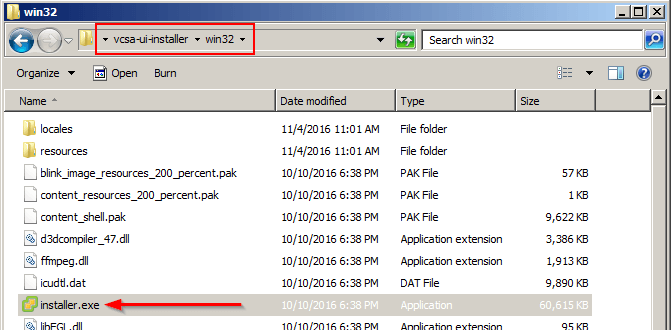
    vcsa installer install
  2. Select Install from the VMware vCenter Server Appliance 6.5 Installer.
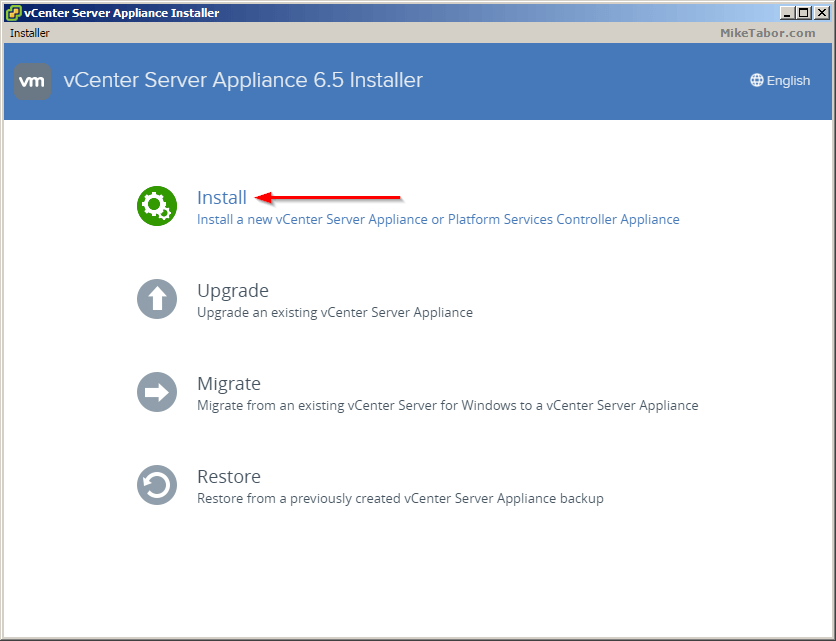
    vcsa 6.5 installer
  3. The introduction shows what I stated above, that the installer is broken up into two stages – deploy and then configure. Click on Next.
    vcsa 6.5 install introduction
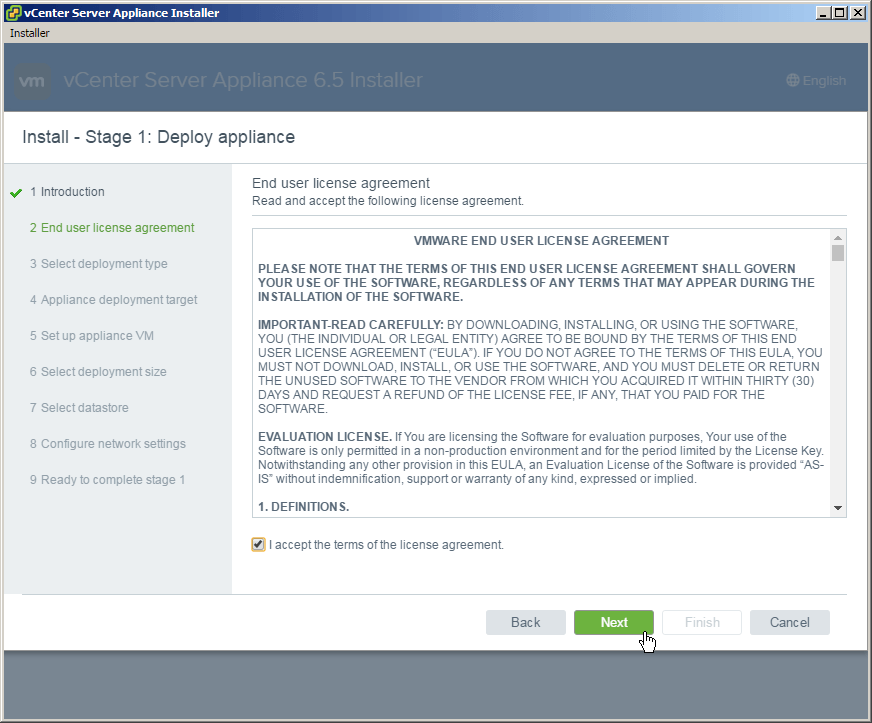
  4. Accept the End User Licence Agreement.
    vcsa 6.5 install eula
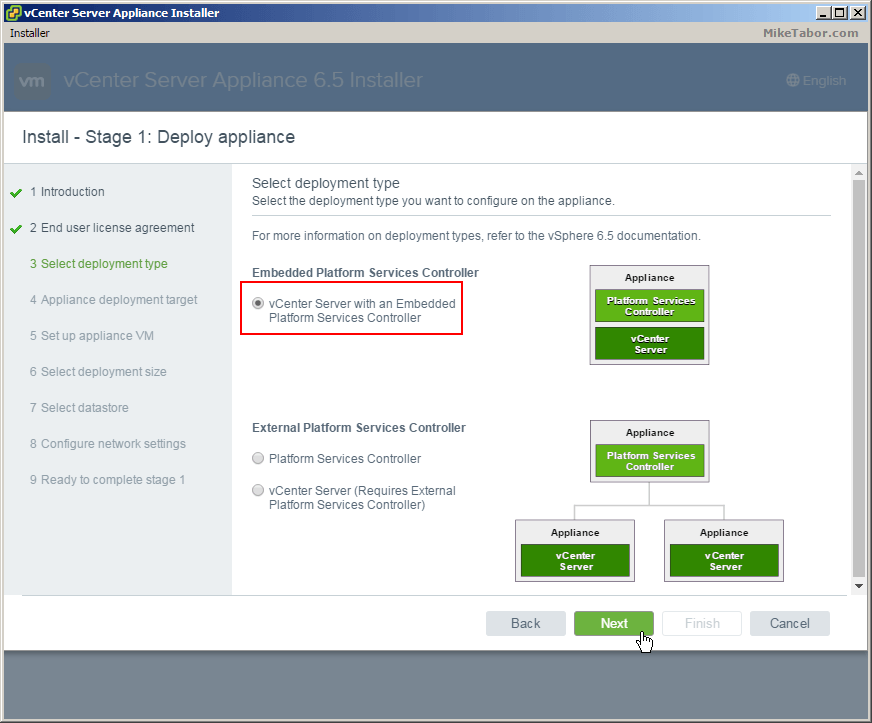
  5. Now you will need to decide to use embedded or an external Platform Services Controller. Since this is my home lab I’ll be selecting embedded. For a production environment I would go with external.
    vcsa 6.5 install deployment type
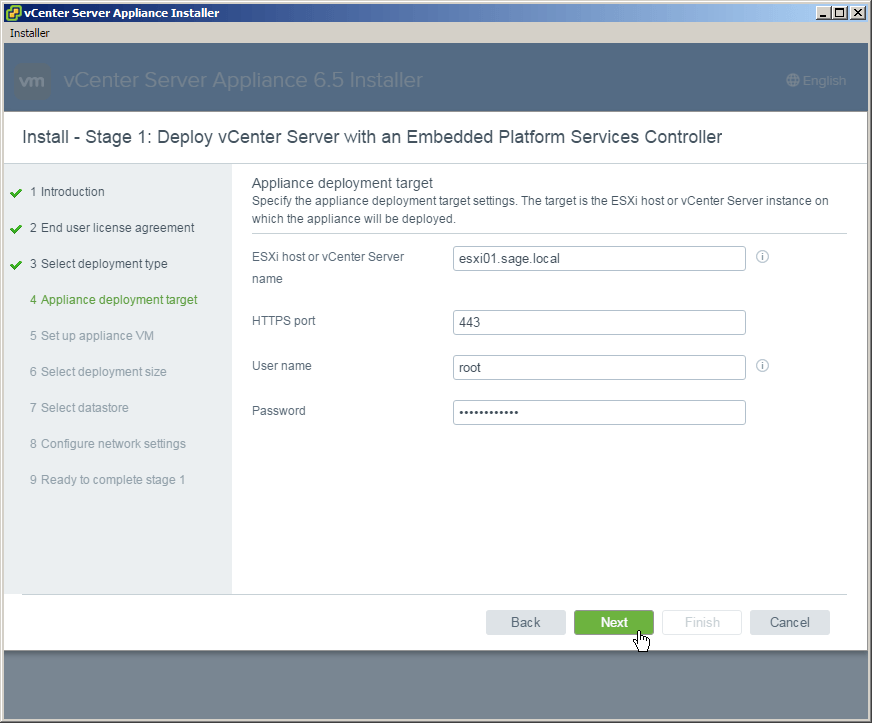
  6. Now enter the ESXi host where you want to have the VCSA deployed and enter your host credentials.
    vcsa 6.5 install appliance deployment
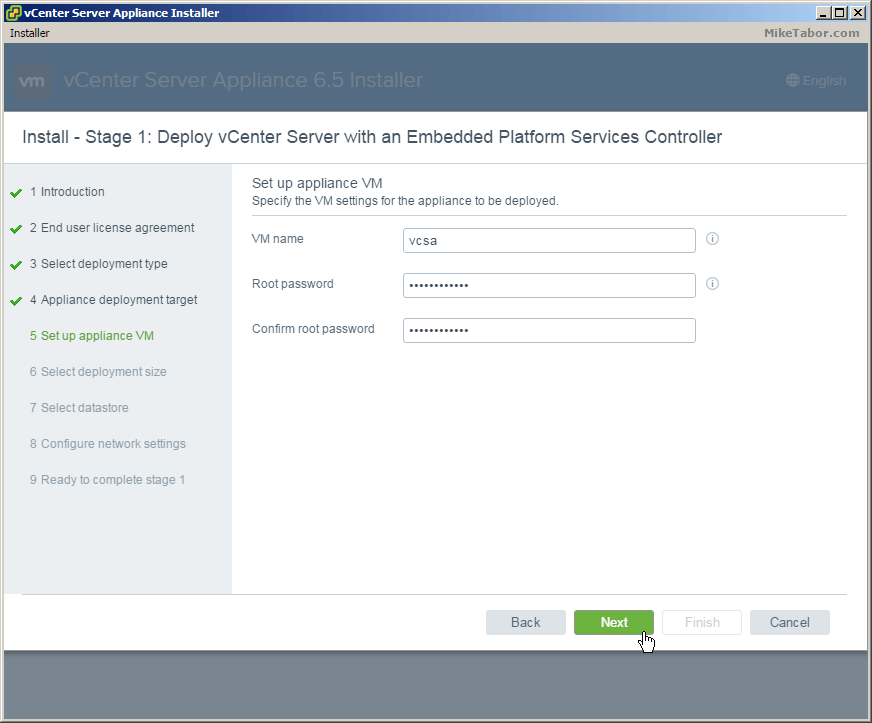
  7. Enter the name you would like for the appliance VM to be called as well as set a root password.
    vcsa 6.5 install set appliance-vm
  8. Select the deployment size that best matches your environment. For my home lab I’m selecting Tiny.
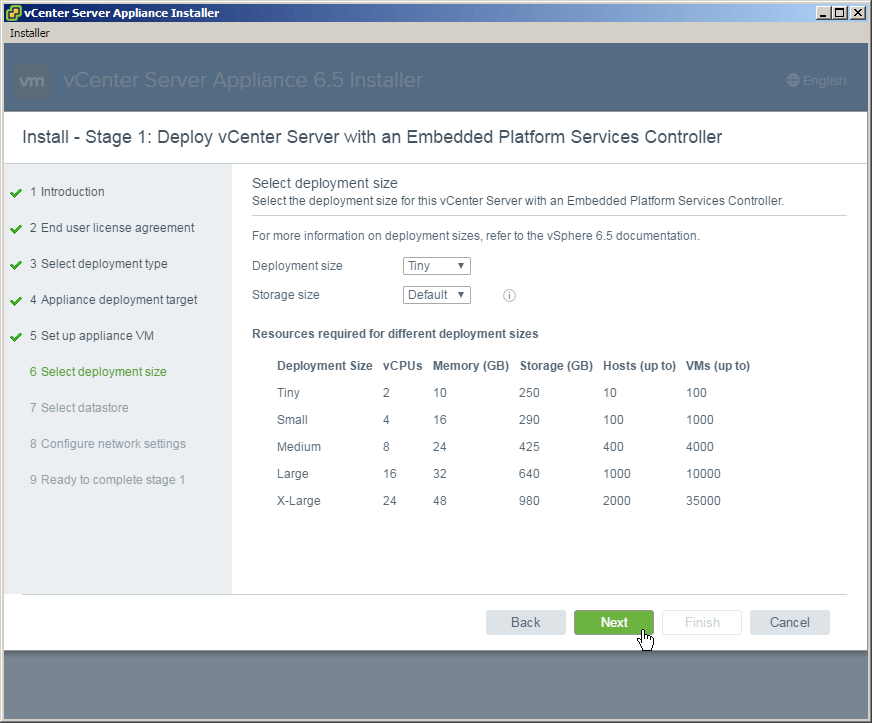
    vcsa 6.5 install deployment size
  9. Select what datastore you want the VCSA appliance to be stored.
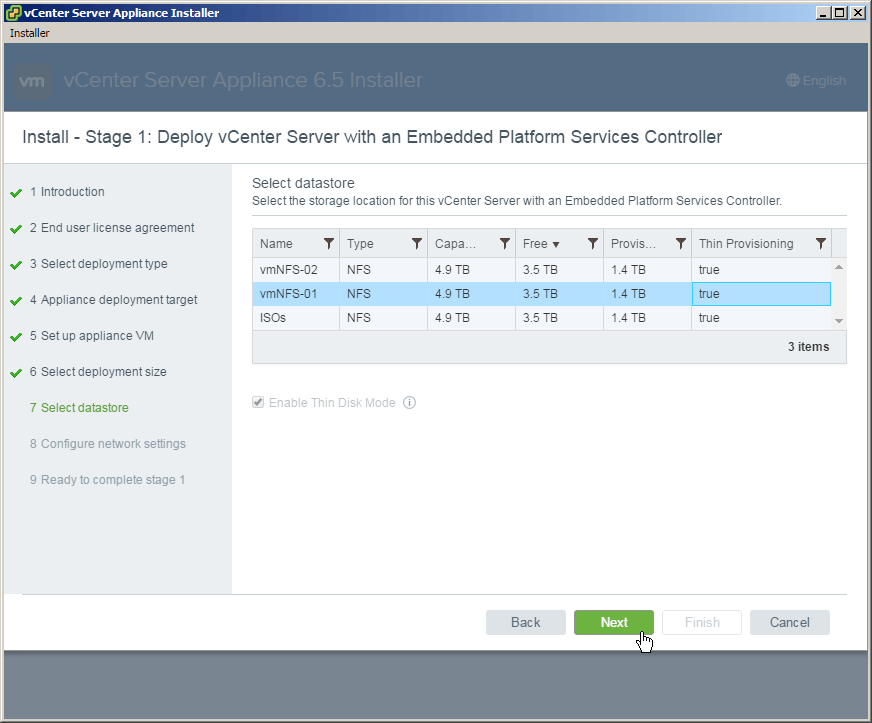
    vcsa 6.5 install select datastore
  10. Now configure the networking the VCSA appliance should use. It’s important to note that DNS for the IP used should both forward and reverse resolve else you will run into errors.
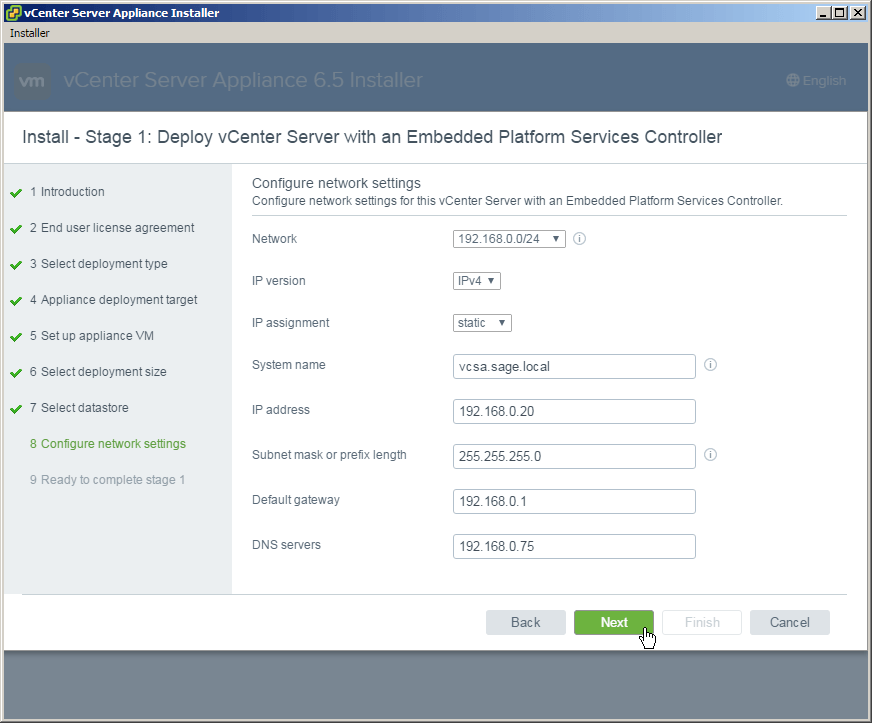
    vcsa 6.5 install network settings
  11. The final step of the vCenter Server Appliance 6.5 deployment process is to review the summary and click on Finish.
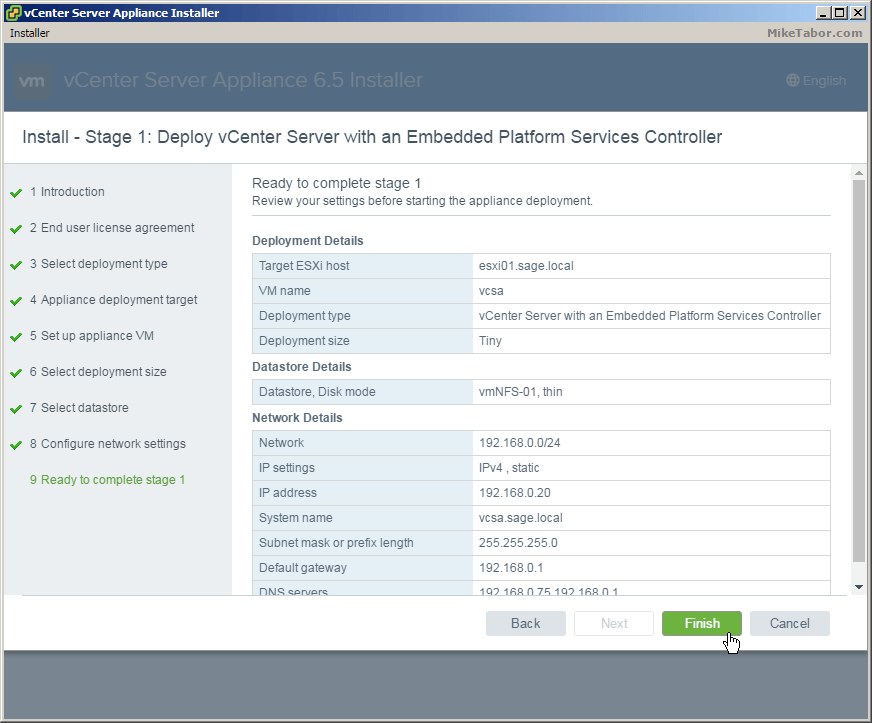
    vcsa 6.5 install complete stage1
  12. Once completed you will have the option to continue onto Stage 2 or close. If you close then you can finish the VCSA config by going to https://<VCENTER_IP>:5480
    vcsa 6.5 install deploying stage 1 complete

Stage 2 – Configuring VCSA 6.5

  1. After clicking Continue from Stage 1 you will be taken to the Stage 2 introduction page, click Next.
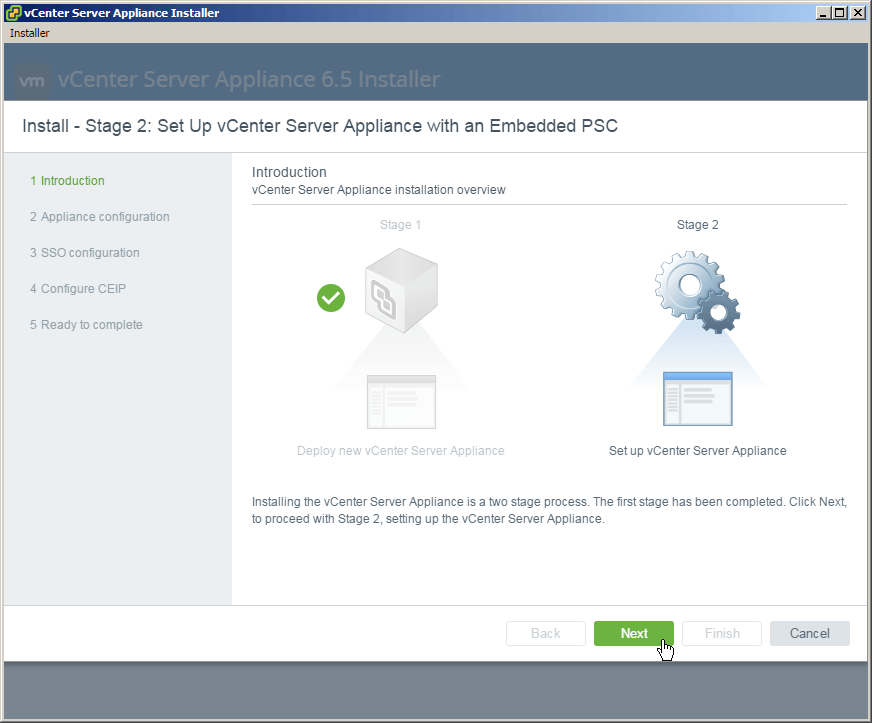
    vcsa 6.5 stage2 intro
  2. First option to configure of the VCSA is Time synchronization. You can either sync with the ESXi host or user defined NTP servers as well as enable or disable SSH.
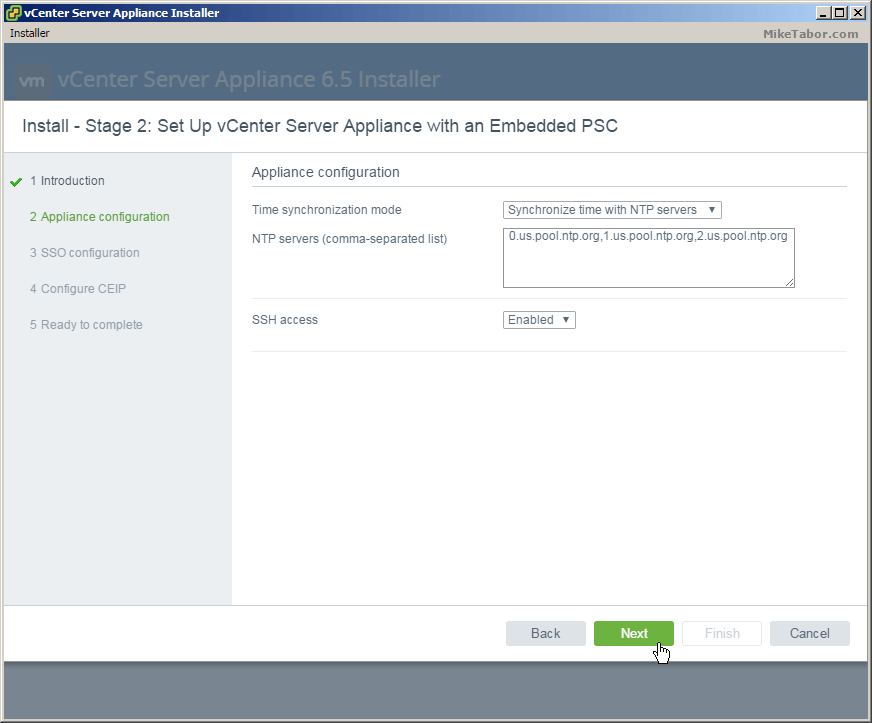
    vcsa 6.5 stage2 appliance config
  3. Next configure Single Sign On (SSO) by giving it a domain name, password and site name.
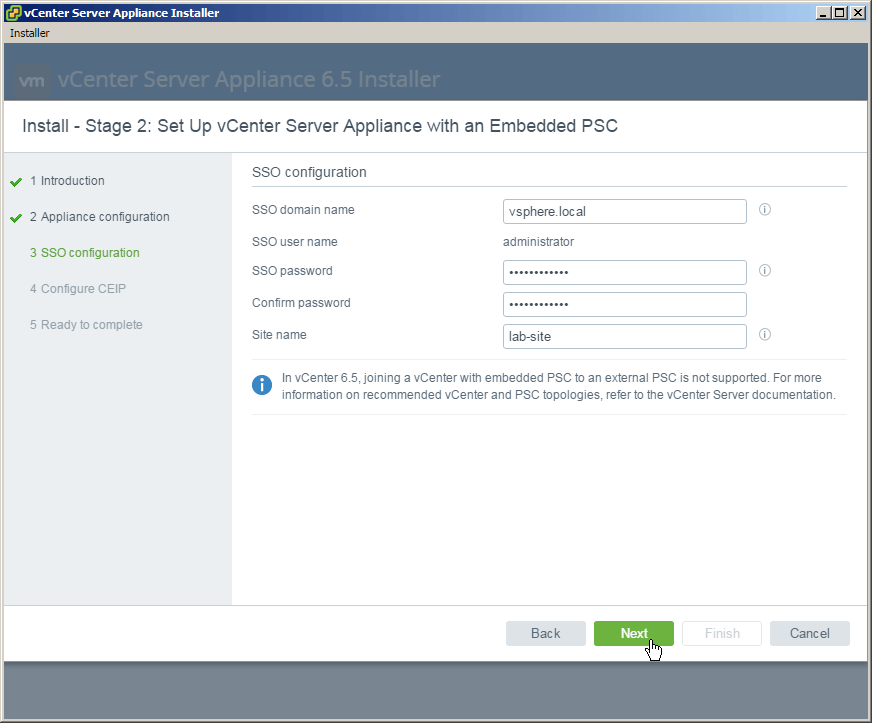
    vcsa 6.5 stage2 sso config
  4. Now decide if you’d like to join the Customer Experience Improvement Program (CEIP) and click Next.
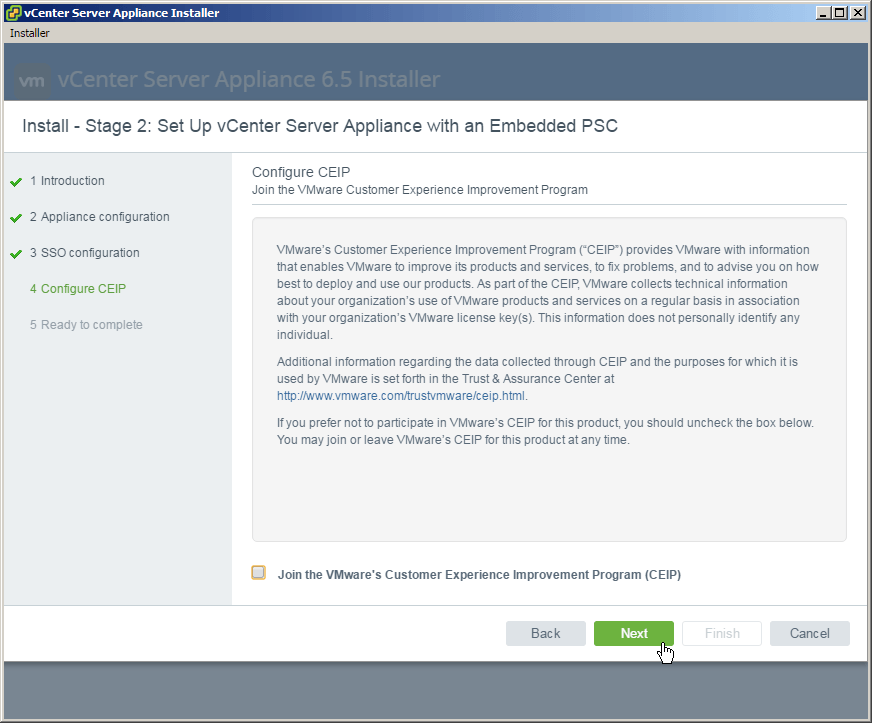
    vcsa 6.5 stage2 ceip
  5. Again review the summary and click Finish.
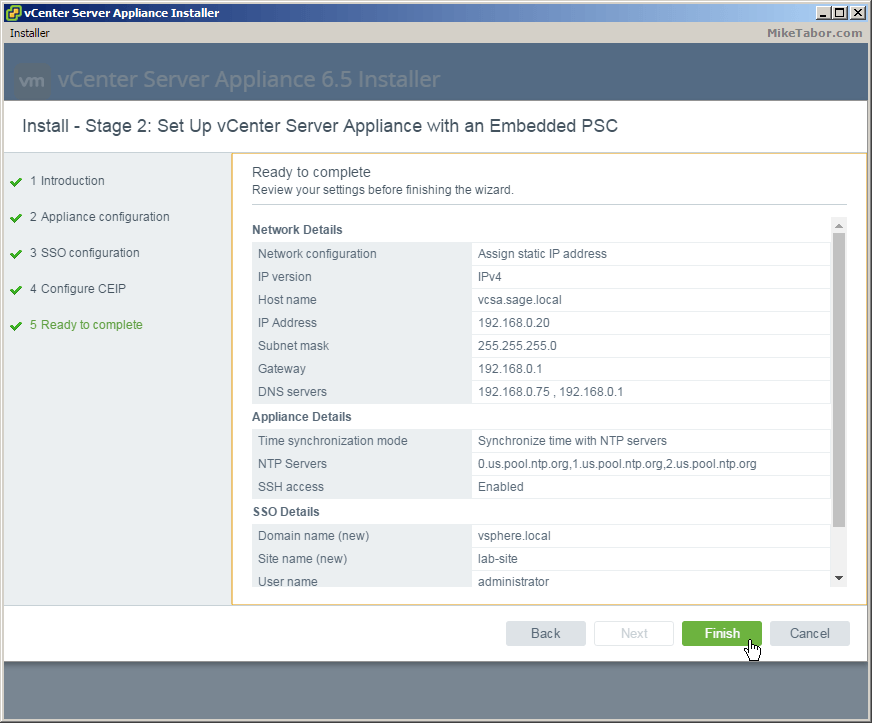
    vcsa 6.5 stage2 ready complete

After the Stage 2 has completed you can then log into the vCenter web client, https://<VCENTER_IP>/vsphere-client (Flash – YUCK!) or the HTML5 client, https://<VCENTER_IP>/ui which currently only offers partial functionality. The vSphere thick client is gone in vSphere 6.5.

If you want more details about vSphere 6.5 check out the VMware vSphere 6.5 release notes here.

Similar Posts

  • Clone VMware ESXi USB boot drive to another USB flash drive

    A few days ago one of my hosts in my home lab was displaying an alarm message:

    Lost connectivity to the device

    Lost connectivity to the device mpx.vmhbaXX:XX:XX:XX backing the boot filesystem /vmfs/devices/disks/mpx.vmhbaXX:XX:XX:XX. As a result, host configuration changes will not be saved to persistent storage.

    The last part of the message (“persistent storage”) made me think it might have something to do with the USB drive due to the fact that a similar message appeared when setting up the home lab on the Intel NUC’s. After some research it appears my assumption was correct and that the USB flash drive I was using to boot from was indeed starting to fail.

    Read More “Clone VMware ESXi USB boot drive to another USB flash drive”

  • VMware Update Manager U3e upgrade failing? Un-install it!

    VMware Update Manager U3e error

    I was recently upgrading a VMware environment from vCenter Server Update 3b to Update 3e and during the scheduled change I had also planned on upgrading VMware Update Manager to Update 3e and ran into the following error:

    VMware Workstation unrecoverable error: (vthread-3)
    GetProcAddress: Failed to resolve ENGINE)load_aesni: 127
    You can request support.

    Looking for a possible solution at the VMware Knowledge Base came back with no results and to error message wasn’t overly useful either with “VMware Workstation unrecoverable error: (vthread-3)” as Workstation wasn’t installed on this server.

    Read More “VMware Update Manager U3e upgrade failing? Un-install it!”

  • My VMware View Windows 7 Optimization Guide

    These are the few steps I do when creating a new "Golden" image. Luckily I don’t have to do these steps all the time as I’ll create the "Golden" image when there is a new upgrade such as when we went from View 4.6 to View 5.0.1. I like to have a new fresh machine using new virtual hardware from the start. You could certainly just upgrade the virtual hardware on the "Golden" image, I just prefer to start clean.

    At any rate, here’s my list. Hopefully someone might find it somewhat useful and maybe even others can improve upon it.

    Preparing a new virtual machine

    1. Create New Virtual Machine – FILE > NEW > VIRTUAL MACHINE (CTRL+N)
    2. Under Configuration select CUSTOM.
    3. Select a Name, Folder, Host, Cluster, and Storage.
    4. Under Guest Operating System select Windows and then Windows 7 32bit under the Version drop down.
    5. Select which Network (VLAN) and under Adapter select VMXNET 3.
    6. Configure disk size to 30GB THIN provisioned.

    Read More “My VMware View Windows 7 Optimization Guide”

  • How to install VMware vSphere Update Manager 5.5

    If you don’t already know, VMware Update Manager (aka, VUM) is a tool which allows you to easily automate patching and upgrading VMware hosts as well as virtual machine hardware and VMware tools. It’s a wonderful tool and makes upgrading and patching so much easier and allows you to quickly see how compliant/up-to-date your environment is with the built in pie graph.

    Recently we had some pretty serious array issues which corrupted the VUM database taking Update Manager down. Since we was going to have to rebuild Update Manager I opted to move from Windows Server 2008 to Windows Server 2012, in the steps below I’ll document step by step how to install VMware Update Manager 5.5 on Server 2012 and a separate database.

    Read More “How to install VMware vSphere Update Manager 5.5”

  • Restore a VM using the {vm}-flat.vmdk file

    missing vmdk file error

    A couple days ago I was asked the question “An admin deleted the vmdk file associated with a VM, there are no snapshots or backups of the VM . Can we restore this VM somehow?“. I believe in backups, I like to have my VM’s backed up so that I can depend on them for events just like this very issue. At first I was stumped, until the {vm-name}.flat.vmdk was mentioned. That’s when I remembered a method to recover a VM using the vm-flat.vmdk file that I had actually done 2-3 years ago.

    Read More “Restore a VM using the {vm}-flat.vmdk file”

  • vSphere 5.1 Release Date leaked, maybe?

    Looks like Sammy Bogaert over at Boerlowie’s Blog has possibly found the release date of vSphere 5.1… maybe?

    I was about to download vSphere Update Manager PowerCLI 5.0.

    I followed the main site and wanted to check the documentation first. So I clicked the Documentation button.

    vmware update manager

    This lead me to the Docs of Update Manager PowerCLI 5.1! That’s right, 5.1! With a release date of 10 September 2012.

    vsphere5.1 release date

    None of the links for 5.1 work, so no news on any new features…

    Guess somebody at VMware was a bit too fast to update the website

    Nice find Sammy, guess time will tell if the Sept. 10th date is the actual release date or not.

Leave a Reply to Philip Salmon Cancel reply

Your email address will not be published. Required fields are marked *

2 Comments

  1. Hello Mike. I need help downloading the vCenter Server Appliance 6.5. I tried from all the links you provided but they kept only allowing me to download the Windows vCenter Server version.

  2. Great job – very informative and helpful. Setup in no time. For the download, choose “vSphere Server” in your my.vmware.com login pages and download the appliance ISO file (about 3.3 GB).