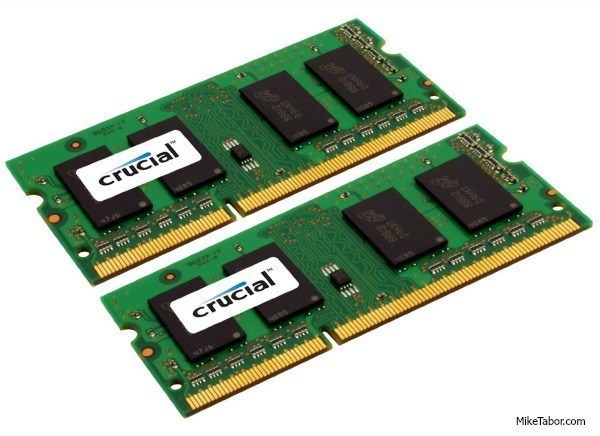
Crucial 16GB memory, perfect for Intel NUC

crucial 16gb 204pin memory

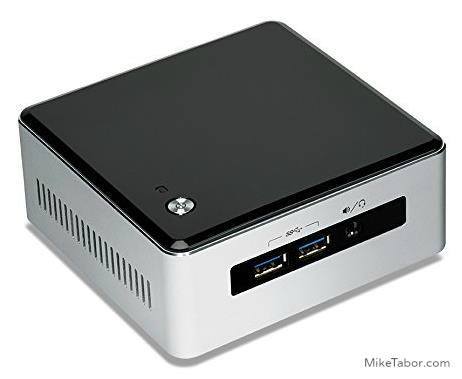
I’m a huge fan the of Intel NUC‘s for a VMware home lab. In fact I just recently picked up my third Intel NUC to give me more head room for a small VMware Horizon (View) environment at home.

I typically use G.Skill memory in my NUC’s as I’ve had great luck with the brand in my desktop and laptop for years. However G.Skill has been increasing in price which made me look around for alternatives and came across Crucial DDR3 204-pin memory for less money, but days after I purchased it they too went up in price. However they are now back on sale and cost about $50 less then the G.Skill memory I have been using in my first two NUC’s.

I’ve been using the Crucial memory now for the last several months without any problems and even though they are rated at a lower voltage I can’t say I really see any difference in power savings or consumption compared to the G.Skill 1.5V. If you’re looking to upgrade now might be a good time to take advantage of the sale price.

Similar Posts

  • Intel NUC i5 5th Generation an ESXi lab improvement

    Intel NUC BLKNUC5I5MYHE 5th gen

    For the past year and a half I’ve been using the Intel i5 3rd Gen NUC’s in my ESXi home lab with great success. In this time several people have asked if I recommend anything newer, and while Intel had a few 4th gen models I wasn’t really sold on them as most CPU benchmarks put them the same as my 3rd gen or lower and only added support for a 2.5″ drive which at the time I didn’t need but then Intel released news about several Intel NUC 5th generation models!

    Read More “Intel NUC i5 5th Generation an ESXi lab improvement”

  • How to Upgrade PowerShell 7 to latest version

    Have you opened a Windows Terminal and seen a highlighted message stating “A new PowerShell stable release is available …“?

    powershell 7 upgrade prompt

    Well you could go to the link provided in the prompt, download the upgrade and then run it on your machine, or you can quickly and easily upgrade PowerShell 7 directly from the terminal by typing the following command.

    Invoke-Expression "& { $(Invoke-Restmethod https://aka.ms/Install-PowerShell.ps1) } -UseMSI"
    

    This will automatically download and run the latest version of PowerShell 7 and run the installer for you. See quick and easy!

  • Setup Synology Syslog server for VMware ESXi

    After performing my home lab upgrade, ESXi now runs from a USB stick and because of that vSphere would complain that the system logs where on non-persistent storage:

    ESXi syslog error

    If I wanted I could have ran the vCenter Server Appliance (vCSA) as it comes with it’s own syslog server, or I could have used something like KIWI or Splunk to be my syslog server. I instead went the route of my Synology NAS as it too has the ability to act as a syslog server and these are the steps I performed to setting it up.

    Read More “Setup Synology Syslog server for VMware ESXi”

  • VMware ESXi 5 fails to install on Intel NUC, “No Network Adapters” error

    If you use the VMware ESXi 5 ISO image and try to install it on an Intel NUC you’ll receive the following error during the install.

    No Network Adapters

    No network adapters were detected. Either no network adapters are physically connected to the system, or a suitable driver could not be located. A third party driver my be required.

    Ensure that there is at least one network adapter physically connected to the system before attempting installation. If the problem persists, consult the VMware Knowledge Base.

    The “No Network Adapters” on the Intel NUC error message during the ESXi install is because VMware removed a number of drivers (non-enterprise drivers) from their ESXi 5.x image and in order to use the Intel NUC as an ESXi host you need to create a customized ESXi image with the NIC drivers added to the image.

    Read More “VMware ESXi 5 fails to install on Intel NUC, “No Network Adapters” error”

  • My VMware ESXi Home Lab Upgrade

    Although the focus in my career right now is certainly more cloud focused in Amazon Web Services and Azure, I still use my home lab a lot.

    For the last 5+ years my home lab had consisted of using 3x Intel NUC’s (i5 DC53427HYE), a Synology NAS for shared storage and an HP ProCurve switch. This setup served me well for most of those years. It has allowed me to get many of the certifications I have, progress in my career and have fun as well.

    At the start of this year I decided it was time to give the home lab an overhaul. At first I looked at the newest generation of Intel NUC’s but really wasn’t looking forward to dropping over $1,300 on just partial compute (I’d still need to be RAM for each of the 3 NUC’s). I also wanted something that just worked, no more fooling around with network adapter drivers or doing this tweak or that tweak.

    I also no longer needed to be concerned about something that had a tiny footprint. I also questioned if I really needed multiple physical ESXi hosts. My home lab isn’t running anything mission critical and if I really wanted I could always build additional nested VMware ESXi hosts on one powerful machine if I needed.

    So in the end, the below is what I settled on. Replacing all of my compute, most of my networking and adding more storage!

    Read More “My VMware ESXi Home Lab Upgrade”

  • Secure your Synology NAS, install a SSL certificate

    I’ve been using the default setup on my Synology DS412+ with HTTPS enabled for a while now but knew it really wasn’t all that secure without a proper SSL certificate and creating a self-signed certificated isn’t all the much better and can be easily forged. I decided it was about time I used a “real” certificate to better secure the NAS.

    Prerequisites before starting

    • You need to own a domain name, for example MikeTabor.com and be able to receive email from the domain name.
      If you don’t already have a webhost for the domain, I’d suggest BlueHost.

    • You also need a DDNS service setup. In this case and for my use, I simply use the Synology DDNS service they offer for free.
    • With those two setup, you will also want to add a CNAME DNS forward from your domain (or subdomain if you wish to go that route) to your DDNS service.
    • Finally you’ll want to make sure Port Forwarding has been configured on your router.

    Read More “Secure your Synology NAS, install a SSL certificate”

Leave a Reply

Your email address will not be published. Required fields are marked *