How to install VMware vSphere Update Manager 5.5

If you don’t already know, VMware Update Manager (aka, VUM) is a tool which allows you to easily automate patching and upgrading VMware hosts as well as virtual machine hardware and VMware tools. It’s a wonderful tool and makes upgrading and patching so much easier and allows you to quickly see how compliant/up-to-date your environment is with the built in pie graph.

Recently we had some pretty serious array issues which corrupted the VUM database taking Update Manager down. Since we was going to have to rebuild Update Manager I opted to move from Windows Server 2008 to Windows Server 2012, in the steps below I’ll document step by step how to install VMware Update Manager 5.5 on Server 2012 and a separate database.

Creating the VMware Update Manager database

Since we already have our vCenter SQL database on it’s on VM (not installed on the vCenter server), I’m going to use the same database server to also run the VMware Update Manager database as well.

To automate the creation of the database I used ran the following script on the database server, be sure to replace “domain\service-account-name” with your own domain and service account username.

/* Creates VMware Update Manager database. */
/* Change login name to VUM service account */

EXEC('CREATE LOGIN [domain\service-account-name]FROM WINDOWS')

USE MSDB
EXEC sp_grantdbaccess 'domain\service-account-name'
EXEC sp_addrolemember db_owner, 'domain\service-account-name'

USE master
create database "VUM"
on
( name = 'VUM',
filename = 'D:\MSSQL\Data\VUM.mdf',
size = 250MB,
filegrowth = 25MB )
log on
( name = 'VUM log',
filename = 'D:\MSSQL\Logs\VUM.ldf',
size = 25MB,
filegrowth = 2MB )
COLLATE SQL_Latin1_General_CP1_CI_AS;

EXEC('ALTER AUTHORIZATION ON DATABASE::"VUM" TO [domain\service-account-name]')

GO

That should create the databases needed with the correct permissions. The only thing you may want to change is set the database recovery from “Full” to “Simple”, otherwise that’s it on the database server.

Creating the VUM 32-bit DSN

First thing’s first, make sure your VUM service account is a local admin on your new Server 2012 virtual machine. Next, before I could get started configure the 32-bit DSM connection I first had to install the SQL Server Native Client which I quickly installed by mounting the SQL Server ISO to my new VUM virtual machine and went to the folder: 1033_enu_lp\x64\setup\x64 and ran the file: sqlncli.msi.

Now lets setup the DSN…

  1. Open the 32-bit ODBC Manager which is located here:
    C:\Windows\SysWOW64 named odbcad32.exe
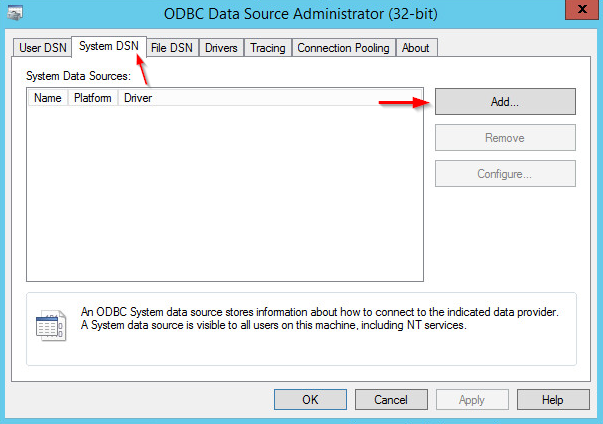
  2. Click on the System DSN tab and then click on Add.
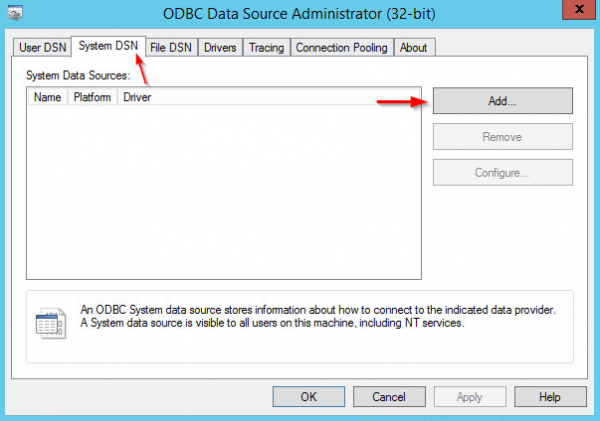
    Add ODBC step 1
  3. From the list of data sources, select SQL Server Native Client and click on Next.
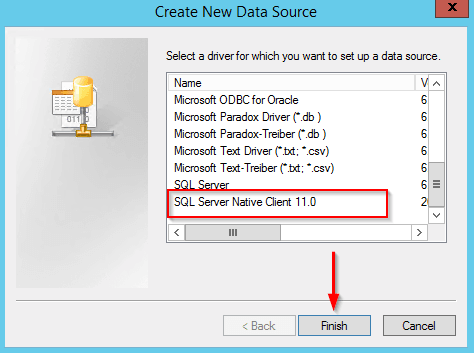
    Add ODBC step 2
  4. Give the new data source a name, description and lastly enter the name of your SQL database server and click Next.
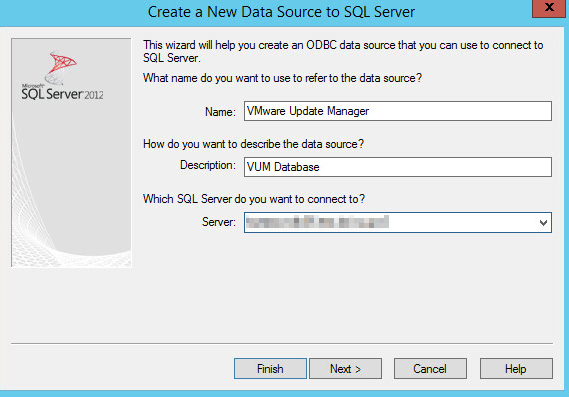
    Add ODBC step 3
  5. Leave the default “with Integrated Windows Authentication” selected and click on Next
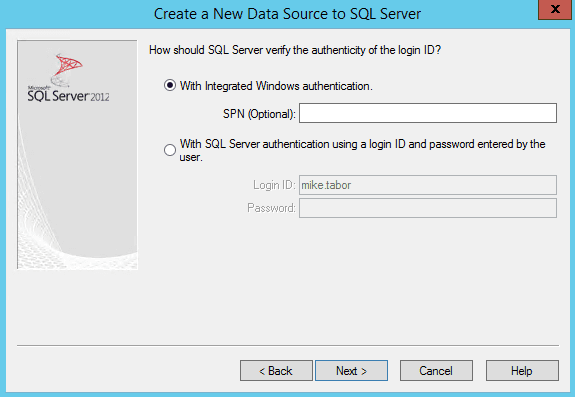
    Add ODBC step 4
  6. From the default database drop down menu select the name of your VUM database and click Next.
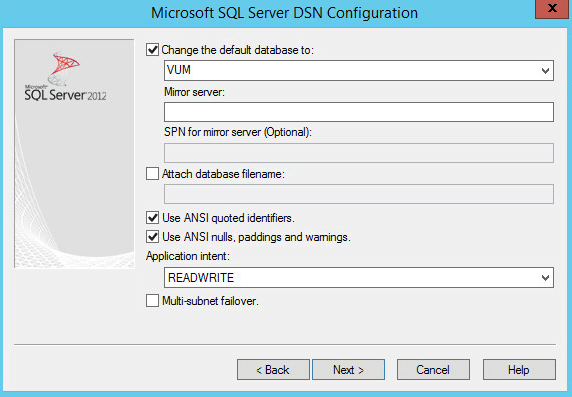
    Add ODBC step 5
  7. Finish the configuration and now we’re ready to actually install VUM!
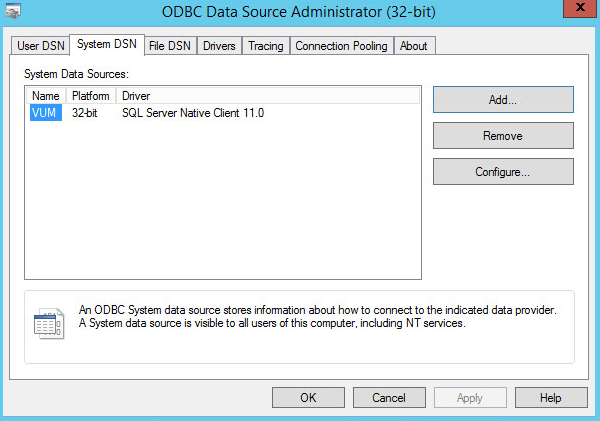
    Add ODBC step 6

Installing VMware Update Manager

For this install I used the latest ISO currently available at the time of writing this (VMware-VIMSetup-all-5.5.0-1750795-20140201-update01.iso).

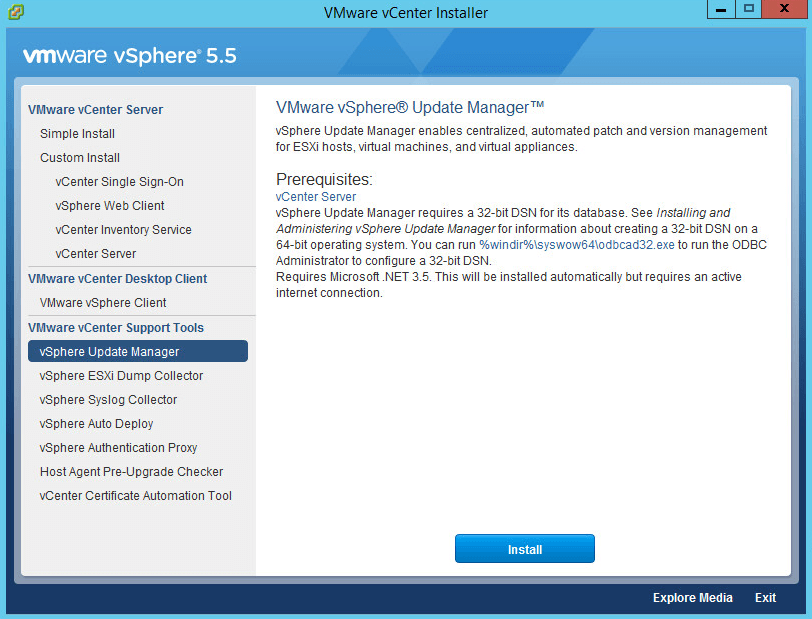
  1. Mount the ISO image to your VM which should start the VMware vCenter Installer, select “vSphere Update Manager” and click on Next
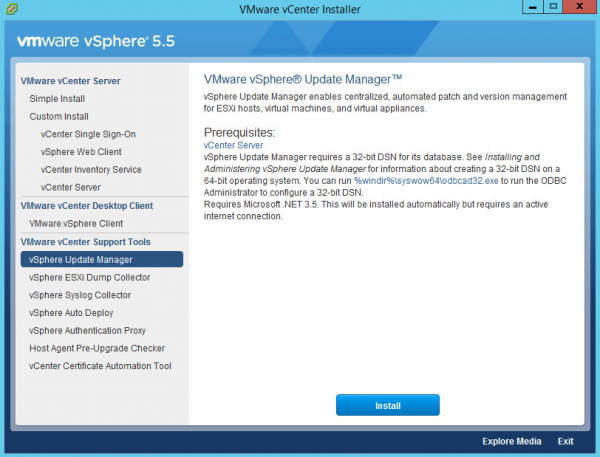
    vSphere installer
  2. Select the language of your choice and click on Ok.
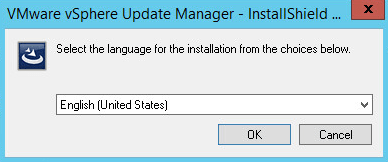
    Installing vSphere Update Manager step 1
  3. Start the install wizard by clicking Next.
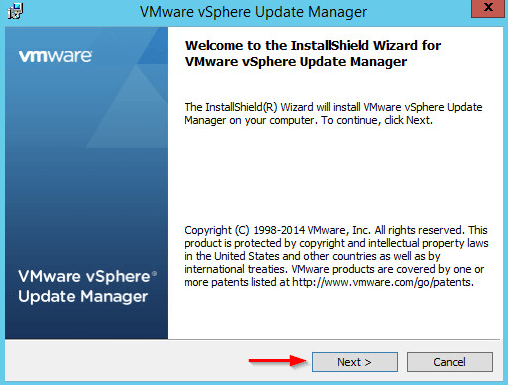
    Installing vSphere Update Manager step 2
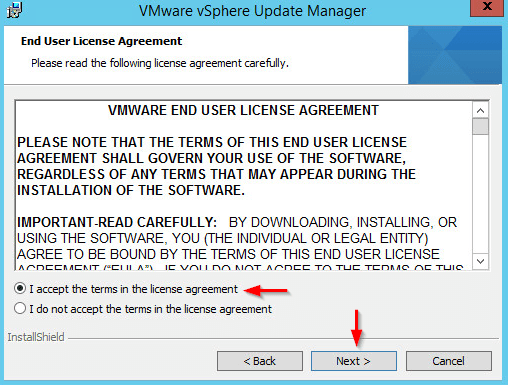
  4. Accept the license agreement.
    Installing vSphere Update Manager step 3
  5. I want VUM to download updates right away and so I left the default “Download updates from default sources immediately after installation” checked.
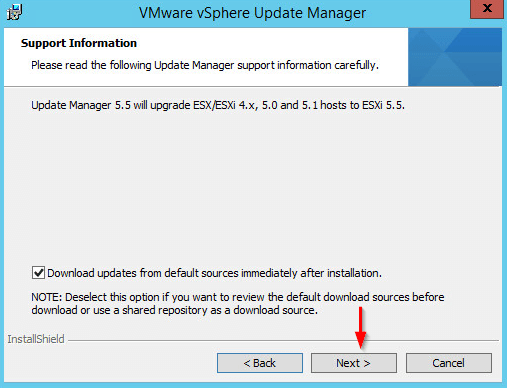
    Installing vSphere Update Manager step 4
  6. VUM needs to register with vCenter, so enter the vCenter IP or Name along with any username and password that has administrator access on vCenter.
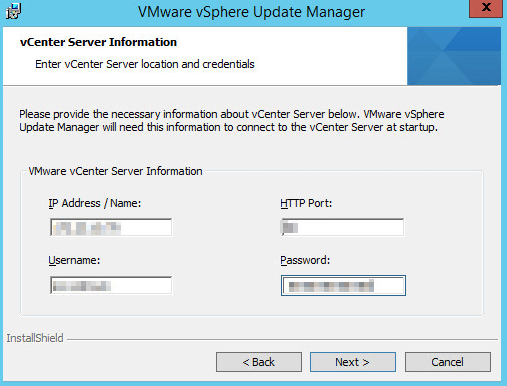
    Installing vSphere Update Manager step 5
  7. Since we’ve opted to use a standalone SQL server for this install, select “Use an existing supported database” and use the previously configured DSN from the drop down (VUM).
    Installing vSphere Update Manager step 6
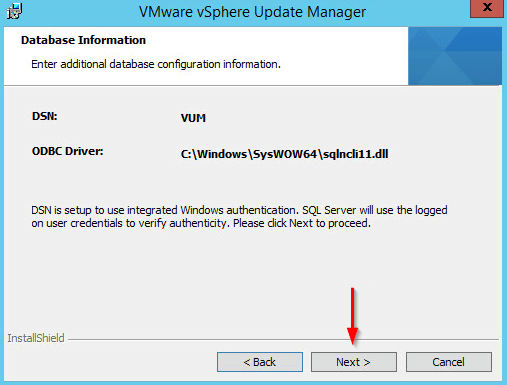
  8. Summary of database configuration.
    Installing vSphere Update Manager step 7
  9. Enter the IP or name of your vCenter server, I’ve used the FQDN name in this case.
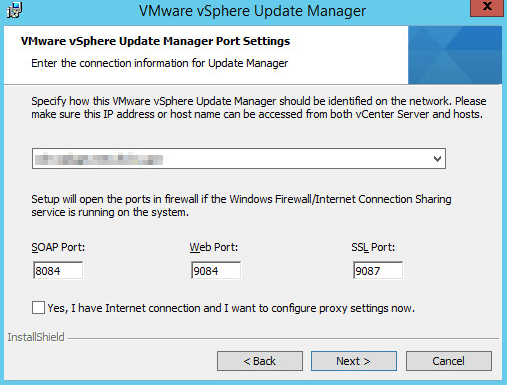
    Installing vSphere Update Manager step 8
  10. Neither of my drives on the VUM VM have have 120GB or more free space and thus the installer shows this warning message. It’s okay, just click Ok to continue.
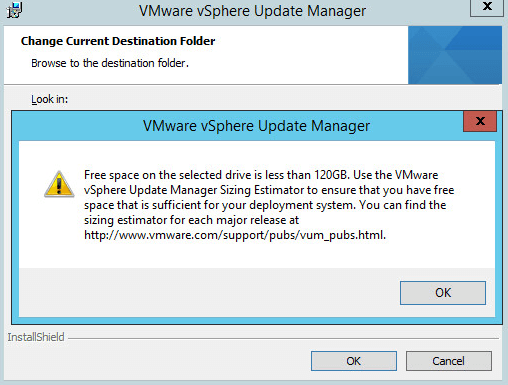
    Installing vSphere Update Manager step 9
  11. I added an 80GB drive to the VM and changed the destination folder to the secondary drive. You don’t have to change the destination if you don’t want to. Click Next.
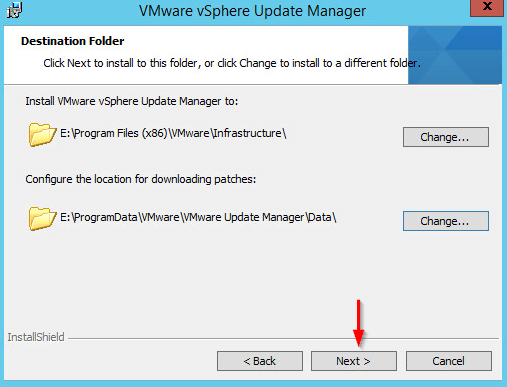
    Installing vSphere Update Manager step 10
  12. To start the installation click on Install
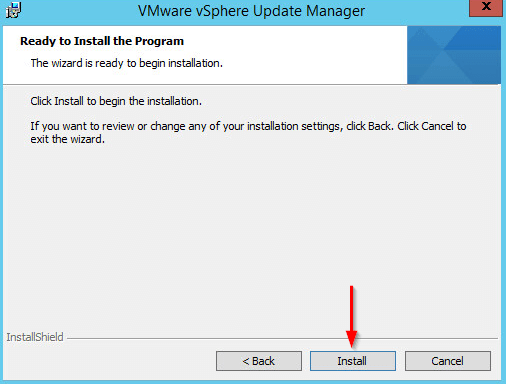
    Installing vSphere Update Manager step 11
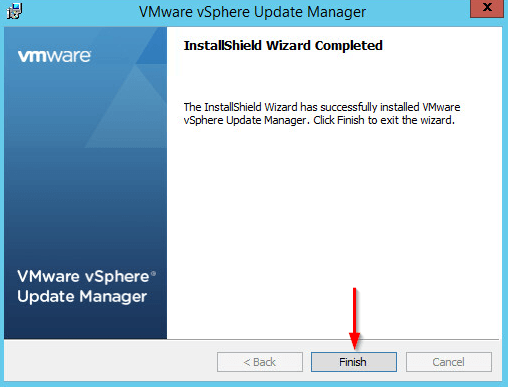
  13. That’s it, click on Finish.
    Installing vSphere Update Manager step 12

Now that the install for Update Manager is complete, log into the vSphere client and confirm the “VMware vSphere Update Manager” plugin is listed.

vSphere Update Manager plugin installed

You’ve now installed vSphere Update Manager and are ready to start upgrading and patching your hosts. If you need help with that I’ve already posted about that earlier in my Upgrade ESXi host to ESXi 5.5 using VMware Update Manager 5.5 post.

Enjoy!
Similar Posts

  • How to create a bootable VMware ESXi installer USB flash drive

    I’ve mentioned how to create a bootable VMware ESXi installer USB flash drive in an older post, but wanted to detail the steps I use to create an ESXi bootable install drive.

    Creating a bootable flash drive is very useful for machines without a CD-Rom or remote access like an iDRAC where you can virtually mount an ISO image – such as the Intel NUC.

    The process is very easy with just one tool needed, Rufus – if you don’t already have it go ahead and download it now!

    Read More “How to create a bootable VMware ESXi installer USB flash drive”

  • VMware Workstation 12 Pro Released

    VMware has just released a new version of Workstation in VMware Workstation 12 Pro. Workstation 12 Pro provides full support for Windows 10, including features such as Cortana and universal applications. As well as even larger virtual machines with up to 16 vCPU’s and 64GB of memory. Workstation 12 Pro even supports 4K displays and DirectX 10 and OpenGL 3.3

    You can even seamlessly drag and drop virtual machines between your PC and your internal cloud running vSphere, ESXi or another instance of Workstation. In addition, easily connect to vCloud Air and upload, run, and view virtual machines right from the Workstation 12 Pro interface.

    Read More “VMware Workstation 12 Pro Released”

  • VMware vSphere 7 announced

    VMware vSphere 7

    Some pretty big news coming out of VMware today. The announcement of VMware vSphere 7 to become available May 1, 2020! One of the biggest item coming out of this news so far is that vSphere 7 will come in two options.

    The first being vSphere 7 as we all have known it to be for years and then the second being vSphere 7 with Kubernetes which will be available through VMware Cloud Foundation and is a new generation of vSphere for containerized applications.

    Other notables is that the flash based vSphere client is FINALLY no more! From here on out, only the HTML 5 will exist. vCenter Server on Windows will also finally be put to rest and new deployments of vCenter server will be done using the tried and tested vCenter Server Appliance (VCSA) based on PhotonOS linux.

    Read More “VMware vSphere 7 announced”

  • vSphere 5.1 Release Date leaked, maybe?

    Looks like Sammy Bogaert over at Boerlowie’s Blog has possibly found the release date of vSphere 5.1… maybe?

    I was about to download vSphere Update Manager PowerCLI 5.0.

    I followed the main site and wanted to check the documentation first. So I clicked the Documentation button.

    vmware update manager

    This lead me to the Docs of Update Manager PowerCLI 5.1! That’s right, 5.1! With a release date of 10 September 2012.

    vsphere5.1 release date

    None of the links for 5.1 work, so no news on any new features…

    Guess somebody at VMware was a bit too fast to update the website

    Nice find Sammy, guess time will tell if the Sept. 10th date is the actual release date or not.

  • VMware ESXi 6.0 CBT bug fix released

    VMware

    You may remember ESXi 4.x-5.x had a CBT bug, as mentioned here, that could potentially cause your backups to be pretty useless. Well it seems ESXi 6.0 isn’t without it’s own CBT bug which could cause the following to possibly occur:

    • Backing up a VM with CBT enabled fails.
    • Powering on virtual machines fails.
    • Expanding the size of a virtual disk fails.
    • Taking VM quiesced snapshots fails.

    Prior to the fix, the workaround was to disable CBT. Thankfully VMware has released a fix for the ESXi 6.0 CBT bug and it’s recommended that anyone who uses CBT apply this patch regardless if it was a clean install of VMware ESXi 6.0 or an upgrade to ESXi 6.0.

    Read More “VMware ESXi 6.0 CBT bug fix released”

  • ESXi 5.5 free edition removes 32GB memory limit

    There have been a ton of exciting announcements coming out of VMword 2013, one of which is vSphere 5.5 and all of it’s improvements and additions. Along that note, VMware has changed ESXi 5.5 free version to remove the physical RAM limit which was limited to only 32GB in version 5.1.

    The new virtual hardware, version 10, we can now grow our home labs into more powerful VM’s as most all configuration maximums have been doubled:

    Read More “ESXi 5.5 free edition removes 32GB memory limit”

Leave a Reply

Your email address will not be published. Required fields are marked *

2 Comments