How to install VMware vSphere Update Manager 5.5

If you don’t already know, VMware Update Manager (aka, VUM) is a tool which allows you to easily automate patching and upgrading VMware hosts as well as virtual machine hardware and VMware tools. It’s a wonderful tool and makes upgrading and patching so much easier and allows you to quickly see how compliant/up-to-date your environment is with the built in pie graph.

Recently we had some pretty serious array issues which corrupted the VUM database taking Update Manager down. Since we was going to have to rebuild Update Manager I opted to move from Windows Server 2008 to Windows Server 2012, in the steps below I’ll document step by step how to install VMware Update Manager 5.5 on Server 2012 and a separate database.

Creating the VMware Update Manager database

Since we already have our vCenter SQL database on it’s on VM (not installed on the vCenter server), I’m going to use the same database server to also run the VMware Update Manager database as well.

To automate the creation of the database I used ran the following script on the database server, be sure to replace “domain\service-account-name” with your own domain and service account username.

/* Creates VMware Update Manager database. */
/* Change login name to VUM service account */

EXEC('CREATE LOGIN [domain\service-account-name]FROM WINDOWS')

USE MSDB
EXEC sp_grantdbaccess 'domain\service-account-name'
EXEC sp_addrolemember db_owner, 'domain\service-account-name'

USE master
create database "VUM"
on
( name = 'VUM',
filename = 'D:\MSSQL\Data\VUM.mdf',
size = 250MB,
filegrowth = 25MB )
log on
( name = 'VUM log',
filename = 'D:\MSSQL\Logs\VUM.ldf',
size = 25MB,
filegrowth = 2MB )
COLLATE SQL_Latin1_General_CP1_CI_AS;

EXEC('ALTER AUTHORIZATION ON DATABASE::"VUM" TO [domain\service-account-name]')

GO

That should create the databases needed with the correct permissions. The only thing you may want to change is set the database recovery from “Full” to “Simple”, otherwise that’s it on the database server.

Creating the VUM 32-bit DSN

First thing’s first, make sure your VUM service account is a local admin on your new Server 2012 virtual machine. Next, before I could get started configure the 32-bit DSM connection I first had to install the SQL Server Native Client which I quickly installed by mounting the SQL Server ISO to my new VUM virtual machine and went to the folder: 1033_enu_lp\x64\setup\x64 and ran the file: sqlncli.msi.

Now lets setup the DSN…

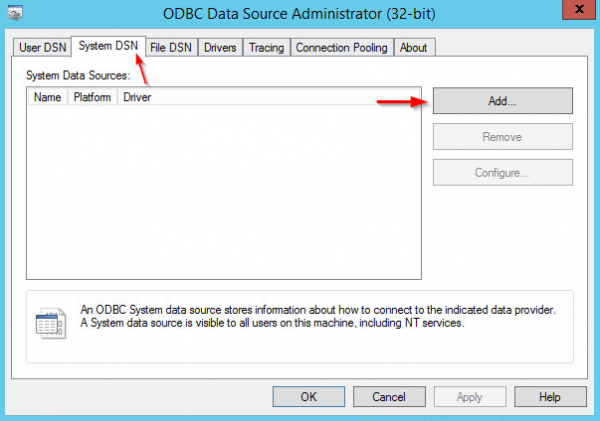
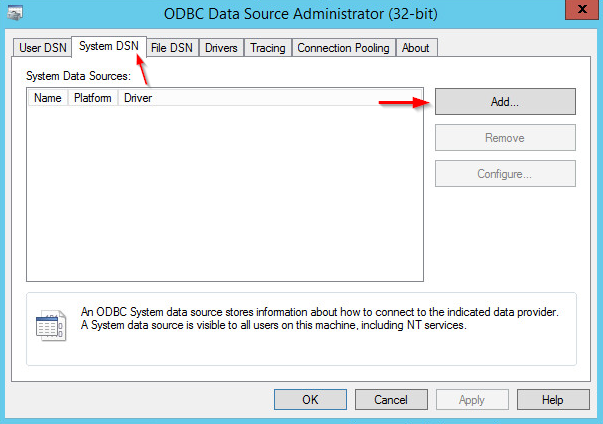
  1. Open the 32-bit ODBC Manager which is located here:
    C:\Windows\SysWOW64 named odbcad32.exe
  2. Click on the System DSN tab and then click on Add.
    Add ODBC step 1
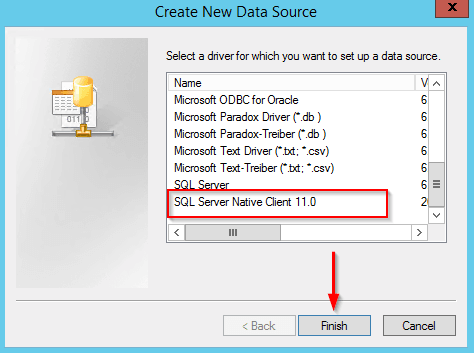
  3. From the list of data sources, select SQL Server Native Client and click on Next.
    Add ODBC step 2
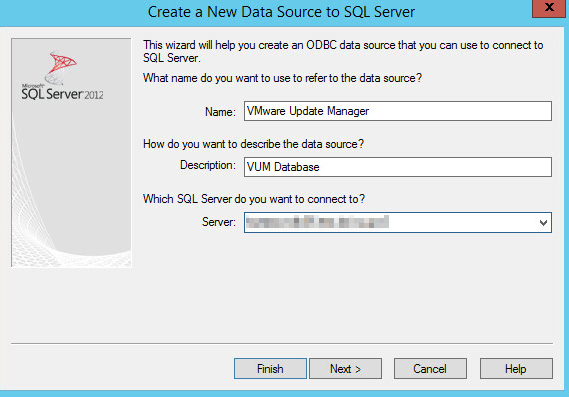
  4. Give the new data source a name, description and lastly enter the name of your SQL database server and click Next.
    Add ODBC step 3
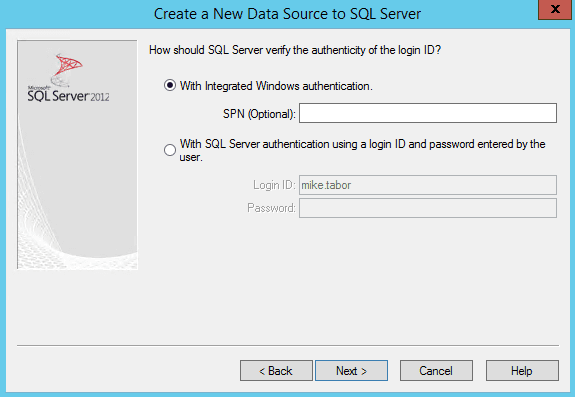
  5. Leave the default “with Integrated Windows Authentication” selected and click on Next
    Add ODBC step 4
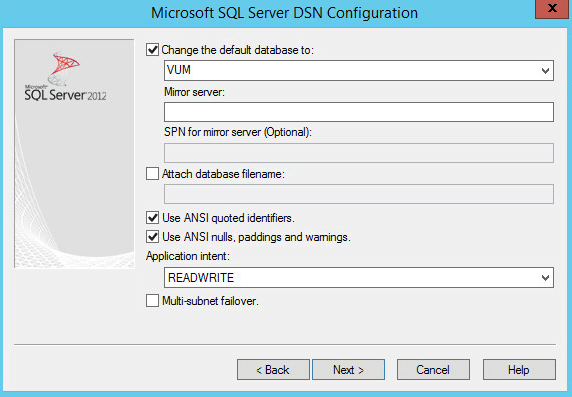
  6. From the default database drop down menu select the name of your VUM database and click Next.
    Add ODBC step 5
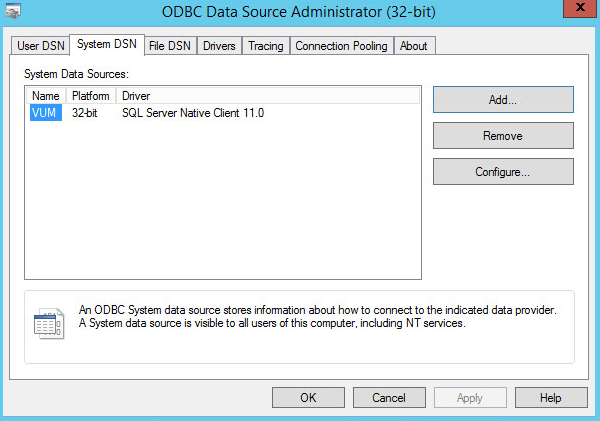
  7. Finish the configuration and now we’re ready to actually install VUM!
    Add ODBC step 6

Installing VMware Update Manager

For this install I used the latest ISO currently available at the time of writing this (VMware-VIMSetup-all-5.5.0-1750795-20140201-update01.iso).

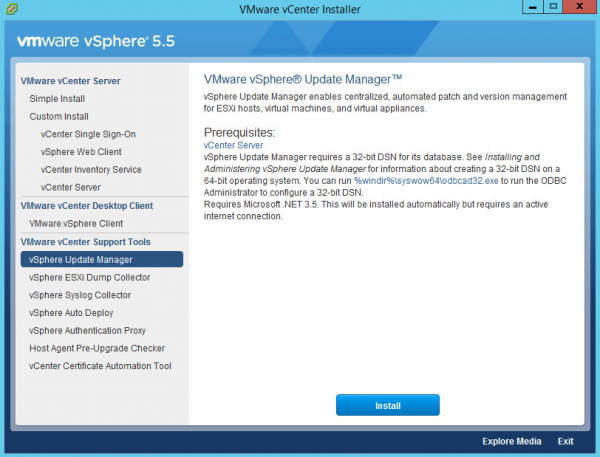
  1. Mount the ISO image to your VM which should start the VMware vCenter Installer, select “vSphere Update Manager” and click on Next
    vSphere installer
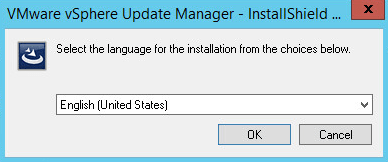
  2. Select the language of your choice and click on Ok.
    Installing vSphere Update Manager step 1
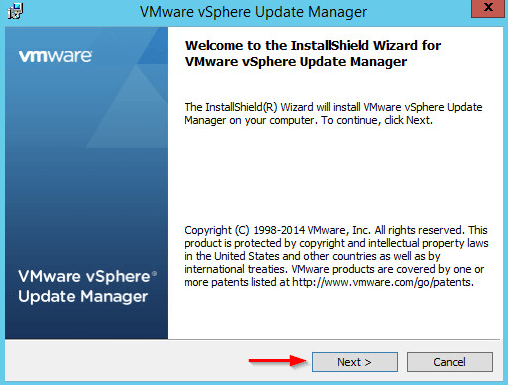
  3. Start the install wizard by clicking Next.
    Installing vSphere Update Manager step 2
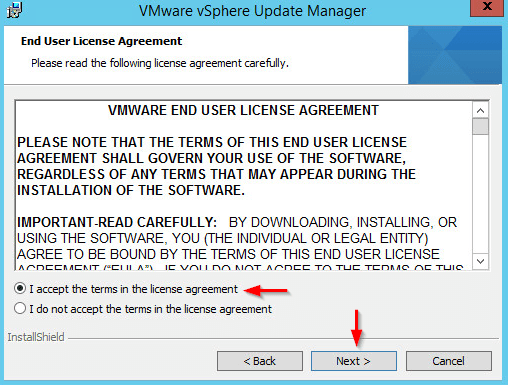
  4. Accept the license agreement.
    Installing vSphere Update Manager step 3
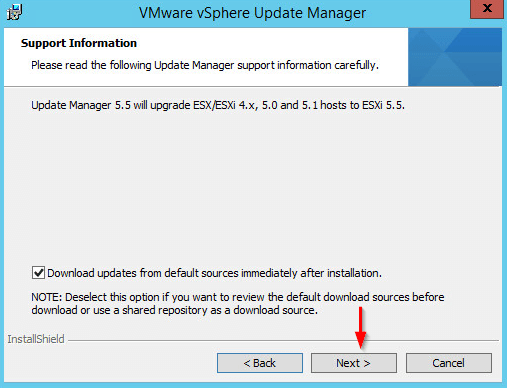
  5. I want VUM to download updates right away and so I left the default “Download updates from default sources immediately after installation” checked.
    Installing vSphere Update Manager step 4
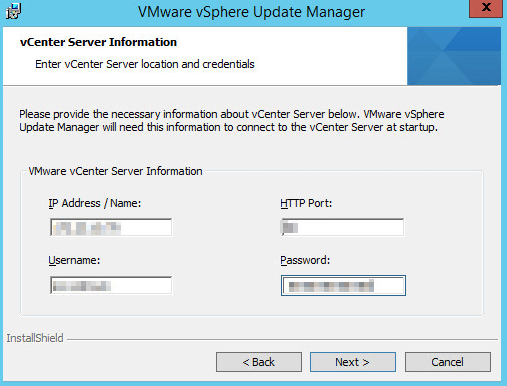
  6. VUM needs to register with vCenter, so enter the vCenter IP or Name along with any username and password that has administrator access on vCenter.
    Installing vSphere Update Manager step 5
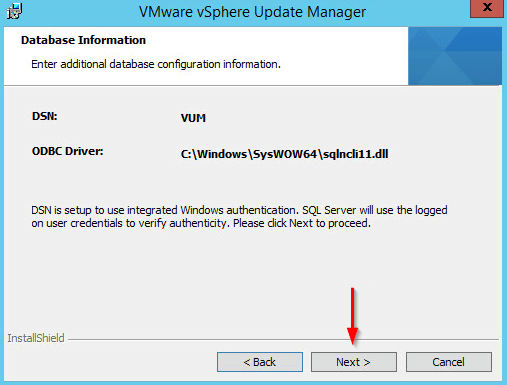
  7. Since we’ve opted to use a standalone SQL server for this install, select “Use an existing supported database” and use the previously configured DSN from the drop down (VUM).
    Installing vSphere Update Manager step 6
  8. Summary of database configuration.
    Installing vSphere Update Manager step 7
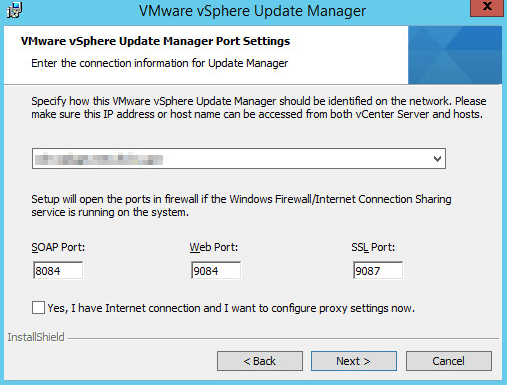
  9. Enter the IP or name of your vCenter server, I’ve used the FQDN name in this case.
    Installing vSphere Update Manager step 8
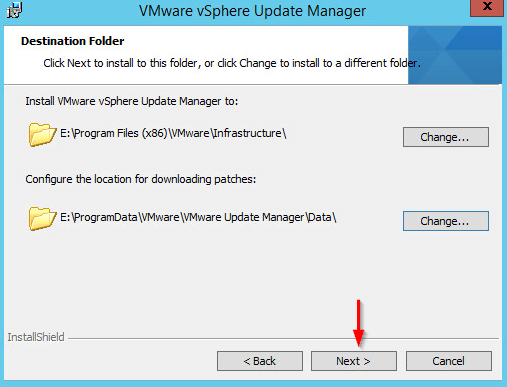
  10. Neither of my drives on the VUM VM have have 120GB or more free space and thus the installer shows this warning message. It’s okay, just click Ok to continue.
    Installing vSphere Update Manager step 9
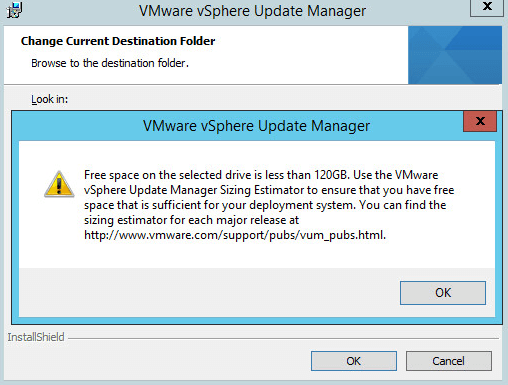
  11. I added an 80GB drive to the VM and changed the destination folder to the secondary drive. You don’t have to change the destination if you don’t want to. Click Next.
    Installing vSphere Update Manager step 10
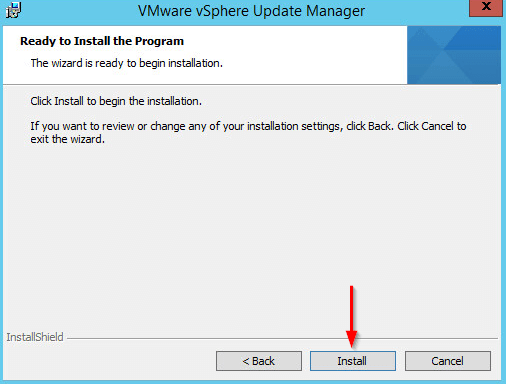
  12. To start the installation click on Install
    Installing vSphere Update Manager step 11
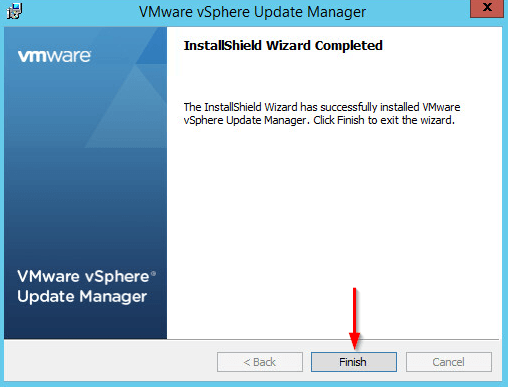
  13. That’s it, click on Finish.
    Installing vSphere Update Manager step 12

Now that the install for Update Manager is complete, log into the vSphere client and confirm the “VMware vSphere Update Manager” plugin is listed.

vSphere Update Manager plugin installed

You’ve now installed vSphere Update Manager and are ready to start upgrading and patching your hosts. If you need help with that I’ve already posted about that earlier in my Upgrade ESXi host to ESXi 5.5 using VMware Update Manager 5.5 post.

Enjoy!

Similar Posts

  • Increase incremental backup speed by enabling CBT

    In a recent VMware environment I was working in, we noticed that our incremental backups was taking a long time (like up to 7-8 hours) to complete. After digging around it was found that VMware actually has a feature built-in since version 4 called Change Block Tracking (CBT). CBT will track any blocks that were changed since the last backup and tag them and stores the information in a -CTK file. The obvious benefit is that now the third party software only backs up the changed block and not the entire VM each time, reducing the amount of data being backed thus speeding up backups and even lowers the CPU utilization on the VM host.

    CBT is disabled by default though there are some backup tools that will enable it automatically or you can enable it manually which can easily be done following these steps:

    Read More “Increase incremental backup speed by enabling CBT”

  • vSphere 5.5 Update 1 has been released, includes VSAN.

    VMware vSphere 5.5 update 1

    VMware has officially released vSphere 5.5 U1 which includes a number of improvements, fixes, and most excitedly the production ready version of VSAN!

    What’s new

    • vCloud Hybrid Service vSphere Client Plug-in, is now available in vSphere Web Client.
    • vCenter Server is now supported on Windows Server 2012 R2.
    • A number of resolved issues

    Read More “vSphere 5.5 Update 1 has been released, includes VSAN.”

  • Thank you VMware Community!

    VMware vExpert 2014

    So far, 2014 has been a very rewarding year for a number of reasons, two of which has happened in just a week or two span. First, Eric Siebert (@ericsiebert) announced on March 27th, this years results of the 2014 Top VMware & Virtualization Blog voting. My first year entered into voting and made it to 71st place! A huge thanks goes out to not only Eric but just as much so to everyone who voted for me!

    To top it off, yesterday VMware announced 2014’s first quarter VMware vExpert list. While vExpert isn’t a technical certification or even a general measure of VMware expertise. The VMware judges selected people who were engaged with their community and who had developed a substantial personal platform of influence in those communities. There were a lot of very smart, very accomplished people, even VCDXs, that weren’t named as vExpert this year. VMware awarded this title to 754 people this year and on that list of many impressive names you’ll find yours truly, Michael Tabor!

    I’m both honored and humbled by both lists. It’s a great feeling to be recognized by not only my peers through the voting in the Top vBlog but also by VMware themselves through the vExpert title.

    So again THANK YOU very much to the entire VMware community, a spectacular community indeed, and congratulations to everyone else that made the Top vBlog and vExpert lists!

  • How to use Site Recovery Manager DR IP Customizer

    As one of the tasks given to me include protecting critical virtual machines via Site Recovery Manager (SRM) I ran into an environment that needed to be protected and have static IP’s assigned to them. The environment consists of about 15 VM’s, all of the VM’s each have 5 NIC’s with two of the VM’s having 9 NIC’s – that’s a lot of NIC’s to manually configure on both the Protected and Recovery side in SRM.

    Looking through the SRM Documentation I was able to see that VMware has graced us with a wonderful tool to greatly speed up this process, dr-ip-customizer.exe!

    How to use VMware DR-IP-Customizer

    Read More “How to use Site Recovery Manager DR IP Customizer”

  • How to fix vRealize Orchestrator 6 appliance, weak ephemeral Diffie-Hellman key

    vrealize orchestrator chrome error

    I’ve recently deployed the vRealize Orchestrator appliance (6.0.2) and noticed right away that my default browser Firefox, would not load the Orchestrator appliance web panel. Firefox always complained about a weak Diffie-Hellman key.

    An error occurred during a connection to ip-address:8281. SSL received a weak ephemeral Diffie-Hellman key in Server Key Exchange handshake message. (Error code: ssl_error_weak_server_ephemeral_dh_key)

    At the time I simply ignored it and just tried Google Chrome which it worked fine. That was until the latest release also broke with the same type of error message:

    Server has a weak ephemeral Diffie-Hellman public key“.

    I now had a problem and contacted VMware support, below is the very easy fix to make vCO 6 work in both the latest version of Firefox and Chrome!

    Read More “How to fix vRealize Orchestrator 6 appliance, weak ephemeral Diffie-Hellman key”

Leave a Reply

Your email address will not be published. Required fields are marked *

2 Comments