VMware ESXi 5 fails to install on Intel NUC, “No Network Adapters” error
If you use the VMware ESXi 5 ISO image and try to install it on an Intel NUC you’ll receive the following error during the install.
No Network Adapters
No network adapters were detected. Either no network adapters are physically connected to the system, or a suitable driver could not be located. A third party driver my be required.
Ensure that there is at least one network adapter physically connected to the system before attempting installation. If the problem persists, consult the VMware Knowledge Base.
The “No Network Adapters” on the Intel NUC error message during the ESXi install is because VMware removed a number of drivers (non-enterprise drivers) from their ESXi 5.x image and in order to use the Intel NUC as an ESXi host you need to create a customized ESXi image with the NIC drivers added to the image.
This is something I briefly mention in my ESXi Homelab Upgrade post, but still receive a number questions about how add the driver or asking for more details on how exactly to add the Intel NUC (Intel 82579LM) NIC adapter drivers to the ESXi image.
Customized VMware ESXi 5.5 ISO for Intel NUC
There are several ways to add the Intel NUC network adapter driver to an ESXi image. I’m going to show the way I’ve done it for my three Intel NUC hosts that have worked perfectly for me each time.
First we’ll need to download a few things before we start…
- VMware ESXi 5.x ISO
- Intel net-e1000e-2.3.2.x86_64.vib NIC driver (mirror)
- ESXi-Customizer and extract it (double click on ESXi-Customizer-v2.7.2.exe)
Now lets begin…
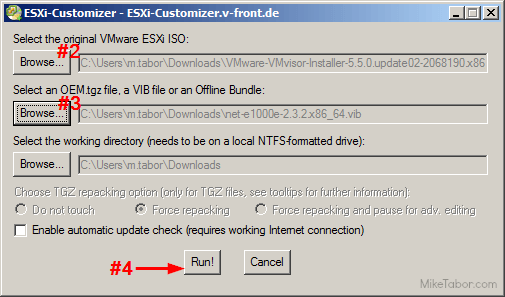
- Open ESXi-Customizer.cmd
- Click on Browse to the location of the ESXi ISO image.
- Click on Browse to the location of the Intel net-e1000e-2.3.2.x86_64.vib file.
- Click RUN.
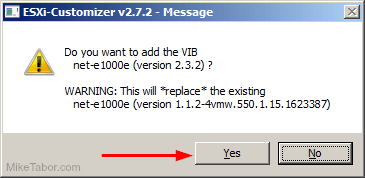
Note: If you’re prompted to replace an existing driver, click on YES.
You should now have a new ISO image called “ESXi-5.x-Custom.iso” with the needed Intel NIC driver added into the image!
Or another method…
Using ESXi-Customizer-PS to create customized ESXi image
Another method to creating a customized ESXi ISO image with Intel NIC drivers is to use the ESXi-Customizer-PS script.
ESXi-Customizer-PS will automatically create an ESXi ISO image, using the latest version and patch level and with a few extra switches can also add a new Intel net-e1000e-3.1.0.2 NIC driver.
You’ll need PowerCLI 5.1 or better and to download ESXi-Customizer-PS.
- Open PowerCLI
- Navigate to where you saved the ESXi-Customizer-PS script. In my case “C:\scripts”
- Type in the following command:
.\ESXi-Customizer-PS-v2.3.ps1 -vft -load net-e1000e - After just a minute or two the script will be completed with the customized ESXi ISO image saved to the same location of your ESXi-Customizer-PS is located!
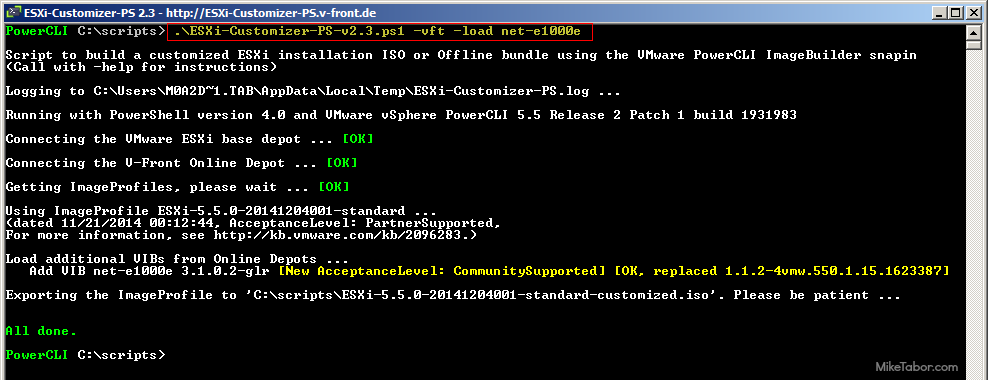
Super easy and quick. Plus saves you the time having to manually download the ESXi image yourself and spits out an ESXi image that’s the lastest build and patched version is pretty nice (there are switches to get older versions if you needed).
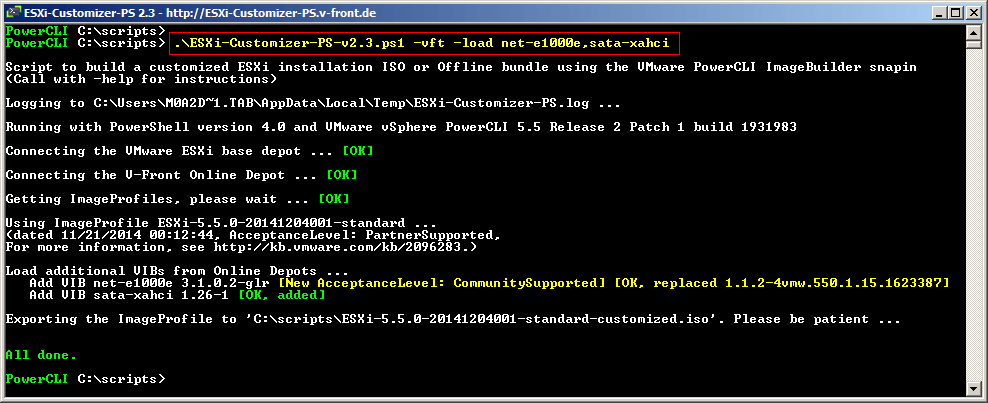
Adding SATA AHCI drivers for 4th gen Intel NUC’s using ESXi-Customizer-PS
On the Intel NUC 4th generation models an extra SATA AHCI controller driver is required if you plan on using local storage. Adding that driver using the ESXi-Customizer-PS script is incredibly easy by just adding a “,sata-xahci” to the existing command, as shown below.
You’ll need PowerCLI 5.1 or better and to download ESXi-Customizer-PS.
- Open PowerCLI
- Navigate to where you saved the ESXi-Customizer-PS script. In my case “C:\scripts”
- Type in the following command:
.\ESXi-Customizer-PS-v2.3.ps1 -vft -load net-e1000e,sata-xahci - In just minutes the script will download the latest patched version of ESXi 5.5 with the Intel NUC network adapter and SATA ahci drivers.
Create bootable USB drive using customized ESXi image
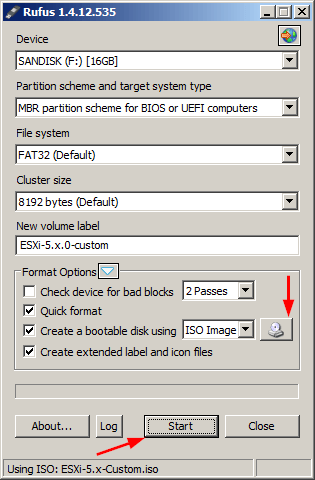
Once you have the customized ESXi image you’ll likely want to create a bootable USB thumb drive using the new ESXi image. The tool I’ve been using recently, and is very fast, is a tool listed in my Tools page called Rufus.
- Insert your USB thumb drive
- Open Rufus.
- Click on the CD icon next to “Create a bootable disk using” and navigate to your newly created ESXi-5.x-Custom.iso image.
- Then click on Start.
In about 1 or 2 minutes you’ll have an USB thumb drive that’s bootable with your new ESXi image and the Intel NUC NIC driver. Boot from the USB drive and run the ESXi installer. The installer will be loaded into memory which allows you to then install ESXi over top of the ISO image and you’re ready to go!
Regarding USB thumb drives, I’ve been using 8GB SanDisk cruzer blades for some time now with no problems.
Hope this helps. Please post in the comments section if you have any questions!