How to create a virtual machine on a Synology NAS
A common request I’ve seen among Synology NAS owners, is the ability to run virtual machines directly from their NAS. Recently Synology released a beta version of their new Virtual Machine Manager package that allows users to do exactly that.
Below I’ll detail how to install, configure, and create a Windows 10 virtual machine on my Synology DS1815+.
Before getting started, your Synology NAS not only needs to be compatible but also needs to meet a couple requirements:
- Have at least one Btrfs volume
- 4GB or more memory (now might be a great time to check out my Upgrade Synology DS1815+ to 16GB RAM post)
- Running DSM 6.1.1 or better.
You’ll also want to have a couple ISO images downloaded and ready; Windows 10, Synology Guest Tools, and Windows Virtio Drivers.
With that, lets get started!
Install and configure the Virtual Machine Manager package
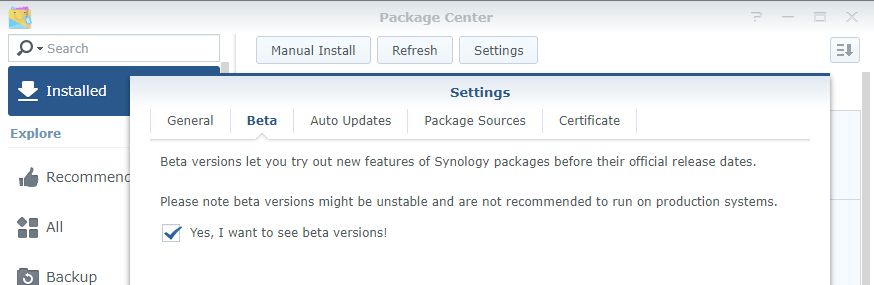
- The Synology Virtual Maching Manager package is still in BETA so we’ll first need to set the Package Center to display BETA packages. Do so by opening the Package Center and clicking on Settings > then going to the Beta tab and checking “Yes, I want to see beta versions!“.
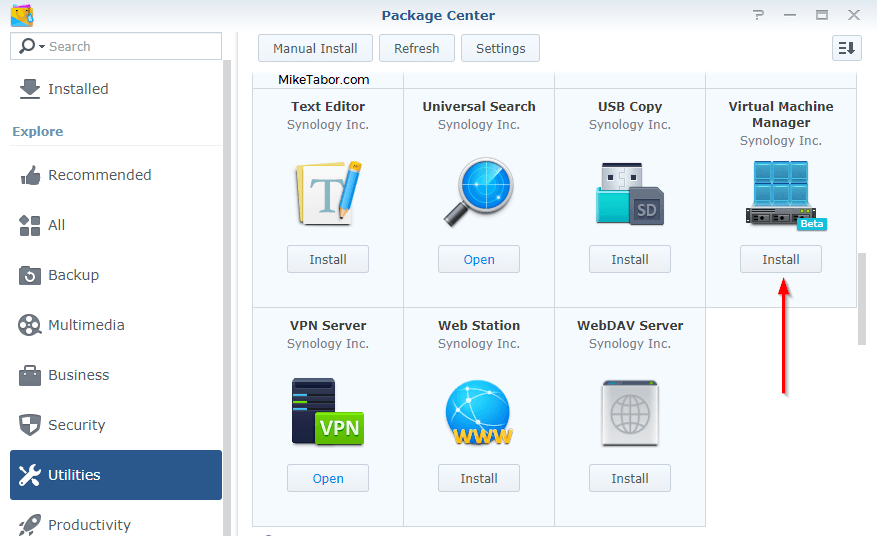
- Now go to Utilities, find Virtual Machine Manager and click on “Install“.
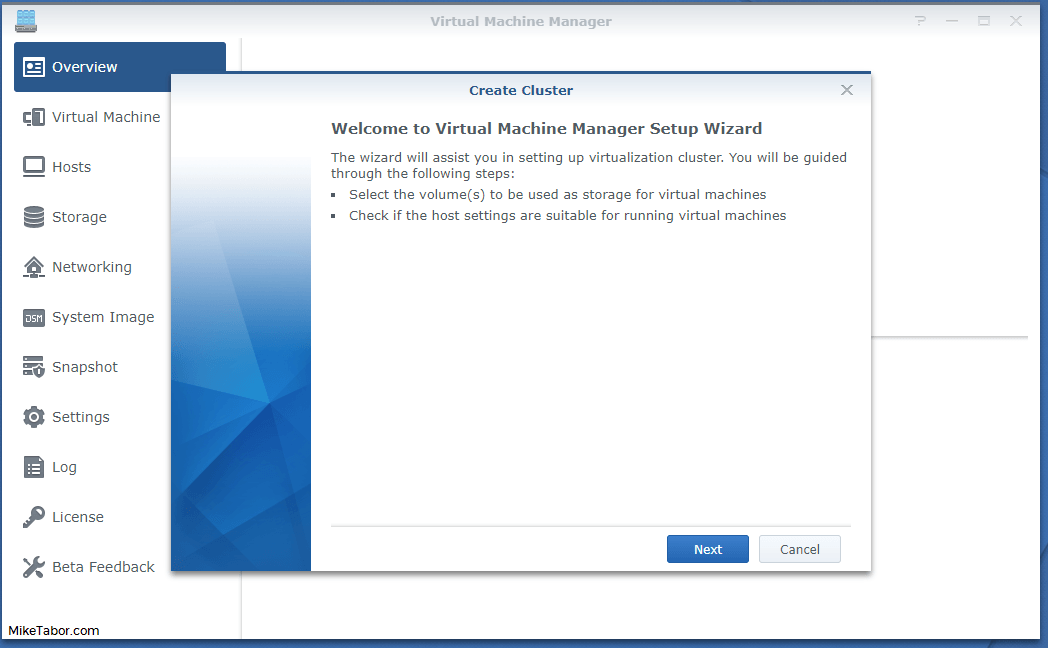
- Open the Virtual Maching Manager package and you’ll be prompted to begin the Virtual Machine Manager setup wizard. Click on “Next“.
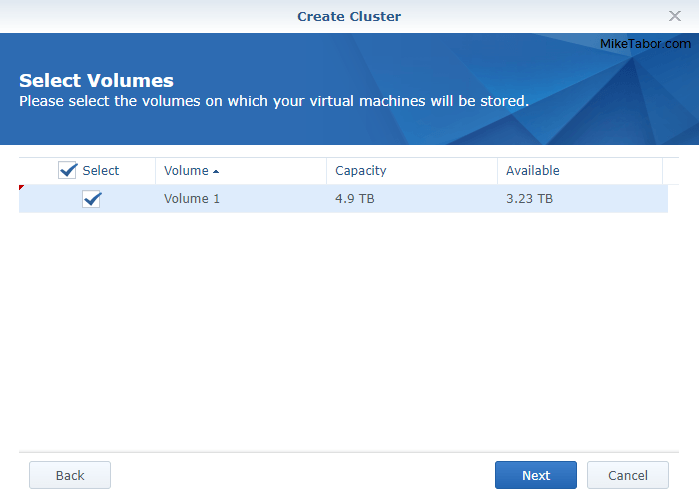
- Select which volume(s) you would like for your virtual machines to be stored and click “Next“.
- Select which network interface you want to use then click on “Next” and click on “Yes” to the confirmation prompt.

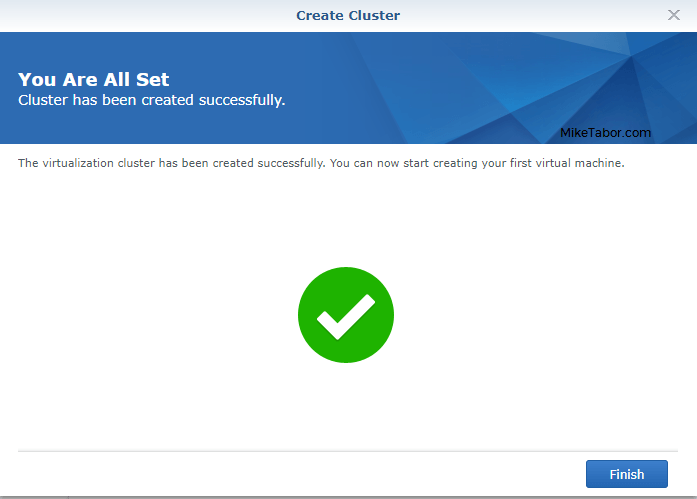
- After the services have been restarted from the step above you should get a “You are all set” message like below, click on “Finish”
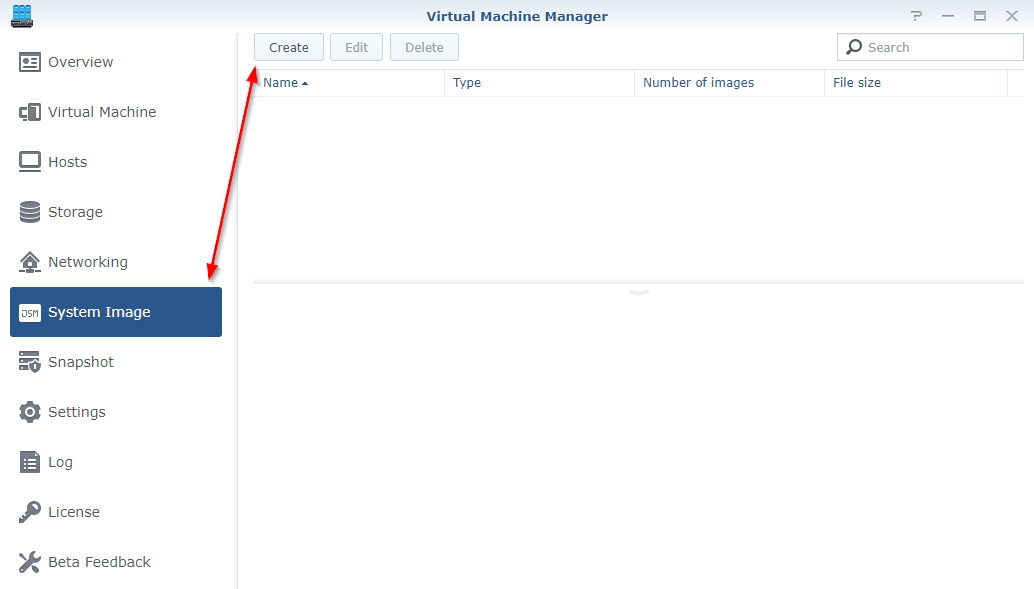
- We now need to upload the ISO’s, from the getting started section above, to the Synology Virtual Machine Manager. So click on System Image and then click on “Create“.
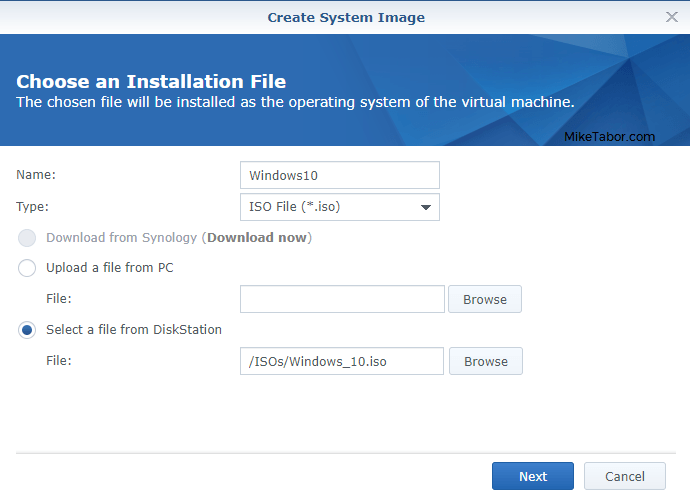
- Enter a name for the image, change the type to ISO File and select the ISO from where it’s located (either your local PC or the Synology NAS) and clikc on “Next“:
- Next select where the system image should be stored and click on “Apply”.

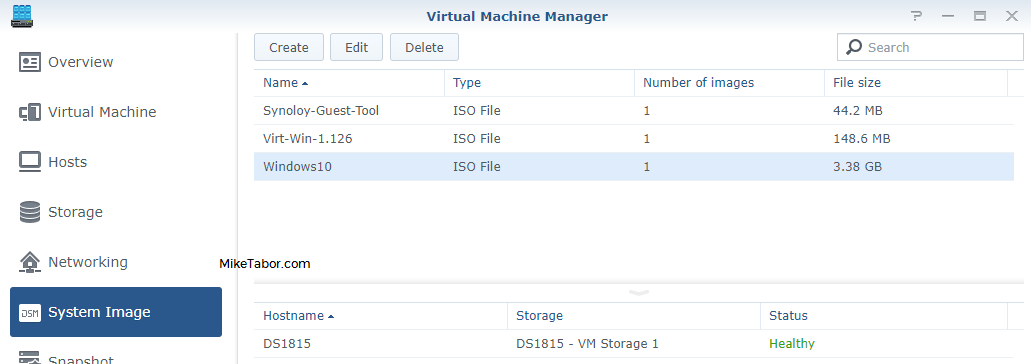
- You’ll need to repeat steps 7-9 for each of the three ISO’s – operating System, Synology Tools, and Virt-Win drivers. Your system images tab should look something similar to below:
At this point the Synology Virtual Machine Manager package should be installed and ready to start creating virtual machines.
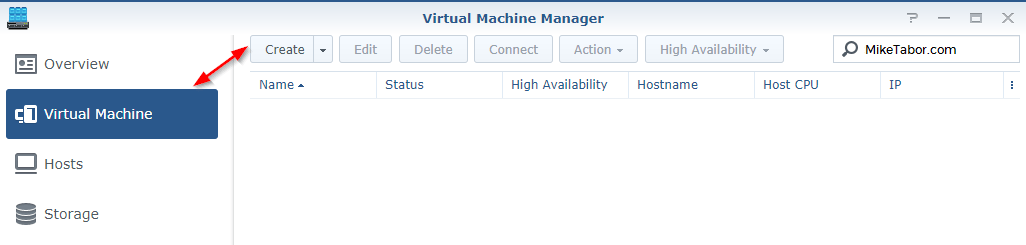
Creating a virtual machine on a Synology NAS
- In Virtual Machine Manager click on “Virtual Machine” then click on “Create“.
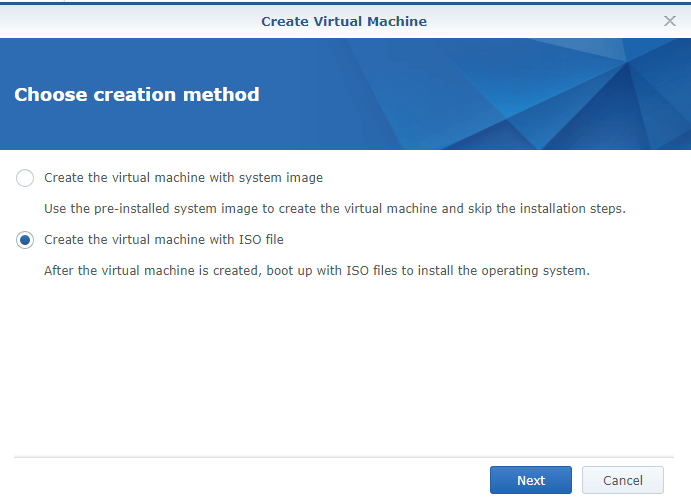
- Next, select “Create the virtual machine with ISO file” and click on “Next“.
- Now configure the name and specs of your new virtual machine. Make sure you select the Windows 10 image for the ISO file for bootup and the Synology Guest Tools for the additional ISO file as shown below:

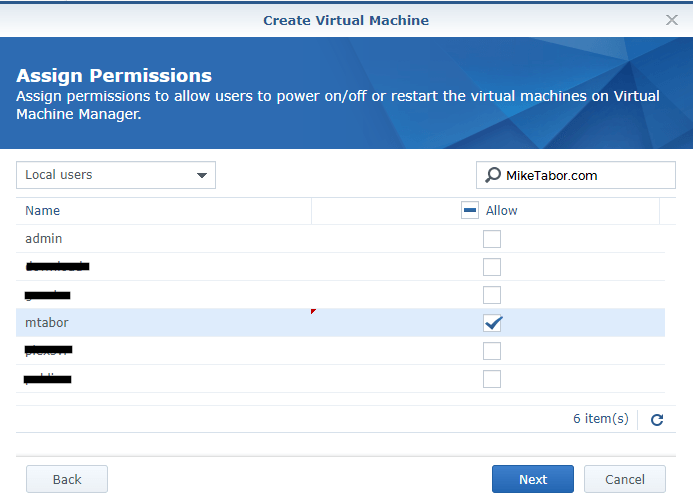
- Assign what users you want to have access to the virtual machine and click on “Next“.
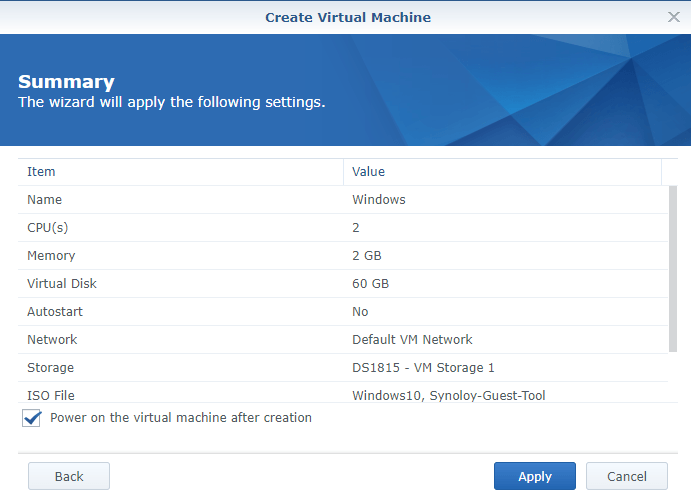
- On the summary screen go ahead and select “Power on the virtual machine after creation” and click on “Apply“.
- After a few seconds your newly created virtual machine should have the status of “Running”, if so then click on “Connect“.

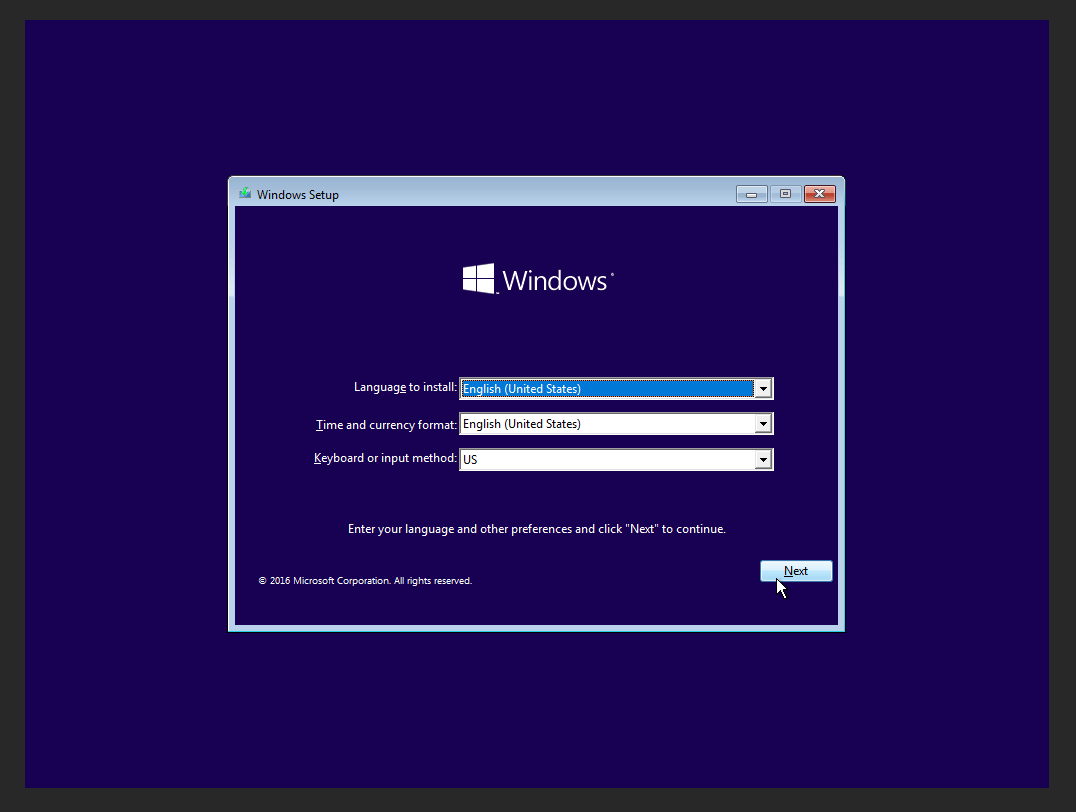
- After clicking on connect your browser should open a new tab with a console to your new virtual machine with the Windows 10 installer running. Go ahead and click on “Next”.
- When selecting which type of installation you want, select “Custom: Install Windows only“. The installer will then ask you where to install Windows. Notice the blank window? We need to load the Synology drivers so that Windows can see the drive. So click on “Load Drivers”.
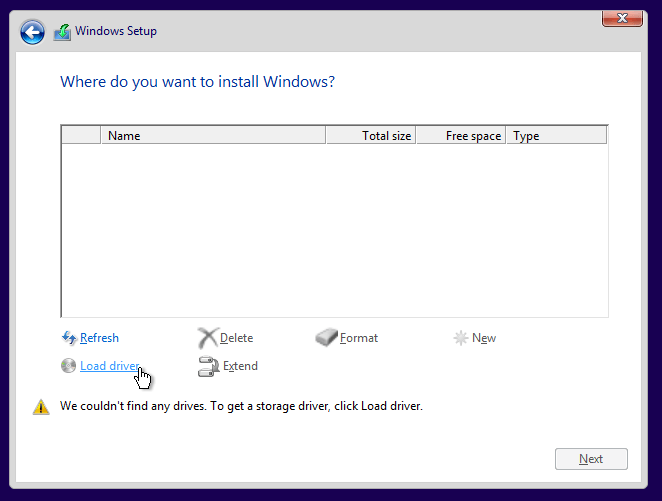
- From the browse dialog box select the “SYNO_INSTALLER” drive (in my case the E: drive) and select amd64 folder under Windows_Virtio_SCSI_Driver > Windows_10 folder.

- At this point the Windows 10 installer will see the provisioned drive and is ready for install.

- Now complete the Windows 10 install as normal.
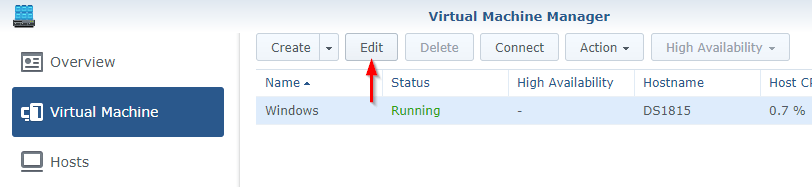
- After the install is complete you’ll notice the network interface card driver along with a couple other drivers are missing. To install those drivers we’ll need to attach the Windows Virtio Drivers ISO, so back on the Synology Virtual Machine Manager click on “Edit“.
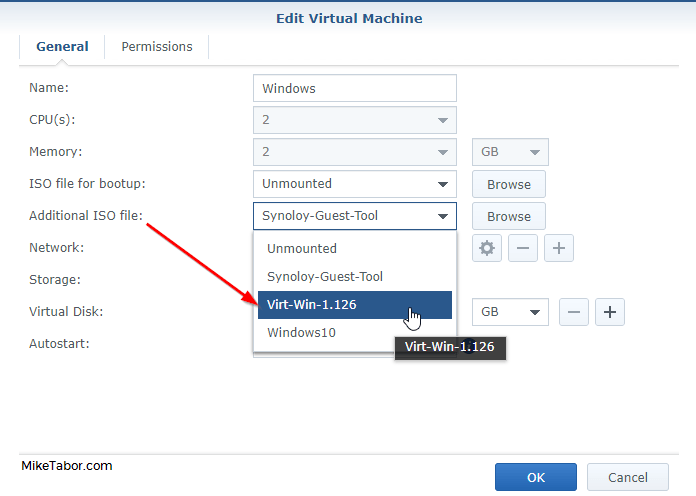
- Now change the ISO file for bootup to “unmounted” and change the Additional ISO file to the “Virt-Win” ISO that we uploaded in steps 7-9 above and click on “OK“.
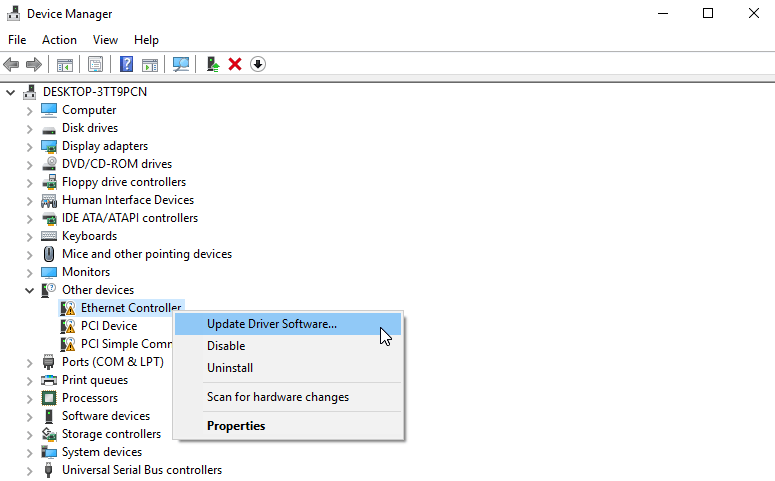
- Go back to the Windows 10 virtual machine browser tab and then right click on the Start menu and click on “Device Manager“.
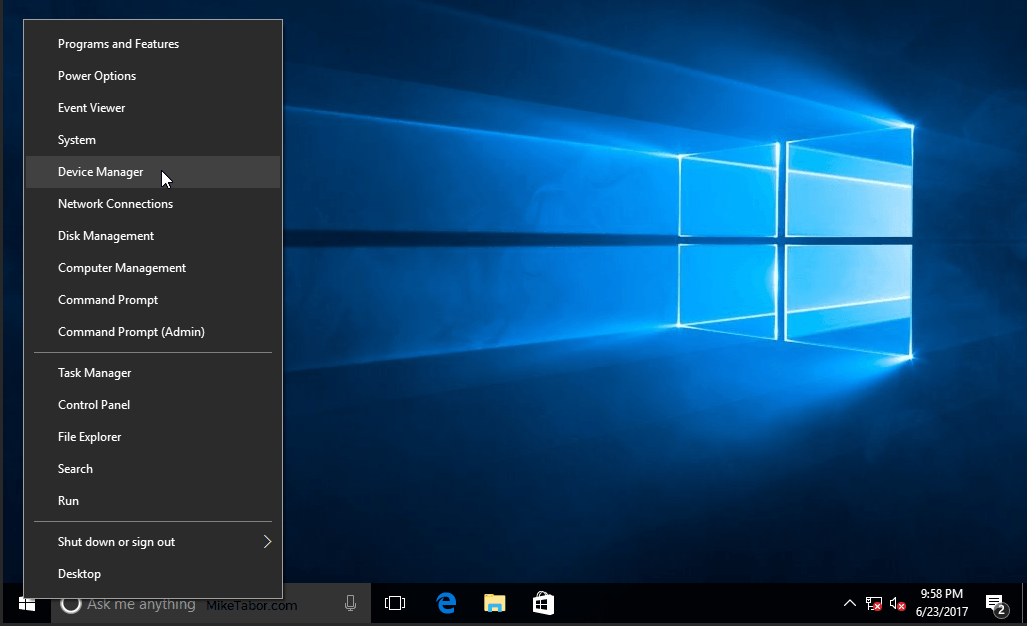
- Now right click on Ethernet Controller and click on “Update Driver Software…”.
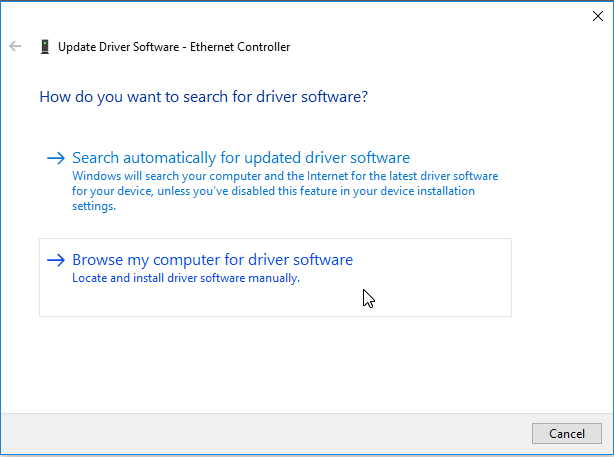
- Select “Browse my computer for driver software”.
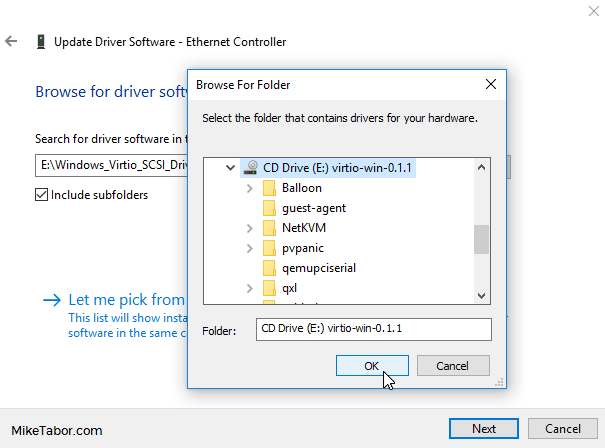
- Browse to the virito-win drive, in my case the E drive.
- After a few seconds Windows will locate the driver and prompt you to install the driver. Click on “Install”.

- Repeat this process for the remaining two devices listed under “Other devices”. Your Windows 10 virtual machine is now ready for use!
That’s it, now you can access the virtual machine using RDP, Teamviewer or any other remote access tool you’d like. Or you can simply use the VM through the browser tab if you’d like instead.
This is really cool, Mike. I had no idea about this until I saw your article.
Thanks @chipzoller:disqus. I’ve been pretty impressed how well the VM’s run on the Synology. Still want to get some SSD’s in the NAS and test again.
Great to see your post. Really cool. One question: is that then possible to install MSOffice on that Windows 10 virtual machine
Absolutely. The only thing that probably won’t run very well is going to be applications that require 3D graphics such as games and so on. Otherwise the machine operates like any other virtual machine.
Great. Will try it this week. No Games for me then no stress. Thanks
does this vm have access to my Nas files? if yes can i install crashplan on it and start backing up my Nas directly from Synology?
Great tutorial, thanks for the effort!
Hi Mike,
nice article, thanks. Have you any idea why I can’t have any control on USB ports? Thanks in advance for your answer
There’s actually a msi installer inside Synology Guest Tool that helps you install all drivers you need.
In other words, you don’t need to download virtio-win iso.
https://www.synology.com/en-us/releaseNote/WinVirtioDriver
After creating the W10 VM, is it possible to increase the allocated memory from 2GB (in your example) to more (after upgrading to 16GB)?
@disqus_7hN4W1JUWB:disqus yes you can allocate more than 2GB to a VM so long as your Synology has more than 2GB to give. Make better use of that 16GB upgrade I wrote about sometime ago. :)
-Michael
It seems once the VM is created the allocated RAM cannot be changed anymore. So good that I waited until the 16GB modules arrived and that upgrade went fine according to your other posting. Thanks!
It can be upgraded as a post-step, you just need to shutdown the VM first.
I’m really interested in giving this a go but my setup is based on a ext4 formatted system running in SHR so can’t install to the internal volume. I thought I’d add an external drive which was successfully formatted in btrfs via gparted but I don’t seem to be able to get virtual machine manager to recognise the drive. Is there anyway around this? I’ve read elsewhere there is no ext4 to btrfs conversion/migration tools out there. The only solution I’ve seen would be to backup the data and recreate the volume as btrfs :(
Any help greateful.
Ade,
I’m not aware of any type of conversion. As you know your best bet is to clean off the volume and re-create it. If I come across anything different I’ll pass it along.
-Michael
Hi Mike, can I ask what hard disks you were using in your test ? I’m having a hard time finding any info on whether 5900 rpm disk are ok or whether 7200 rpm or higher disk are an absolute must…
Hi Mike! Nice article and walk through!
I am a new owner to Synology NAS and have the cheaper version, but I was wondering if there is an upside or performance increase by using the Synology VM software over a using the synology as a storage location for a VMWare workstation VM and simply accessing it over the network?
Bill, the biggest benefit would be the CPU and Memory resources to run the VM would not be taken up on the Synology itself but instead whatever machine you’re running VMware Workstation on.
This could be a very big benefit if you have a lower-end Synology NAS.
Thank you for this how-to Mike. I would like to do P2V of some Windows 10 machines, Do you have any how-to’s available for that or do you have any tool recommendations? I am trying to use disk2vhd and do an import but haven’t had any luck yet.
You can use VMware Converter to create a virtual machine from a physical then use the Import from vmdk function to import the machine into Synology VMM.
Hi Mike,
Thanks. Very helpful. My synology VM is working ok with windows 10. But I cannot use the installed imazing in my w10 vm as my laptop usb is not recognised by the vm w10! Any ideas how to get around this? Please help! This was the main reason I got this VM for backingup iphones and ipads!
hey mike,
great how-to’s.
im trying to create a vm from a disk image, not an iso.
can’t work it out (you’d think it would be simple???) any ideas?
Many simple tools to covert disk image to VDD or iso dependent on your OS. e.g. Disk2VHD from microsoft own website (search for this on microsoft.com), lots of other free utilities etc.
Hey Matt, if you have a disk image then once you created the “shell” of your virtual computer, you can use this method:
* Open Virtual Machine Manager
* Click Virtual Machine
* Click down-arrow on CREATE button
* Select Import, Import from Disk Image.
Mike – thanks for great article.
Do you know where Synology stores the VM and iso images?