How to Replace a Failed Hard Drive in a Synology NAS
Earlier this week I received a notification from my Synology NAS that a hard drive was failing. Right now in the middle of this COVID-19 pandemic, one thing I don’t need is my NAS down and the kids and wife unable to watch any shows or movies.
Luckily for me Synology has made drive replacement a breeze. Here is how to easily and very quickly replace a failed hard drive in your Synology NAS.
How to replace a failed hard drive in your Synology NAS
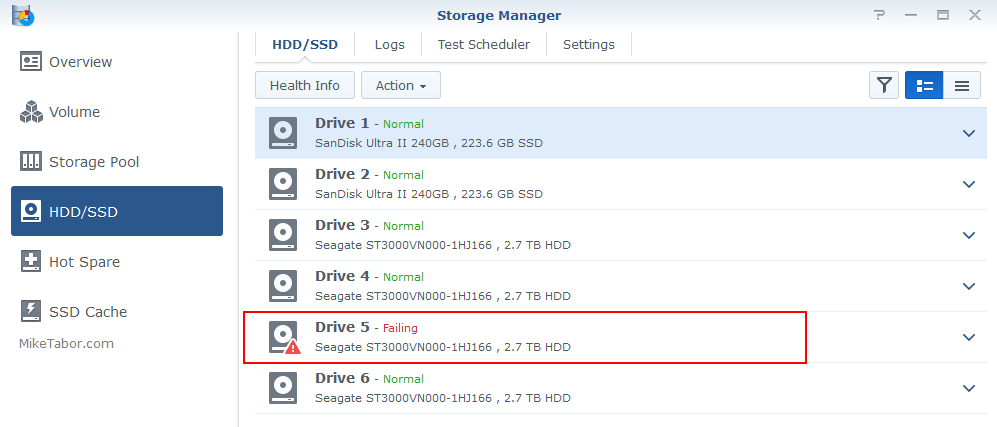
- The first step is to identity the hard drive this is failing. Open the Synology Storage Manger and click on HDD/SSD on the left. Here you can see that Drive 5 was failing on my Synology NAS:
- Now go to your Synology NAS and remove the failing drive and replace it with a new hard drive. I decided to replace my failing drive with a new Western Digital RED 4TB HDD.
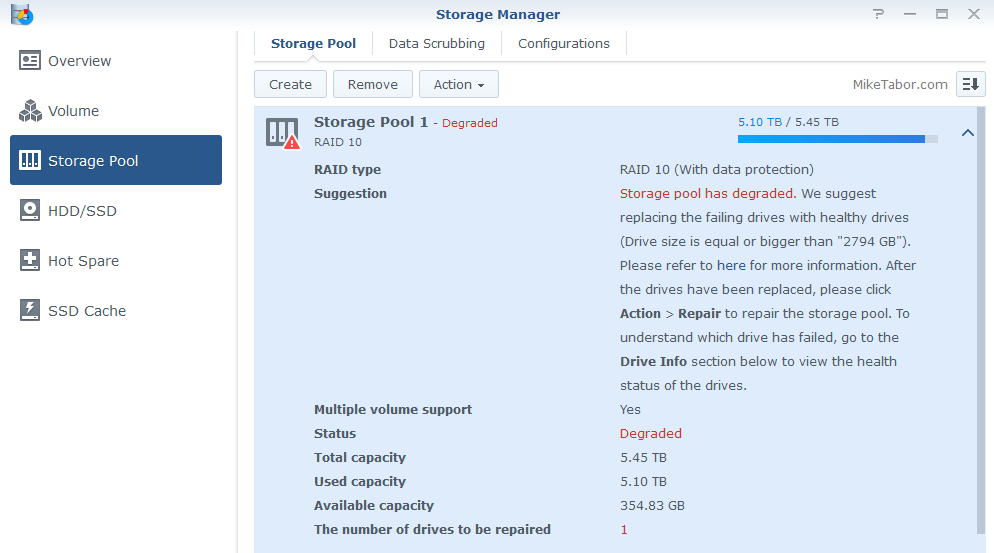
- At this point your Synology NAS Storage Pool will likely be in a “Degraded” state. It may even be beeping, if it hadn’t already. This is normal until we start the repair – so lets do that.
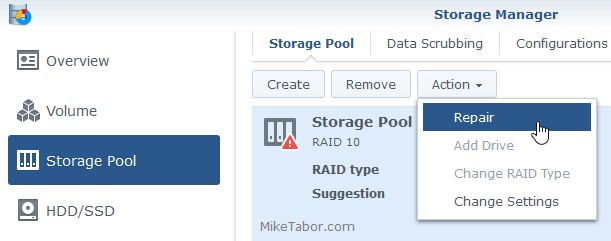
- In Storage Manager click on “Storage Pool” on the left and then click on Action > Repair:
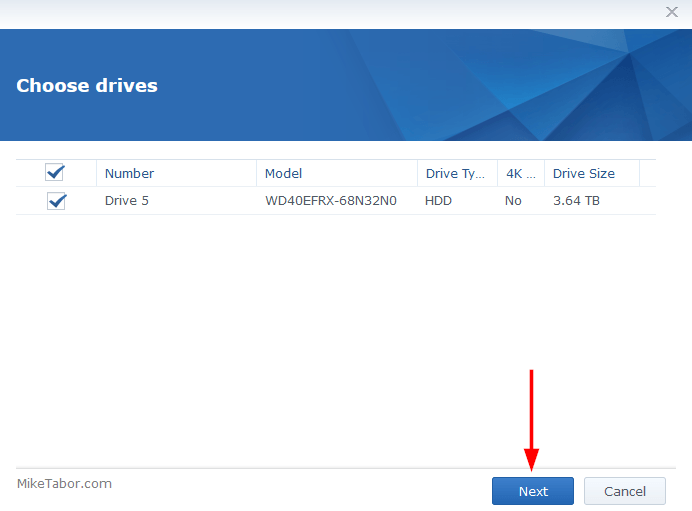
- Confirm the hard drive you’re going to use to repair the Storage Pool and click on “Next“.
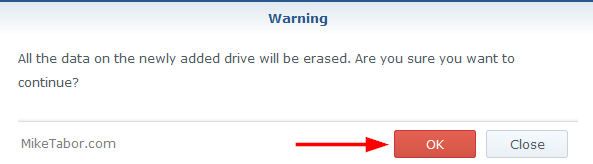
- Click on “OK” to acknowledge that any data on the new drive will be erased.
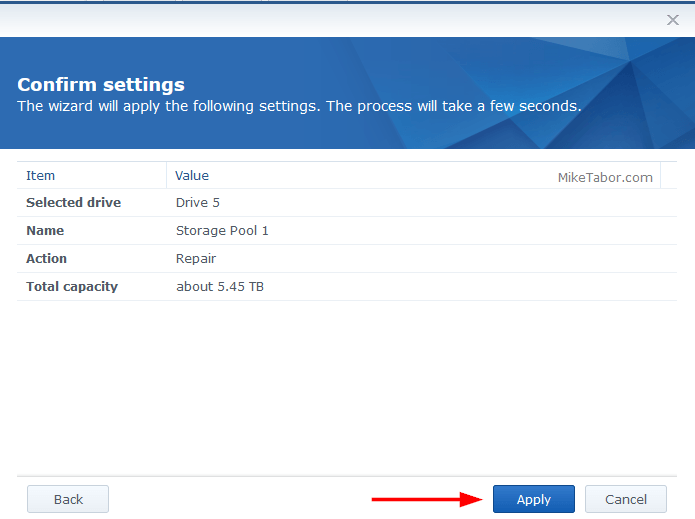
- Finally, click on “Apply” to confirm and start the repair.
At this point the pool will perform its repair and the new disk should be reporting as Normal. A much better sight then the Failing state it was in earlier. :)

Quick and easy, and in the case of my Synology 1815+ I didn’t even have to power the NAS down!
Can you do a slightly modified tutorial on how to swap a working drive in the RAID set with a higher capacity drive and see how that increases the size of the volume?
Also what happens when the NAS itself fails and the data on the RAID set needs to be recovered? I know that redundancy RAID is not a backup, but some people will find themselves in that situation. Can all the member drives in the SHR RAID be simply put into another Synology NAS, same or different model, and the RAID set will automatically recognize itself and resume operations? How about when one drive that was in the NAS but not part of the RAID set where it has been used as its own standalone drive configured as Basic to act as the place for Hyperbackup to put its data? I have been searching for tutorials on the Internet, particular on YouTube, on how to do this, but found none. It’s strange and sad that there are so many tutorials on how to set up RAID and backup data, not just in Synology but other NAS providers, but as far as I cannot find, detailed instructions on the reverse process of recovering the data. While everyone seems to be optimistic that they will never need to recover the data, I am pessimistic, expecting any day now, something will fail and I need to recover the data.
Jason,
The process to increase the RAID capacity is the same as I’ve outlined above. In fact the drive I used to replace the failing hard drive was larger than the one that was once in there.
As for your NAS itself failing, pending no issues with the drives themselves – yes you could put them in a new Synology NAS and restore everything from there.
Hope this helps!
-Michael
I did some testing on a 4-bay Synology NAS to find out where was the OS installed. Apparently, it is installed on all the drives in the RAID set. This means let’s say there are 3 drives in the NAS configured as SHR RAID. When two of those drives were taken out, obviously the data is gone because the RAID configuration only has 1-drive failure fault tolerance. However, the DSM still came up with all the customized settings such as user accounts. When the last original drive was removed and a blank drive was inserted, only the generic factory default DSM came up. What I forgot to test was this:
Let’s say I have a 4-bay NAS with 4 drives in it. Drive 1, 2, and 3 were configured as SHR with 1-drive fault tolerance. Drive 4 is standalone configured as Basic. Hyperbackup is used to backup some or all the shares from the drive-1-2-3 RAID set onto drive 4. Then drives 2 and 3 of the RAID set are removed. The data on the shares are gone because it only can recover from a 1-drive failure. However, the custom DSM configuration still remains because of the surviving drive 1. The question is can this DSM be used to recover data from drive 4, then after drive 2 and 3 are reinserted as blanks, the SHR RAID is rebuilt?
Mike,
I am trying to figure out this. If I will replace one of the four HDDs of my Synology 415+, do I have to use the same type of HDD with the one I replace, in terms of RPM and cache? Or it doesnt matter?
The existing one is WD 5400rpm and 64MB cache. Can I use HDD 7200rpm and 256 cache?
Panos,
You do not have to use the same type of drive. As I showed above, I went from a Seagate 3TB hard drive to a new Western Digital 4TB hard drive. It was a newer drive, different manufacture and different size.
For best performance, I would recommend slowly replacing each drive so they match.
-Michael
Thanks for the info and I have one question. Was the drive hot swapped or did you have to power off the unit to replace the drive ?
Carl,
I replaced the drive while the Synology NAS was still powered on. Though you could also power down the NAS to replace the drive if you’d like.
-Michael