Easy ESXi 5.5 upgrade via command line

ESXi 5.5 was just released general availability (GA) on Sunday (9/22) and I’m itching to upgrade the home lab to run the latest version with all it’s goodies. I wanted to try upgrading my hosts without having to go through the same process that I followed setting up ESXi on the NUC in the first place, injecting custom NIC drivers, etc.

Enter the command line…

  1. Move all VM’s from the host and then put the host into Maintenance Mode.
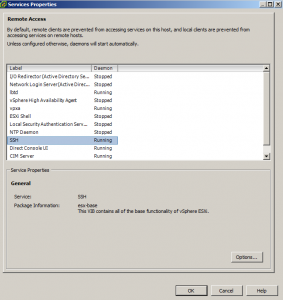
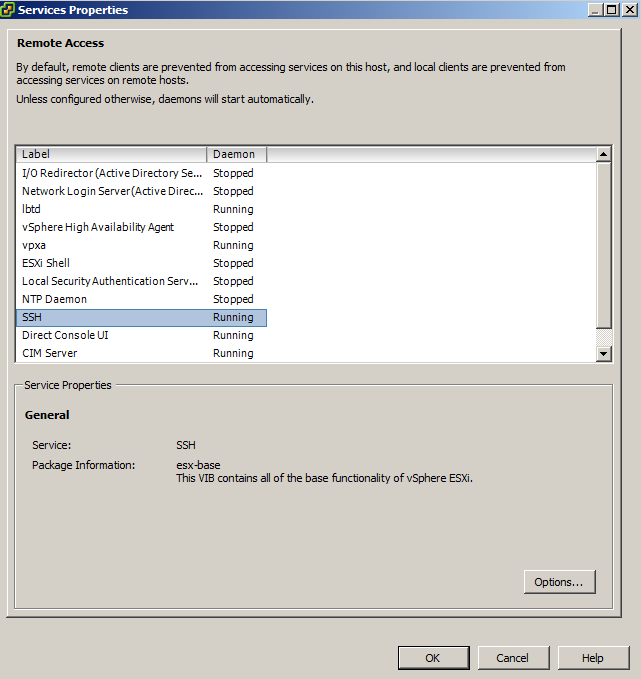
  2. Go to the Configuration tab > Security Profile and Enable SSH under Services.
    ssh enabled
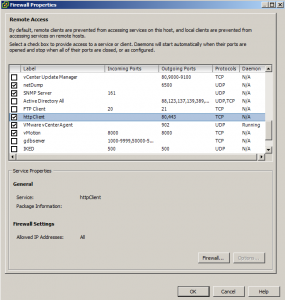
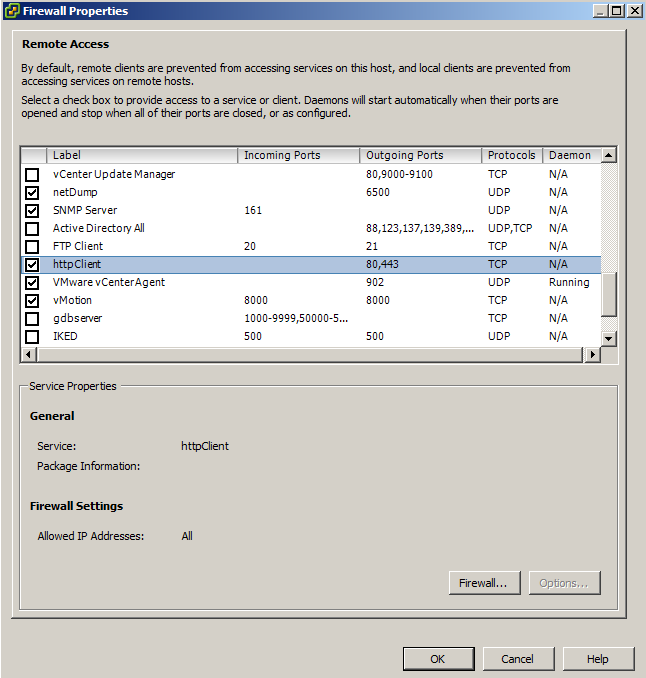
  3. Under Firewall, enable httpClient (outbound http).
    httpClient enable
  4. Open PuTTY (or other SSH client) and SSH into your host.
  5. Type the following command to download and install the update:
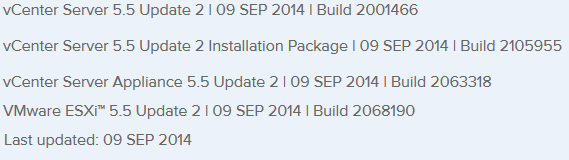
    esxcli software profile update -d https://hostupdate.vmware.com/software/VUM/PRODUCTION/main/vmw-depot-index.xml -p ESXi-5.5.0-1331820-standard
  6. Depending on your internet connection, this could take just a few minutes or longer. Once finished you should see the following:
    esxi update complete
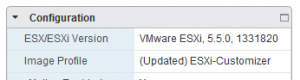
  7. Reboot your host then verify ESXi 5.5 is installed:
    esxi 5.5
  8. note: I did have to restart the virtualcenter service in order for the Web Client to show the updated version number.
    web client esxi 5.5

That’s it, it’s as simple as that! Because I ran the UPDATE command and not the INSTALL command, my existing injected NIC drivers for the Intel NUC remained in place. So a quick and easy upgrade for hosts with no CD-ROM or ability to virtually mount a CD image.

UPDATE:

View available upgrades

The steps above work perfectly for when you want to upgrade to ESXi 5.5, but what about when newer versions come out or you want to apply a different update? Simply run this command to view all available image profiles in the depot:

esxcli software sources profile list -d https://hostupdate.vmware.com/software/VUM/PRODUCTION/main/vmw-depot-index.xml

get image profiles

Then replace the file name in the command from Step 5 with the new/other image profile of your choice.

Similar Posts

  • My VMware ESXi Home Lab Upgrade

    Although the focus in my career right now is certainly more cloud focused in Amazon Web Services and Azure, I still use my home lab a lot.

    For the last 5+ years my home lab had consisted of using 3x Intel NUC’s (i5 DC53427HYE), a Synology NAS for shared storage and an HP ProCurve switch. This setup served me well for most of those years. It has allowed me to get many of the certifications I have, progress in my career and have fun as well.

    At the start of this year I decided it was time to give the home lab an overhaul. At first I looked at the newest generation of Intel NUC’s but really wasn’t looking forward to dropping over $1,300 on just partial compute (I’d still need to be RAM for each of the 3 NUC’s). I also wanted something that just worked, no more fooling around with network adapter drivers or doing this tweak or that tweak.

    I also no longer needed to be concerned about something that had a tiny footprint. I also questioned if I really needed multiple physical ESXi hosts. My home lab isn’t running anything mission critical and if I really wanted I could always build additional nested VMware ESXi hosts on one powerful machine if I needed.

    So in the end, the below is what I settled on. Replacing all of my compute, most of my networking and adding more storage!

    Read More “My VMware ESXi Home Lab Upgrade”

  • VMware ESXi 5 fails to install on Intel NUC, “No Network Adapters” error

    If you use the VMware ESXi 5 ISO image and try to install it on an Intel NUC you’ll receive the following error during the install.

    No Network Adapters

    No network adapters were detected. Either no network adapters are physically connected to the system, or a suitable driver could not be located. A third party driver my be required.

    Ensure that there is at least one network adapter physically connected to the system before attempting installation. If the problem persists, consult the VMware Knowledge Base.

    The “No Network Adapters” on the Intel NUC error message during the ESXi install is because VMware removed a number of drivers (non-enterprise drivers) from their ESXi 5.x image and in order to use the Intel NUC as an ESXi host you need to create a customized ESXi image with the NIC drivers added to the image.

    Read More “VMware ESXi 5 fails to install on Intel NUC, “No Network Adapters” error”

  • VMware Workstation 12 Pro Released

    VMware has just released a new version of Workstation in VMware Workstation 12 Pro. Workstation 12 Pro provides full support for Windows 10, including features such as Cortana and universal applications. As well as even larger virtual machines with up to 16 vCPU’s and 64GB of memory. Workstation 12 Pro even supports 4K displays and DirectX 10 and OpenGL 3.3

    You can even seamlessly drag and drop virtual machines between your PC and your internal cloud running vSphere, ESXi or another instance of Workstation. In addition, easily connect to vCloud Air and upload, run, and view virtual machines right from the Workstation 12 Pro interface.

    Read More “VMware Workstation 12 Pro Released”

  • My VMware View Windows 7 Optimization Guide

    These are the few steps I do when creating a new "Golden" image. Luckily I don’t have to do these steps all the time as I’ll create the "Golden" image when there is a new upgrade such as when we went from View 4.6 to View 5.0.1. I like to have a new fresh machine using new virtual hardware from the start. You could certainly just upgrade the virtual hardware on the "Golden" image, I just prefer to start clean.

    At any rate, here’s my list. Hopefully someone might find it somewhat useful and maybe even others can improve upon it.

    Preparing a new virtual machine

    1. Create New Virtual Machine – FILE > NEW > VIRTUAL MACHINE (CTRL+N)
    2. Under Configuration select CUSTOM.
    3. Select a Name, Folder, Host, Cluster, and Storage.
    4. Under Guest Operating System select Windows and then Windows 7 32bit under the Version drop down.
    5. Select which Network (VLAN) and under Adapter select VMXNET 3.
    6. Configure disk size to 30GB THIN provisioned.

    Read More “My VMware View Windows 7 Optimization Guide”

  • Increase incremental backup speed by enabling CBT

    In a recent VMware environment I was working in, we noticed that our incremental backups was taking a long time (like up to 7-8 hours) to complete. After digging around it was found that VMware actually has a feature built-in since version 4 called Change Block Tracking (CBT). CBT will track any blocks that were changed since the last backup and tag them and stores the information in a -CTK file. The obvious benefit is that now the third party software only backs up the changed block and not the entire VM each time, reducing the amount of data being backed thus speeding up backups and even lowers the CPU utilization on the VM host.

    CBT is disabled by default though there are some backup tools that will enable it automatically or you can enable it manually which can easily be done following these steps:

    Read More “Increase incremental backup speed by enabling CBT”

Leave a Reply

Your email address will not be published. Required fields are marked *

17 Comments

  1. Thank You. This took care of my issue of not being able to inject NIC drivers to 5.5 and only could on 5.1, this upgraded my NUC server and all is well.

  2. Is it strictly necessary to move all the VMs off the host, or is shutting them down and putting it in Maintenance mode sufficient?

    1. No it is not required that you move the VM’s off the host before upgrading them. I prefer to move all VM’s off in case something was to go wrong and so that I don’t have to power down the machines.

      Powering off the VM’s and putting the host into maintenance mode will work just fine.

      1. Okay; good. We’re SAN-less right now (have one sitting on the floor in my office waiting to be racked-and-stacked), so moving the VMs off the hosts is non-trivial. Much less work to just power them off and put the host into maintenance mode.

      1. Okay; and the argument to the -p flag (ESXi-5.5.0-1331820-standard) came from what source? I’m guessing it’ll always just be the current version + build #?

      2. Yeah, I guess I wasn’t asking so much about what the “-p” means (I could figure that), but rather, how you arrived at the “5.5.0-1331820-standard” – in other words, when ESXi 5.6 comes out (or whatever the next version will be called) and I want to replicate this, where would I need to go to determine what exact version number/build number to use in the command? It looks like I can just go to the MyVMWare site and snag the version + build number – just wasn’t sure if that was your process as well, or if there was a better way of arriving at it.

      3. The way I do it is by doing the same steps above (enable SSH and httpclient) and then run this command:

        esxcli software sources profile list -d https://hostupdate.vmware.com/software/VUM/PRODUCTION/main/vmw-depot-index.xml

        This will then display a list of all available images at depot. So when the new version of ESXi comes out you’d type the above, find the new name and then replace that name with the name I’ve supplied in the post.