How to setup NFS on Synology NAS for VMware ESXi lab
![]()
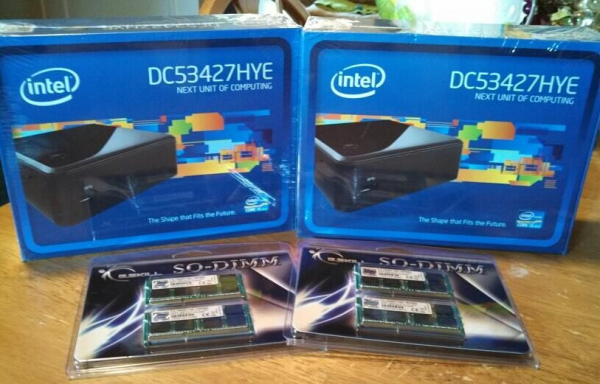
I’ve been asked several times how and why I setup my home lab to use NFS on my Synology NAS and thought a post detailing the steps would be best. First the why, when I purchased my Synology DS412+ about two years I recall seeing several people stating NFS was out performing iSCSI (like this post) on the Synology. It was strictly from reading other peoples findings that I started with NFS and have continued to use NFS without any issue. In fact I’ve been very happy with my DS412+ in a RAID 10 setup.
How I setup NFS on the Synology for my ESXi homelab is pretty simple as well.
Configuring Synology NFS access
- Log into the Synology DiskStation and go to: Control Panel > File Services – located under “File Sharing”.
- NFS is disabled by default so we need to enable it first. Expand NFS Services and check “Enable NFS” and click on Apply.

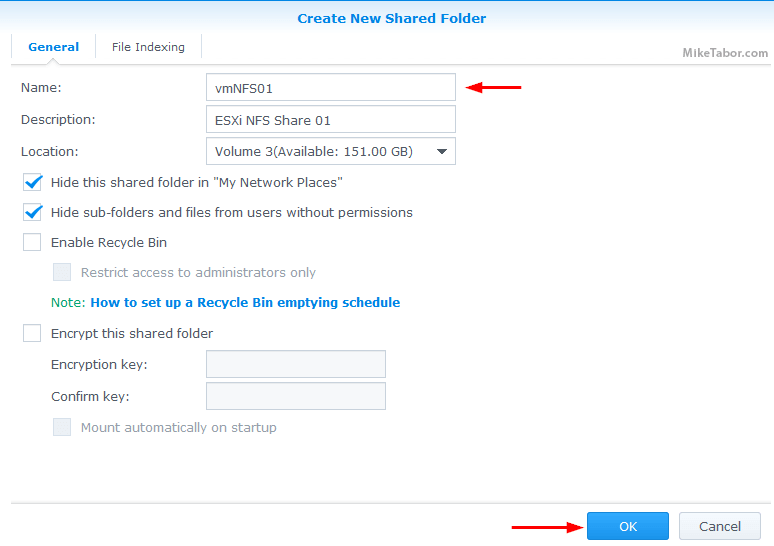
- From the Synology control panel to go “Shared Folder”. A name is the only required step, but I like to give it a description and hide the shared folder from my network places as well as hide files from users without permission. Then click on Ok.
- Once your folder has been created, go to the “Permissions” tab and change all users except your admin account to have “No Access“.
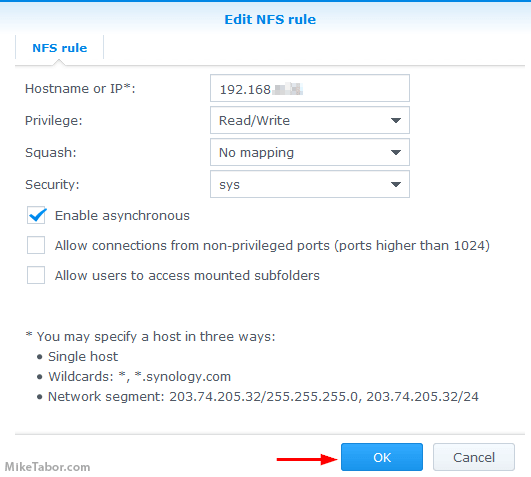
- Then change to the “NFS Permission” and click on Create and type the hostname or IP address of your ESXi host, then click Ok.
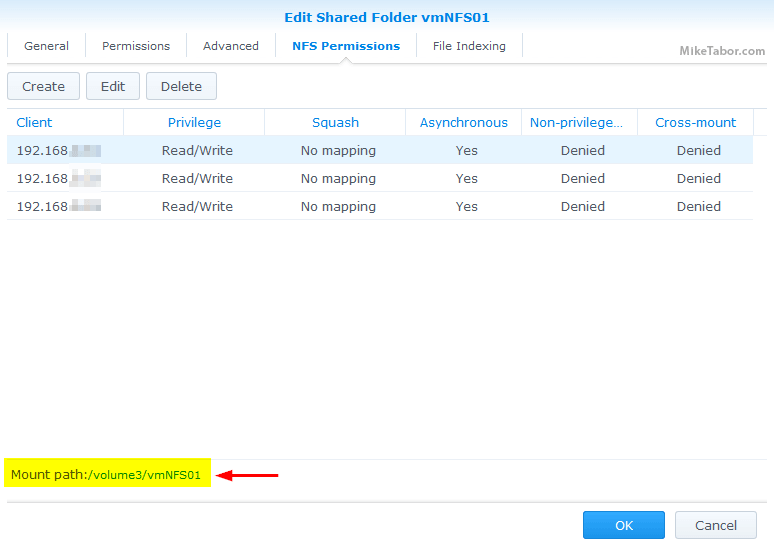
- After you have clicked on “Ok” from the step above you will be taken back to the “Edit Shared Folder (FOLDER NAME)”, you can either click on “Create” to add permissions for another ESXi host if needed or click on “Ok” if not, before clicking on “Ok” to close the window be sure to make note of the “Mount Path“.
That completes the steps on the Synology side of things. You will want to repeat Steps 3 – 6 for each additional NFS share you wish to create. Next we need to add the datastore to the ESXi host.
Note: The above steps was completed using DSM version 5.1-5022 Update 1, your steps may vary if running a different version.
Add NFS datastore(s) to your VMware ESXi host
- Log into the VMware Web Client.
- Under Inventors click on “Hosts and Clusters”.
- Right click on your cluster name and select “New Datastore“.

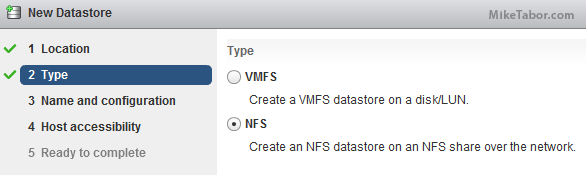
- For Type, select “NFS” then click on Next.
- Give the NFS datastore a name, type in the IP of your Synology NAS, and for folder type in the “Mount Path” you took note of from step 6 above then press Next.

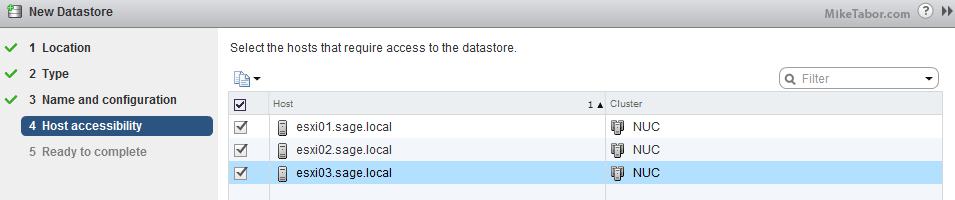
- Under Host accessibility, select which host(s) you want to add the new NFS datastore then press Next.
- Finally press Finish.
That’s it, quick and easy!
You will may also want to install the Synology NFS VAAI plugin if you haven’t already. This will enable the ability to create thick disks as well as improve cloning tasks.

good post, thanks!
Fwiw, i had issues with step 5 (NFS permissions). Ended up having to use * rather than separate individual rules for my two host IPs.
big problem for me as well. I can’t get anything other than * for hosts to get vsphere to mount. This is a security concern I have not been able to find a workaround for.
When I try to add an NFS volume I get “33389)WARNING: NFS41: NFS41ExidNFSProcess:2022: Server doesn’t support the NFS 4.1 protocol” – Looks like vSphere 6U2 uses NFS 4.1 and from what I’m reading Synology doesn’t support that. Has anyone had luck getting it to work or do you end up using NFS3?
Hi Matt, I’m in the same boat. vSphere6.5 and DSM 6.0.2-8451 Update 9. I’m receiving error: “NFS41ExidNFSProcess:2053: Server doesn’t support the NFS 4.1 protocol”. No solution here, I’m backing down to NFS3 until Synology gets their act together or someone finds a proper solution.
I’m trying to created a content library via nfs, getting the following error, any advice would be appreciated
Content Library Service does not have write permission on this storage backing. This might be because the user who is running Content Library Service on the system does not have write permission on it.
I’m using vcenter appliance 6.5 btw
It keeps failing for me, I get “Failed to mount NFS datastore SynoDS1 – NFS mount 192.168.0.1:/volume1/ESXi failed: Unable to connect to NFS server. ” despite the fact that I keep telling it the server IP is 192.168.0.250
Mike – I am not getting very far here.
vCenter is ver 6.5, Synology running DSM 6.1.4 update 1
I have added 10GB PCI NICs to my RS3617 . The built in NICs are on a 10.0.5.x network at 1GB, the 10GB NICs are on a physically separated 10.0.4.x network. The host is able to ping both the 10GB ports and the 1GB ports on the Synology. I have one volume set up and running with iSCSI connections, and it works, but performance is lacking, and I get a lot of dropped heartbeats which sometimes cause severe problems.
I have tried to connect a second volume with NFS share set up per your write up, but the operation fails complaining it is “unable to complete Sysinfo operation”.
I have been trying many combinations of VMFS versions, host IP address, and permissions without any happy faces.
If you are still monitoring this thread I could use some guidance.
You should check “Allow users to access mounted subfolders”
That was awesome! Thanks.
How about performance? Is it actually outperforming iSCSI?
Can you show some test results?
And how would you setup iSCSI with multipathing?
Great post, saved me quite a while getting this configured in my home lab – much appreciated!
Thanks for the comment. Glad I could help!
-Michael