How to perform Instant File Recovery using NAKIVO Backup
NAKIVO Backup has been a great addition in my home lab and just a few months ago I wrote about my first impressions of NAKIVO Backup. Now I have a few posts lined up to highlight some individual features of NAKIVO Backup, starting with Instant File Recovery.
If you haven’t already guessed it, Instant File Recovery allows you to recover files or folders directly from a previous backup job. This is a great alternative to performing a full restore of a VM when all you might need is a single or even a couple of files and/or folders.
Performing a NAKIVO Instant File Recovery
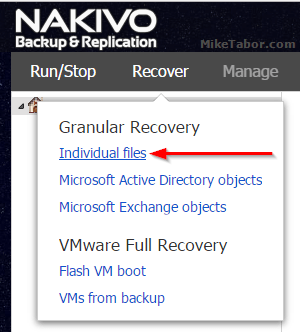
- Log into your NAKIVO Dashboard and go to Recover > Individual files.
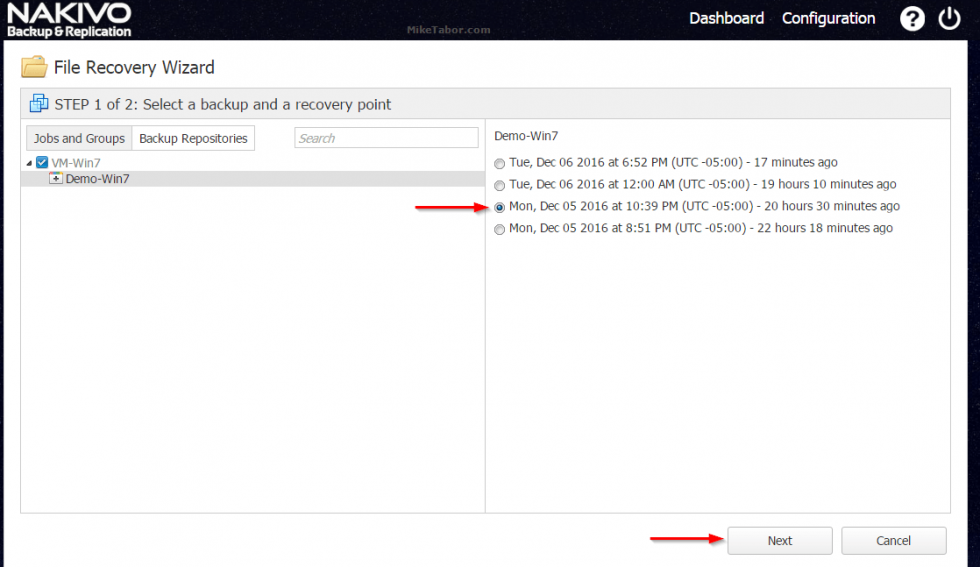
- Next select the Backup Job & VM you want to recover from and then select which Recovery Point you want to restore from and click Next.
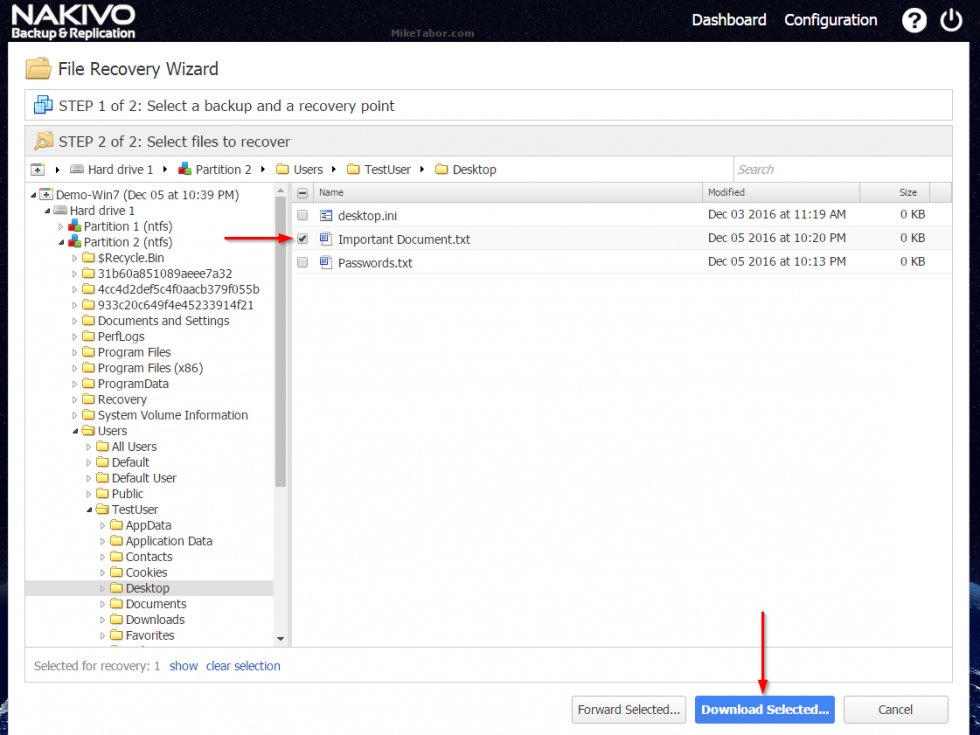
- Now drill down to the location of the file or folder you would like to restore. In this case I have several files located on the Desktop and I chose to restore the “Important Document.txt” file.
Simply click on Download Selected… to download the selected file or folder which will download it directly to your local computer as a .ZIP file. Alternatively, you can have it emailed to someone by clicking on “Foward Selected…”
That’s all there is to it! Now simply do as you need with the downloaded file or folder.
NAKIVO Instant File Recovery Requirements
It’s also worth mentioning, there are a few requirements to make note of, which you can read here.
Most notably would that while NAKIVO Backup supports all VM file systems, if a Transporter is installed on Windows then only NTFS & FAT32 are supported. If the Transporter is installed on Linux then NFTS, FAT32, EXT3, EXT4, & XFS file systems are supported.
